ps绘制绚丽梦幻的循环播放按钮教程(4)
教大家用PhotoShop绘制一个绚丽梦幻的循环播放按钮效果,有点像个炸弹,哈哈~~喜欢的同学可以跟着做一下!
先看看 教程效果图吧:

具体教程:
1..新建600*400大小文档,用蓝色柔软画笔在画布中间点一下,得到效果如下:

2.新建图层,用椭圆选框工具按住shift键不放,画出正圆,填充颜色#ffb910,选区不要取消。

3.给图形增加高光和阴影。新建图层,用白色柔软画笔在左上角点一下,用黑色画笔在右下角点一下,适当降低不透明度,取消选区。


4.新建一层做倒影,用200px柔软画笔点一下,ctrl+T变换,压小,摆放好位置(图层放在黄色图层下面)


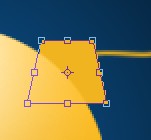
5.新建图层,我们开始做按钮。选择多边形工具,前景色为#2b0e00,


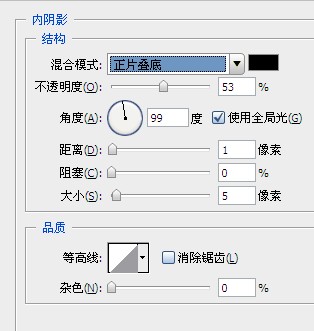
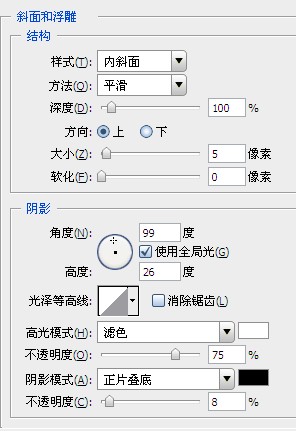
6.给按钮图层设置图层样式,如下:

7.在按钮图层下新建图层,做按钮高光,用柔软画笔画出一点白色高光,ctrl+T变形压扁,放在按钮周边,效果大致如下:


8.做条电线,设置前景色#f0b420,画笔3px,画出电线路径,描边,模拟压力。图层放在黄色图层下面

9.在黄色图层下新建图层,用矩形工具填充颜色#f0b420,摆放如下。ctrl+T变形,右击选择透视。摆放好位置。


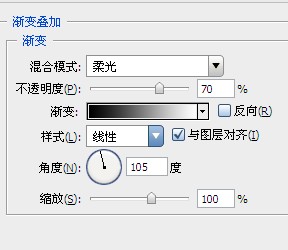
10.给图层设置图层样式,设置如下:


拷贝图层样式,到电线图层,粘贴图层样式

11.现在我们给整体添加梦幻的高光效果,按住ctrl键点击黄色图层,得到圆形选区。新建图层,用柔软画笔点一下,取消选区,将图层像右移动一点,
得到效果如下

12另一边同样的方法:

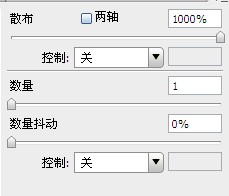
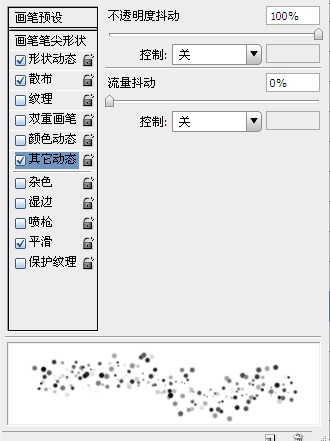
13。选择画笔工具,窗口--画笔,进行以下设置;
14.画出高光,自己尝试用不同的颜色刷出背景高光。

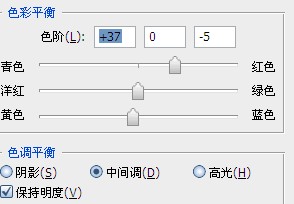
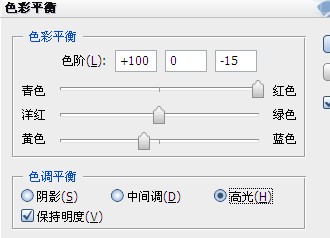
15.最后在最上面新增调整图层--色彩平衡,设置如下:
16.最后做整体调整,完工。

学习 · 提示
相关教程