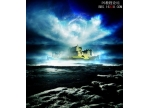
Photoshop合成火炎美女实例教程(7)
来源:作者:令彬 译 来源:psd.tut
作者:bbs.16xx8.com
学习:1039人次
选择素材:
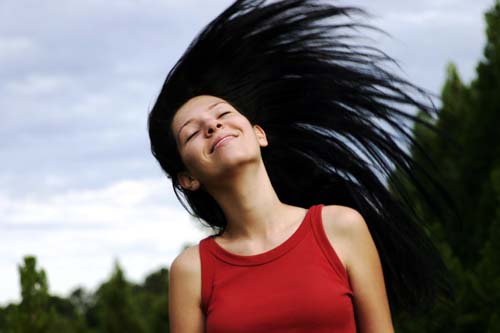
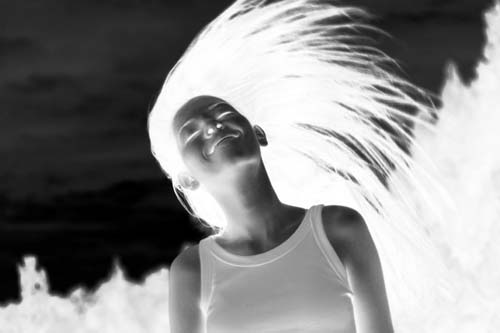
步骤 1、创建黑色画布,并将人像素材复制到画布中。
步骤 2、图像 >> 调整 >> 去色。
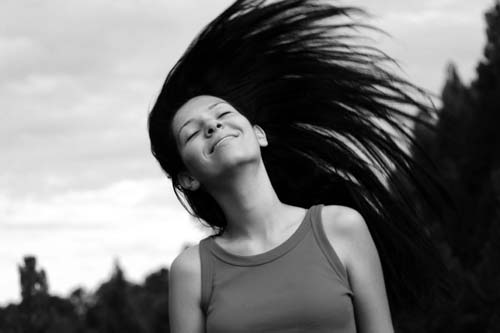
步骤 3、图像 >> 调整 >> 反相。
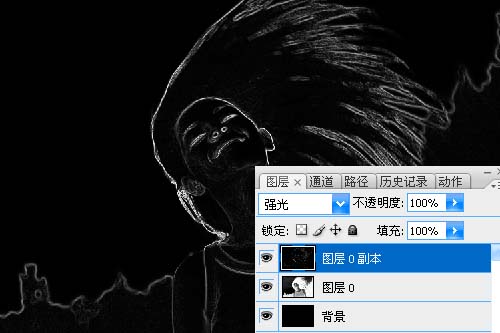
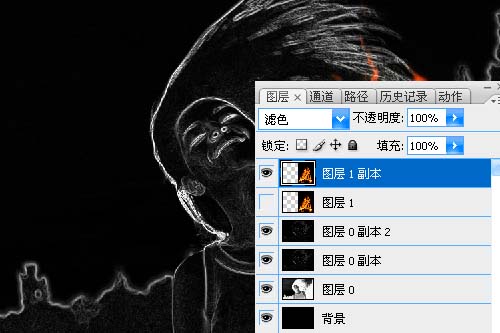
步骤 4、复制人像层,滤镜 >> 风格化 >> 查找边缘,反相,并将图层混合模式设为“强光”。
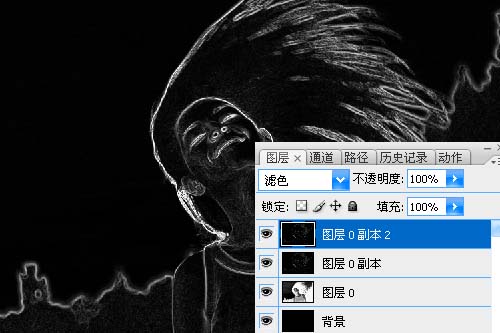
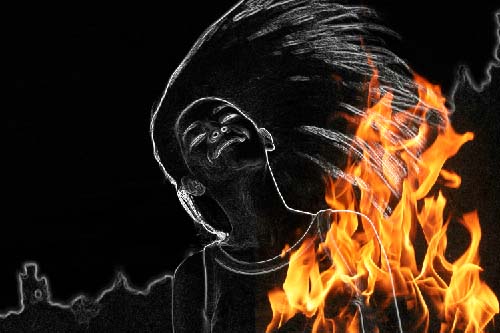
步骤 5、再次复制图层,并将图层混合模式设为“滤色”。
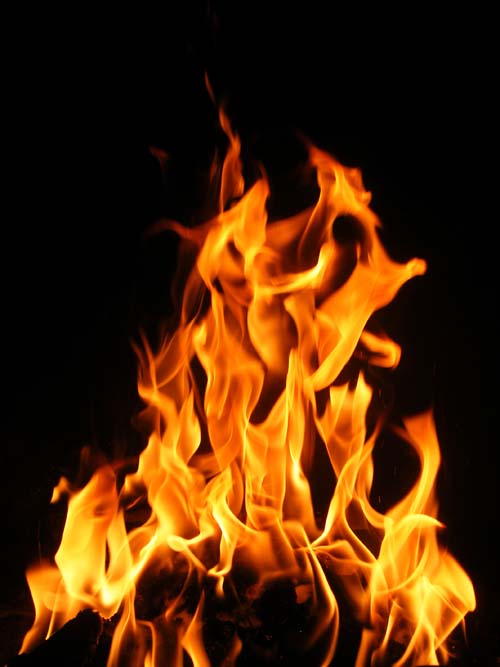
步骤 6、使用移动工具将火焰素材拖入画布,在弹出匹配颜色设定窗口中点击确定。
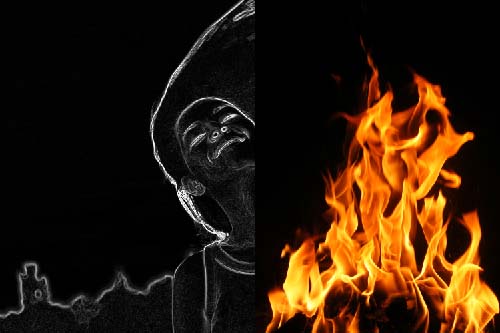
步骤 7、将火焰层的图层混合模式设为“滤色”。
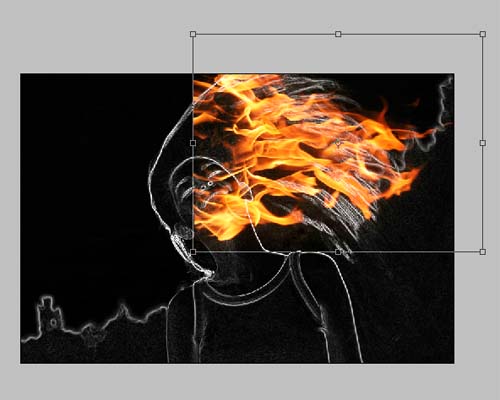
步骤 8、复制火焰层,并将其中一层设置为不可见。
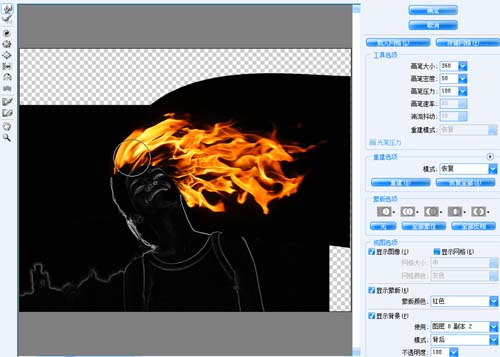
步骤 9、选择火焰层,自由变换。
步骤 10、编辑 >> 变换 >> 变形。
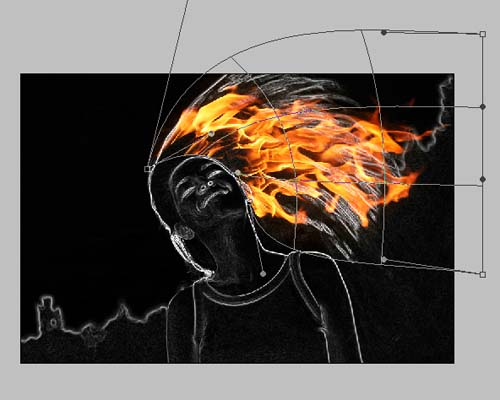
步骤 11、如果感觉火焰匹配的不够理想可以使用液化滤镜进行微调。
步骤 12、复制火焰层并调整大小和位置。
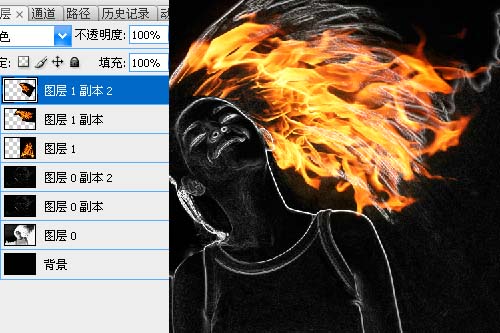
步骤 13、重复步骤 12,得到如下效果。
步骤 14、将之前不可见的火焰层混合模式设为“亮光”。
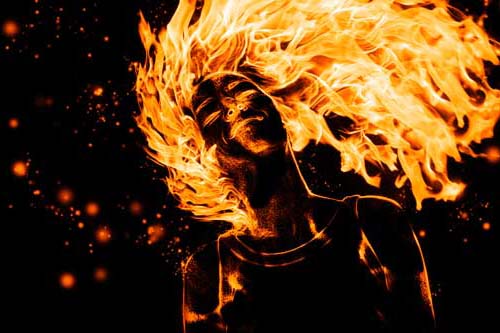
步骤 15、调整火焰层位置和大小,滤镜 >> 模糊 >> 高斯模糊,模糊半径设为10。
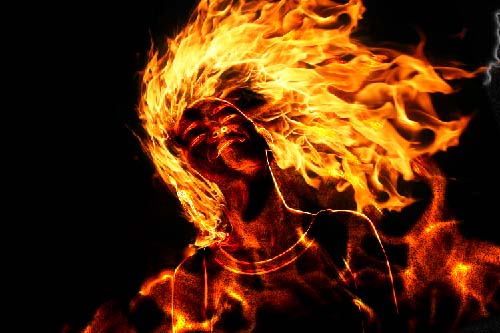
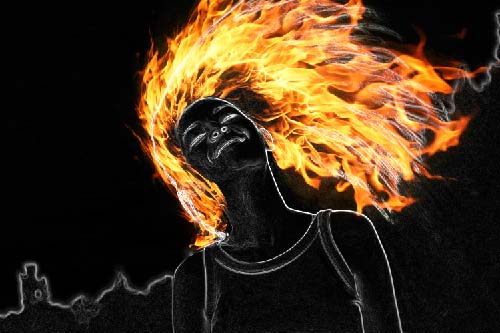
步骤 16、添加图层蒙版,并将多余部分用蒙版遮住。
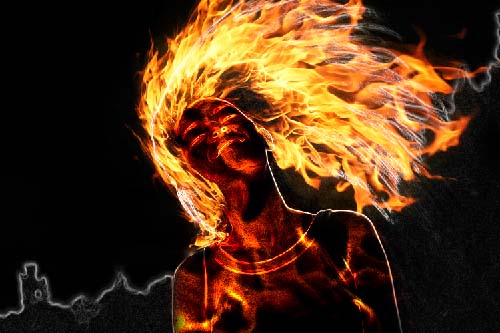
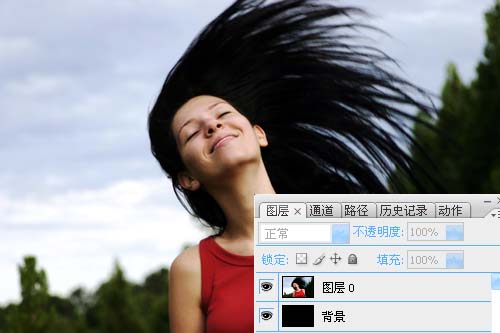
步骤 17、在人像层上方创建新图层,使用黑色笔刷将背景中的白色遮去。

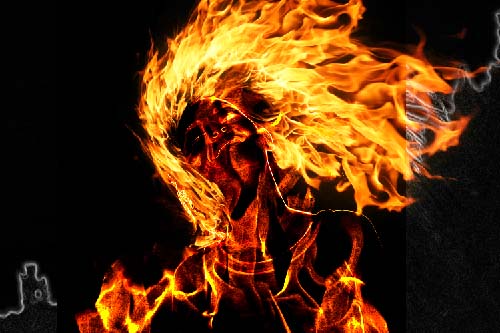
步骤 18、利用笔刷工具添加光斑效果。
步骤 1、创建黑色画布,并将人像素材复制到画布中。
步骤 2、图像 >> 调整 >> 去色。
步骤 3、图像 >> 调整 >> 反相。
步骤 4、复制人像层,滤镜 >> 风格化 >> 查找边缘,反相,并将图层混合模式设为“强光”。
步骤 5、再次复制图层,并将图层混合模式设为“滤色”。
步骤 6、使用移动工具将火焰素材拖入画布,在弹出匹配颜色设定窗口中点击确定。
步骤 7、将火焰层的图层混合模式设为“滤色”。
步骤 8、复制火焰层,并将其中一层设置为不可见。
步骤 9、选择火焰层,自由变换。
步骤 10、编辑 >> 变换 >> 变形。
步骤 11、如果感觉火焰匹配的不够理想可以使用液化滤镜进行微调。
步骤 12、复制火焰层并调整大小和位置。
步骤 13、重复步骤 12,得到如下效果。
步骤 14、将之前不可见的火焰层混合模式设为“亮光”。
步骤 15、调整火焰层位置和大小,滤镜 >> 模糊 >> 高斯模糊,模糊半径设为10。
步骤 16、添加图层蒙版,并将多余部分用蒙版遮住。
步骤 17、在人像层上方创建新图层,使用黑色笔刷将背景中的白色遮去。
步骤 18、利用笔刷工具添加光斑效果。
学习 · 提示
- 发评论 | 交作业 -
最新评论
雯雯路口饰品2011-01-09 11:27
恐怖片里面的情景吗
回复
c030702010-11-17 02:13
看着不是火炎美女,是火烧美女本文来自:ps教程论坛(bbs.16xx8.com)详细出处参考:http://bbs.16xx8.com/thread-73939-1-1.html
相关教程
关注大神微博加入>>


网友求助,请回答!