ps cs6合成城中战场场景教程(5)
使用PS超强合成战火弥漫的城市,教程合成出来的效果图挺漂亮,有点游戏的感觉。教程作者在场景合成上的手法还和技巧还挺实用的,我们先来看看最终的效果图吧:
")
效果超赞的,有心给自己一个挑战的同学先给你赞一个,移步这里下载素材(已打包):http://bbs.16xx8.com/thread-165455-1-1.html
下载完成后,我们就开始咯
一、创建一个大小宽度200px,高度1700px 的文件
")
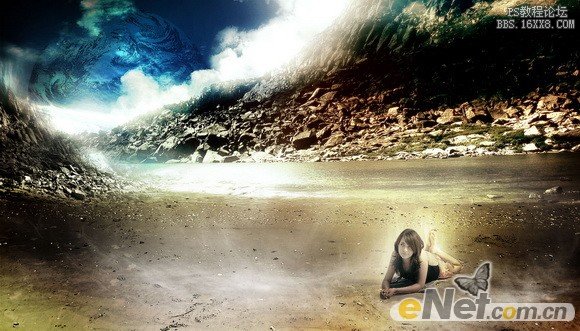
接下来创建背景,你可以用画笔涂抹后添加高斯模糊,效果如下:
")
2,把墙体素材拖进来,添加蒙版
")
3,用黑色画笔,在蒙版上涂抹,效果如图,这时候不必担心不好看,记得涂抹墙体的边缘部分
")
4,将城市素材拖进来,位置如下:
")
5,重复上一步的操作,添加蒙版,除了建筑,涂抹掉无关的景物,你可以使用套索工具作好选区再操作。
")
6,将图层混合模式改为正片叠底
")
7,把天空素材拖进来
")
8,改图层混合模式为柔光
")
9,新建一个图层,图层模式改为柔光,选择柔边黑色笔刷,把天空跟高楼的亮部都稍作涂抹,你可以将画笔的不透明度降低,或者将图层不透明度降低到40%也可以,调整效果如下:
")
10,拖进火焰素材,调整图层混合模式为柔光模式,不透明度60%,填充50%,如图
")
")
11,为火焰图层添加高斯模糊,参数如下:
")
12,添加另一张火焰素材,像之前一样添加蒙版,用黑色画笔调整边缘,使过渡比较和谐。
接着图层模式改为滤色,不透明度降低为50%,填充80%
")
")
13,继续添加火焰素材,改图层模式为滤色
")
14,复制火焰图层,调整位置到墙后面,不透明度调整为55%,如下:
")
15,把素材包的纹理拖进来,旋转180度,移到左边的墙体
")
添加蒙版,擦掉其他部分,留下墙壁的那几个洞
")
将不透明度降低为70%,如图
")
16,将素材包的破碎效果打开(上传前名字搞错了,是破碎效果图,不是笔刷,见谅),添加到高楼上面,如图
")
17,给城市底部添加一点雾,才有轰然坍塌的感觉,关于雾的素材,同学们自己百度就好,北京的朋友请右转出门拍个天气照(戴好口罩),找到素材后降低不透明度到满意为止,也可以用蒙版修饰一下,效果见下
")
18,拿起笔刷,选用黄色或者橘色,给高楼顶部添加一点火焰,如下
")
继续添加大点的火焰,记得随时调整不透明度跟笔刷大小,直到效果看起来很棒了,像这样
")
好叻,真能干少年,现在开始来修饰细节,稍微考验功力唷,拿起涂抹工具,在火焰上涂抹,让效果更逼真。
")
在这个过程中,你可以新建一个图层,把不透明度降低,用柔边笔刷涂抹,直到效果越来越震撼,如图
")
19,这一步添加阴影细节,新建一个图层,用黑色柔边笔刷,分别给高楼底部,侧部添加阴影
")
")
继续细节修饰,选择5px大小的黄色画笔,给残垣的边缘描边,制造火光映衬的效果,如下
")
20,把人物素材拖进来,用套索工具选出主体人物
")
选区搞定后,添加蒙版,就把人物抠出来了
")
21,用同样的方法抠出防毒面具,然后Ctrl + T 调整位置大小,直到适合头部(素材的防毒面具与教程不同,同学们也可以自行百度,喜欢就好)
")
载入警示标志的画笔,在人物的肩膀跟武器上画上标志
")
")
22,把子弹素材拖进来,同样用蒙版抠图,Ctrl + J 复制一个,放地上,如图
")
23,接下来是人物的细节修饰,打开画笔,选择一种裂痕性的笔刷,用灰色画笔,在人物的手臂上添加污渍
")
")
继续用2px或者3px的柔边画笔,选择红色跟黑色,给人物添加伤痕
")
用150px大小的圆形黑色柔边画笔,50%的不透明度,给人物添加阴影,如下图
")
利用浅橘黄色笔刷给人物的身体添加亮部
")
降低不透明度,图层混合模式改为颜色减淡
")
用同样的给地面添加亮部,造成火光熊熊,地面也亮了的逼真效果,在这儿不透明度可以调节为40%
")
24,利用2px大小的橘色画笔,给高楼边缘添加火光
")
同样的方法给模特添加全身发光的效果,你可以加点15px大小的高斯模糊,会越形象。
")
25,把素材包的辐射标志拖进来,利用蒙版擦除多余部分,调整大小
")
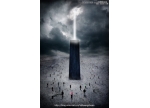
拖进STOP标志的素材,擦除多余部分,剩下那条金属杆子。
")
移动到辐射标志的下方,然后复制一层,降低不透明度为70%
")
为辐射标志添加点斑驳的效果,你可以把素材的破碎图案拖一个进来,图层模式改为颜色加深,多复制几个,旋转,调整大小跟方向就好
")
同样用2px大小的画笔给标志描亮光的边
")
把素材包的「爆炸效果」图拖进来,改不透明度为90%
")
这一步作火光的影子,复制一层「爆炸素材」的图,旋转180°,降低不透明度为55%,将离火光较远的部分用柔边画笔擦淡一点
")
在模特图层下面新建一个图层,图层混合模式改为柔光,不透明度降低到70%,然后用橘色画笔给人物涂抹边缘
")
26,现在修饰大局咯,新建一个图层,用画笔涂抹,画笔颜色如下
")
涂抹效果如下
")
添加50px大小的高斯模糊
")
改不透明度为60%,图层混合模式改为柔光
")
新建图层,填充颜色参数如下,图层混合模式改为柔光,不透明度65%
")
学完之后继续我们的教程。(CS6 以上版本才有这个功能噢),没有这个版本的同学不要放弃,最后也有讲解 : )
在图层底部新建一个颜色查找的调整图层
")
选择「胶片质感」的光线效果,如下,然后调整不透明度为25%,填充65%
")
继续新建一个,光线效果改为青橙(不透明度和填充都填充为50%):
")
如果你的版本较低,可以选择在底部新建一个曲线调整图层,形状如下
")
最终效果
到此结束啦,能坚持下来的同学真不容易,为自己点个赞吧,回头想想,这个教程,你学到了什么呢?欢迎分享唷
学习 · 提示
相关教程