Photoshop纠正歪斜照片方法和技巧
来源:不详
作者:佚名
学习:278人次
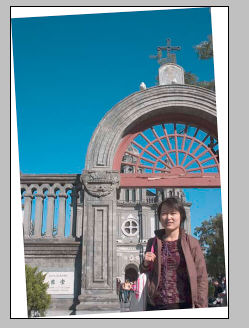
Photoshop纠正歪斜照片方法和技巧先看看校正前和校正后的区别吧!
校正前: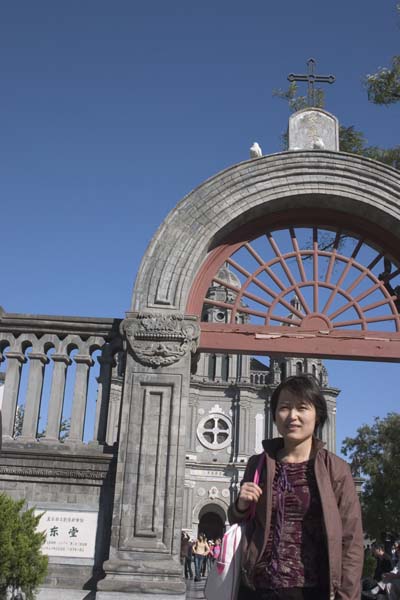


校正前:
校正后:
校正步骤正式开始:
补充技巧:
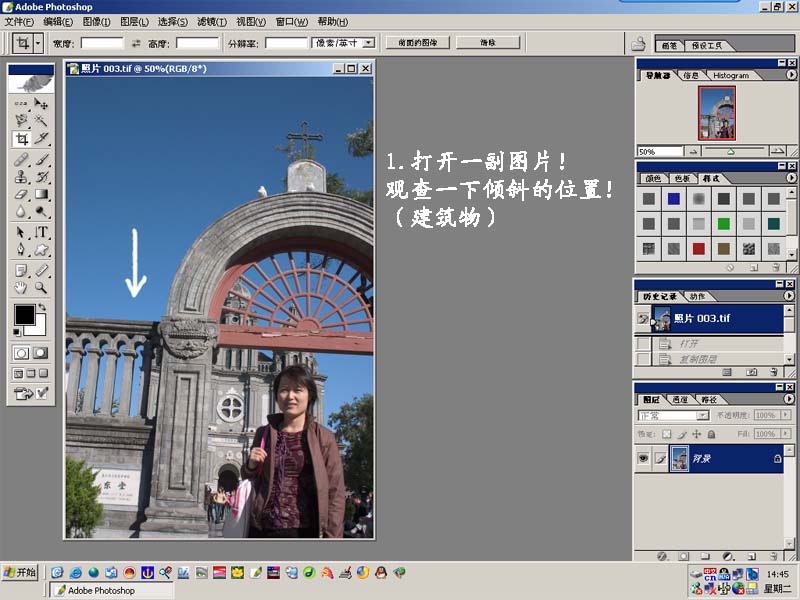
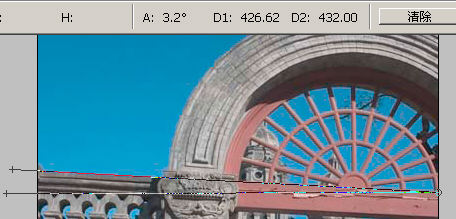
量角的两边线越长,度量角度越准确,关键在于目光判断图象那些部分是水平的,象这图,大门的上门框应该是水平的,所以,就用度角量如图位置测量。
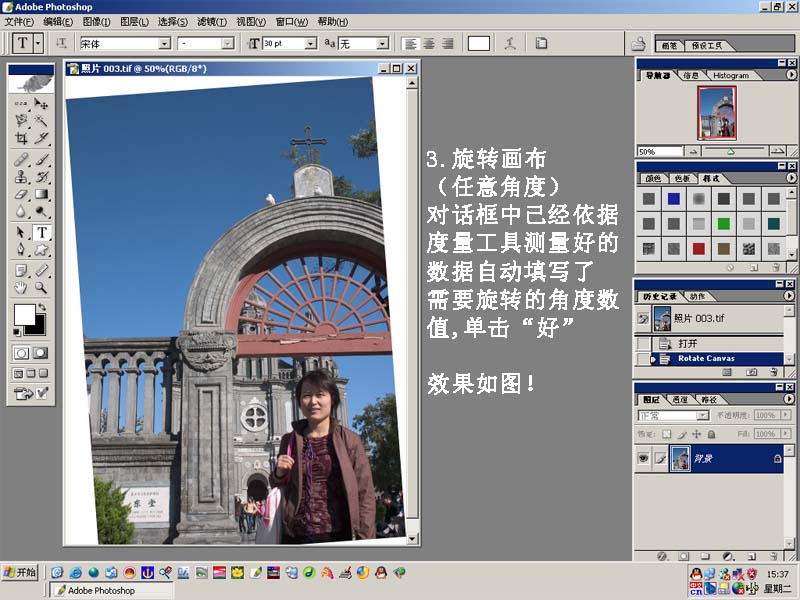
测量之后,如图命令操作。
ps会自动“记忆”测量角度。
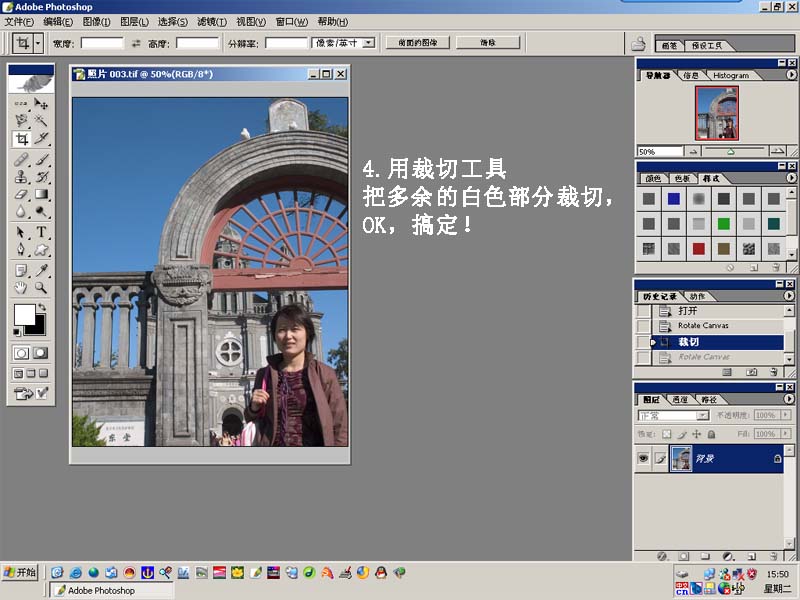
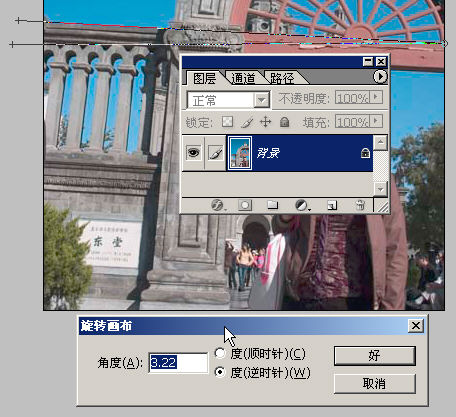
然后,我们就可以裁剪了
学习 · 提示
相关教程
关注大神微博加入>>


网友求助,请回答!