PS小红帽艺术合成教程(6)
来源:网络
作者:不详
学习:4737人次
步骤48创建新的“填充或调整图层”, 选择“可选颜色”。

颜色选择“中性色”,数值如下图。

步骤49我创建了另一个渐变,来得到更好的光影效果。

步骤50新建图层,用一个黑色软刷绘制出阴影部分,再新建一个图层,用白色笔刷绘制出灯光部分。

步骤51用蓝色和黄色笔刷在人物身上绘制。

更改图层不透明度为70%。

步骤52在一个新的图层,使用椭圆工具作一圆。

按右键单击,然后选择“反向”。

填充黑色:

然后执行滤镜 - 模糊 - 高斯模糊,150半径。

将椭圆层放大到125%。

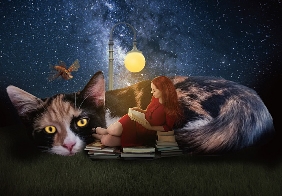
最终结果
![final-results[1]](http://pic.16xx8.com/allimg/120925/144G62S4-77.jpg "ps合成教程_www.16xx8.com")
学习 · 提示
相关教程
关注大神微博加入>>


网友求助,请回答!