ps制作复古黄金字效果教程(4)
网上有一些黄金字的制作方法,但是总感觉没有这个技术全面而且效果逼真,所以给介绍给大家,不为别的多学点技术总是好的。
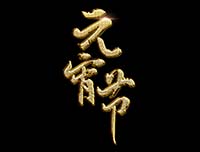
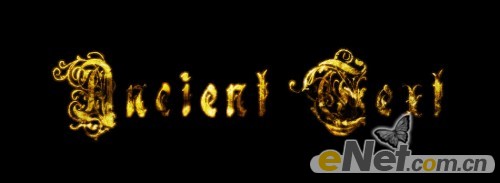
最终效果:

1.新建文件设置大小为1000*400像素,背景为黑色。输入字体,这里你可以使用你自己喜欢的字体,我用的是Ruritania字体。调整大小放入图片正中位置。

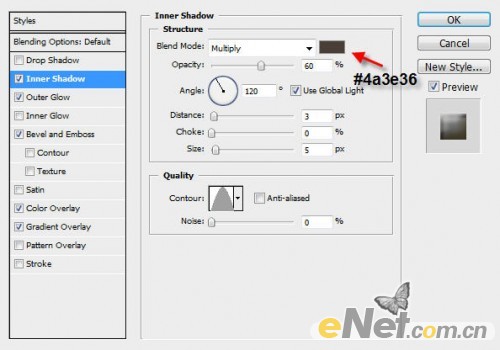
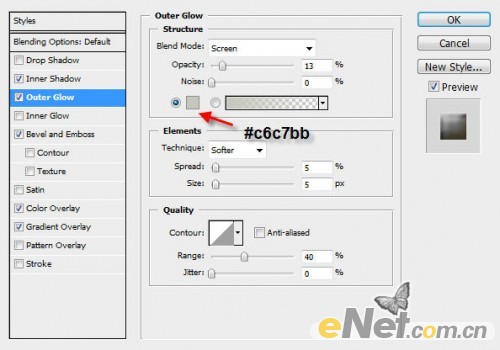
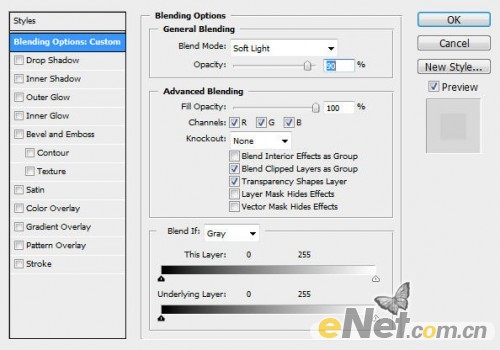
2.在文本层点击图层面板下方的“添加图层样式”选择以下选项
内阴影
外发光
斜面与浮雕
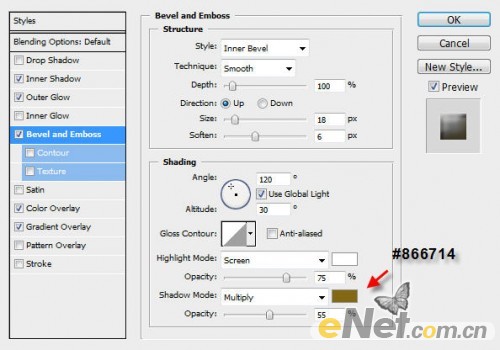
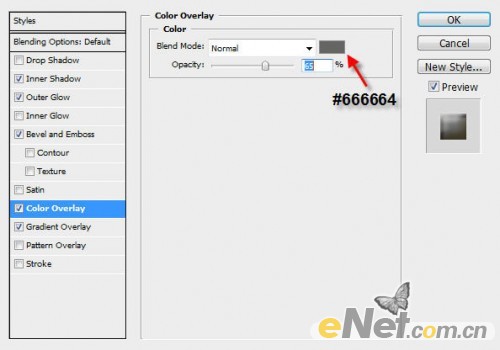
颜色叠加
得到如下效果

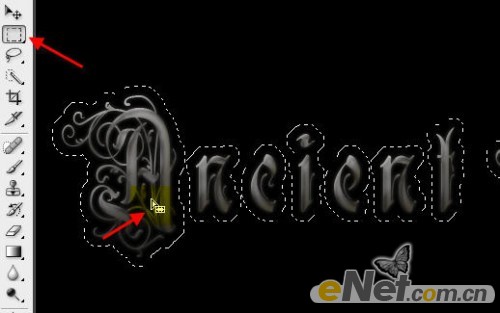
3.下面要选择文字路径,按住CTRL键用鼠标左键点击文本略缩图
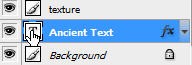
选中以后如下所示

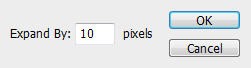
在菜单中点击“选择>修改>扩展”
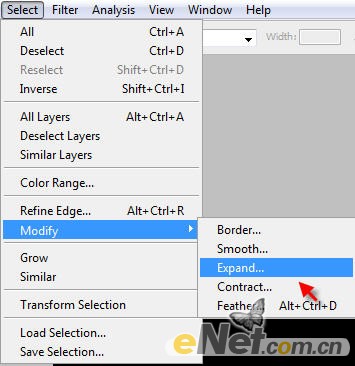
按下图设置
设置好以后,这时候在看字体别以前显得更宽

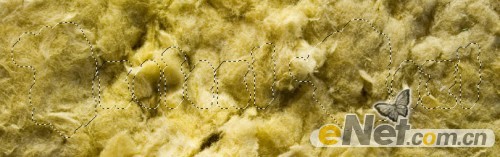
4.下面添加一些纹理,弄出一点古味来。打开黄色海绵素材图片备用,然后回到制作的字体,这时候保证文字选区还存在,然后选择“矩形选框工具”将鼠标
移动的虚线上,等鼠标图标变成三角和矩形形状
将鼠标拖动选区到提前打开的海绵纹理上
复制并粘贴文本到前面的文字上,这时产生新层,设置为“质感”

将“质感”图层的混合模式设置为“叠加”,得到如下效果

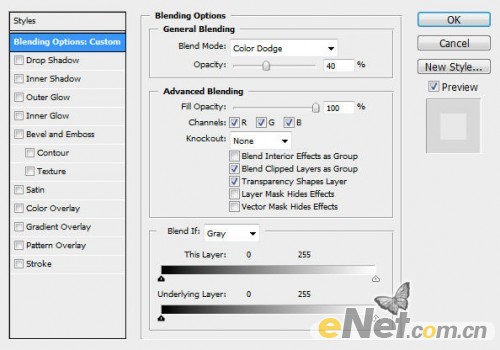
5.复制“质感”图层三次,分别命名图层名称为“质感1、2、3”点击图层下方的“添加图层样式”,首先设置“质感1”的混合模式为“颜色减淡”,
不透明度为40
设置“质感2”图层的混合模式为“叠加”,不透明度100%

设置“质感3”图层的的混合模式为“柔光”,不透明度为90%
现在得到如下效果
6.其实到现在已经基本完成了,下面的步骤可选。复制“质感3”图层,点击图层面板下方的“创建新的填充或调整图层”设置下面的调整
黑白
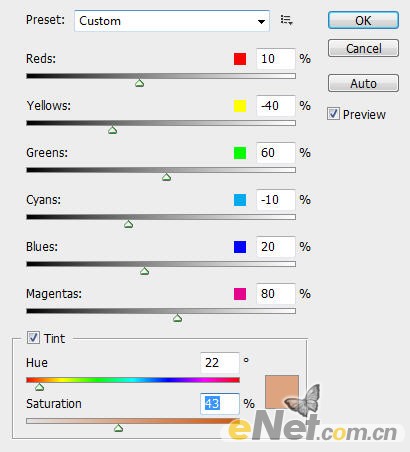
得到如下效果

当然你可以添加更多的图层调整层,如调整色草平衡等,当然你自己决定,这样我们就完成了这个效果

学习 · 提示
相关教程