ps金属上色教程(4)
利用PS可以对很多旧照片或灰色照片进行上色,本例教程将以一个简单的灰白金属块照片的上色过程进行讲述,主要涉及到钢笔工具、色相/饱和度、剪贴蒙版的使用,有兴趣的朋友可以一看!
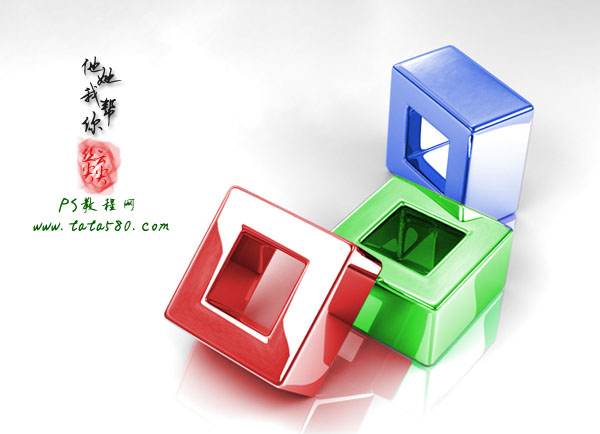
效果图:
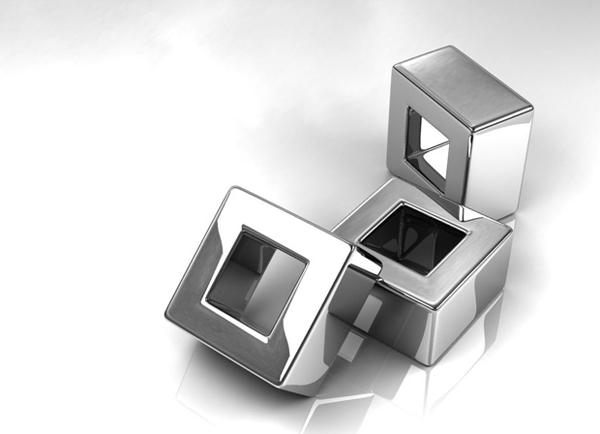
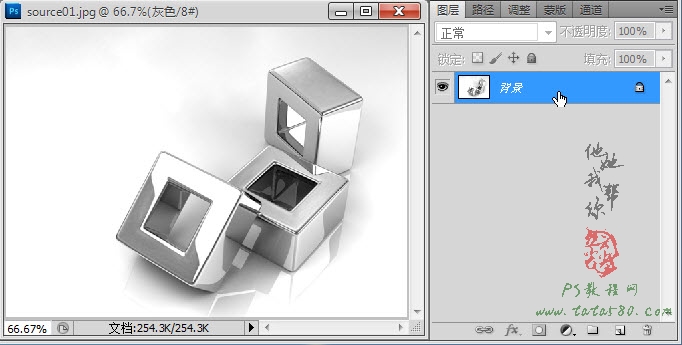
原图:
1、本例教程以photoshop CS5制作,其它版本通用,先在PS中打开原图,从标题栏上可以看出本原图为灰色模式,如下图所示:
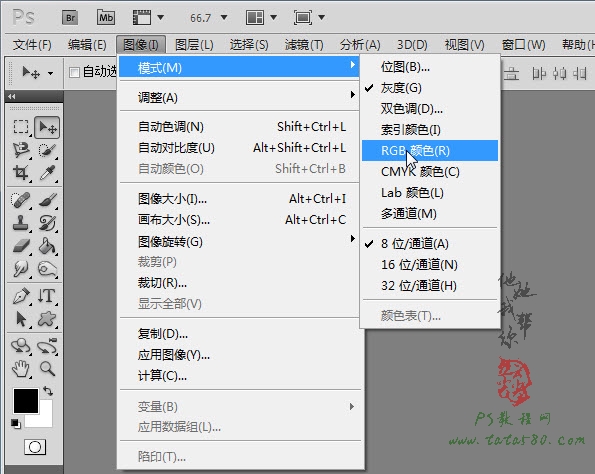
2、因为要进行上色,所以必需先将灰度模式转换为RGB颜色,选择菜单“图像->模式->RGB颜色”即可转换,如下图所示:
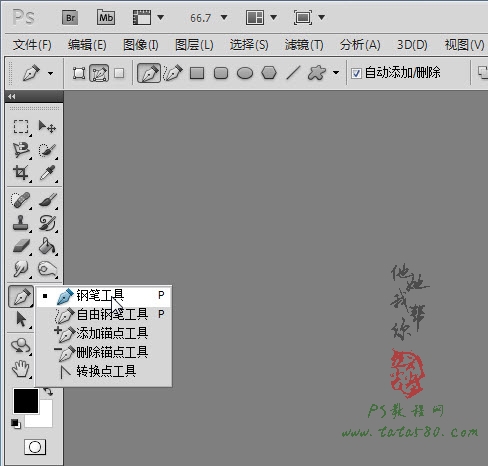
3、单击选择常用工具栏上的“钢笔工具”,如下图所示:
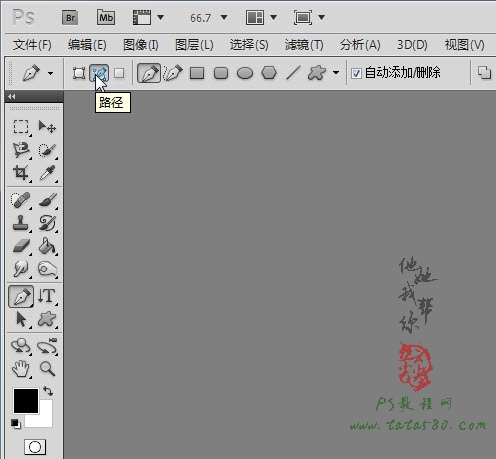
4、确保钢笔工具的属性为“路径”,如下图所示:
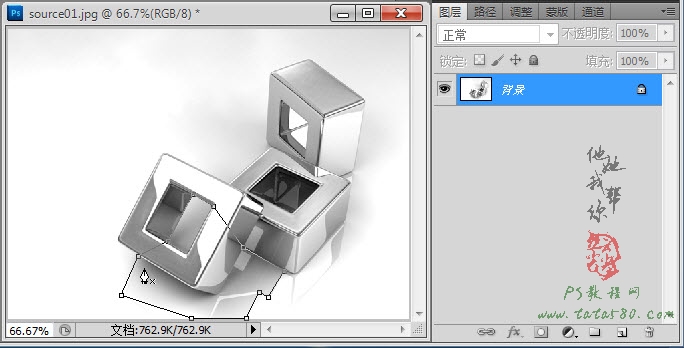
5、本例中有三个金属块,我们以最下方的一个金属块为例进行讲述,首先处理倒影部分,利用钢笔工具将属于最下方金属块的倒影部分勾选中,
如下图所示:
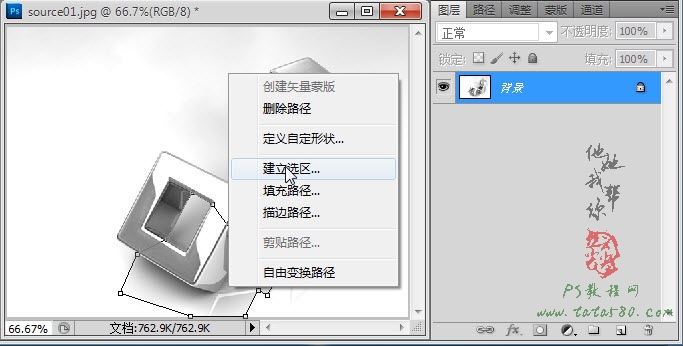
6、在路径上单击右键,在弹出的菜单中选择“建立选区”,如下图所示:
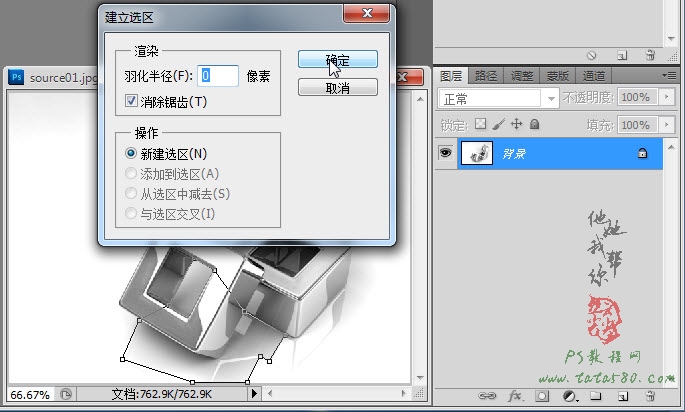
7、在弹出的“建立选区”设置框中,设置羽化半径为0,然后单击确定即可,如下图所示:
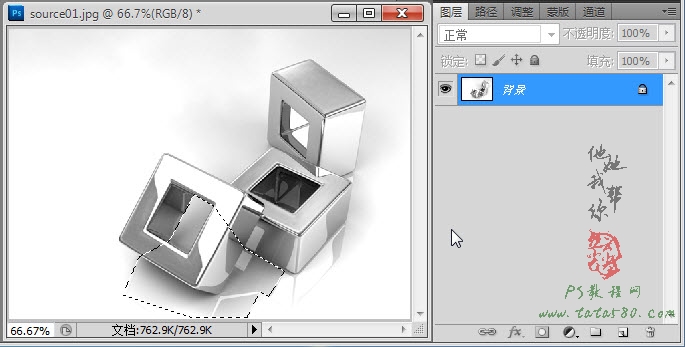
8、这样即可得到最下方金属块的倒影部分,其中可能包含部分非倒影内容,这没有关系,因为在做金属块上色时会覆盖住,如下图所示:
9、按住Ctrl+J键将选区部分生成图层1,如下图所示:

10、单击图层面板下方的“创建新的填充或调整图层”按钮,在弹出的菜单中选择“色相/饱和度”,如下图所示:
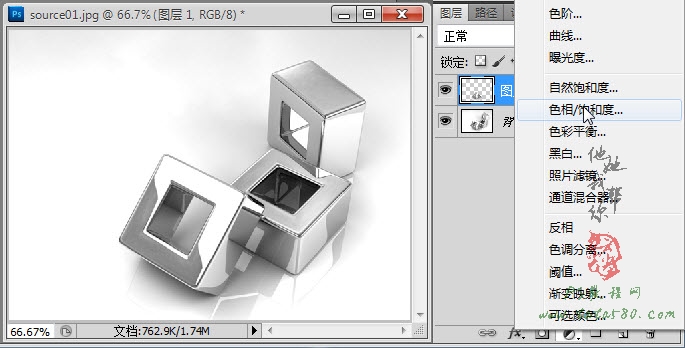
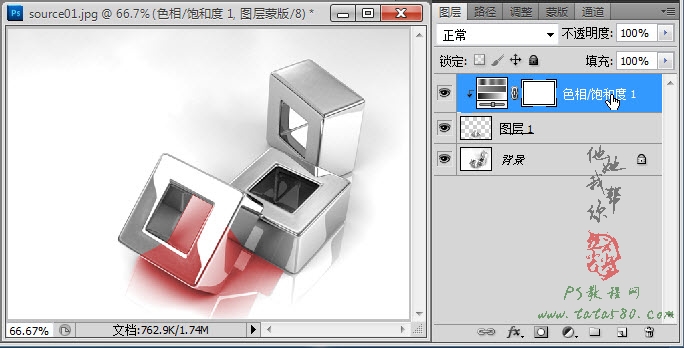
11、在弹出的调整窗口中进行相应的设置,勾选“着色”,适当升高饱和度,选择相应的色相值,本例设置如下图所示:

12、返回图层面板,右键单击“色相/饱和度1”图层,在弹出的菜单中选择“创建剪贴蒙版”,如下图所示:

13、创建完剪贴蒙版后会发现上色只针对图层1起作用,效果如下图所示:
14、接下来处理金属块部分,重新单击选择“背景”图层,然后用与之前相同的方法获得金属块的外围选区,如下图所示:
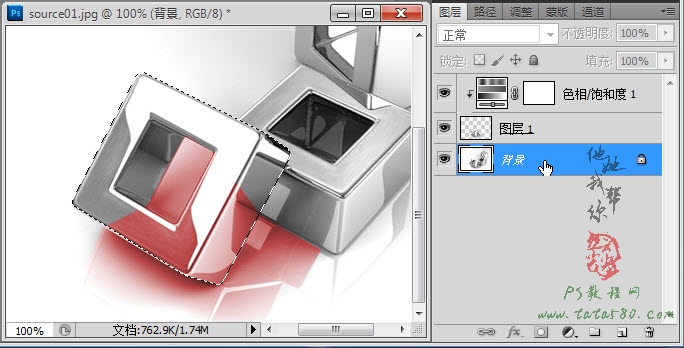
15、同样按Ctrl+J键将选区生成图层2,并置于最上方,如下图所示:

16、再利用钢笔工具获得金属块内部选区,如下图所示:
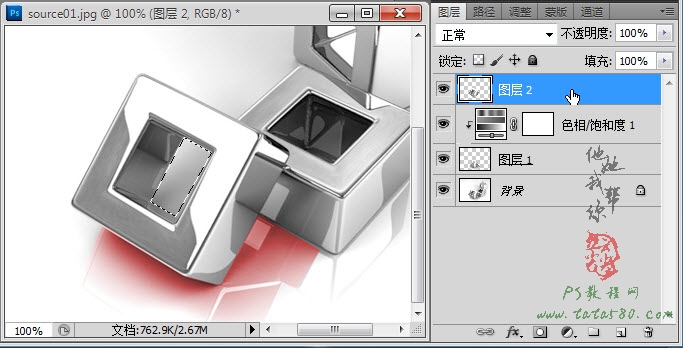
17、确保选中图层2,然后按Del键将内部区域删除,这样就能看到下方的倒影区域,如下图所示:
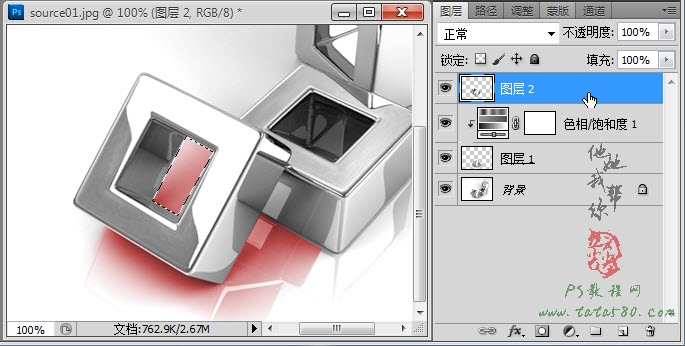
18、同样给图层2添加“色相/饱和度”调整图层,并进行相应的设置,本例参数设置如下图所示:
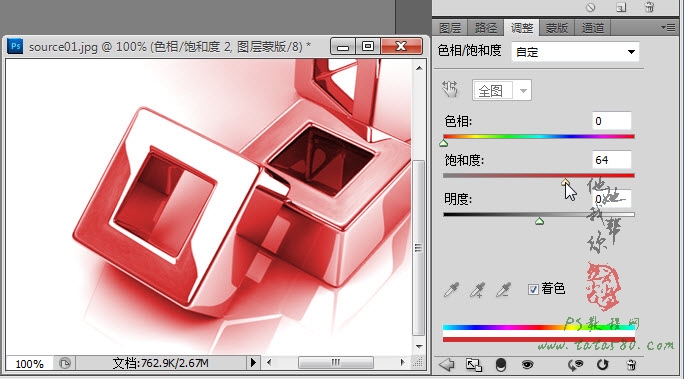
19、返回图层面板,同样将“色相/饱和度2”创建为剪贴蒙版,这样上色就只针对图层2,效果如下图所示:

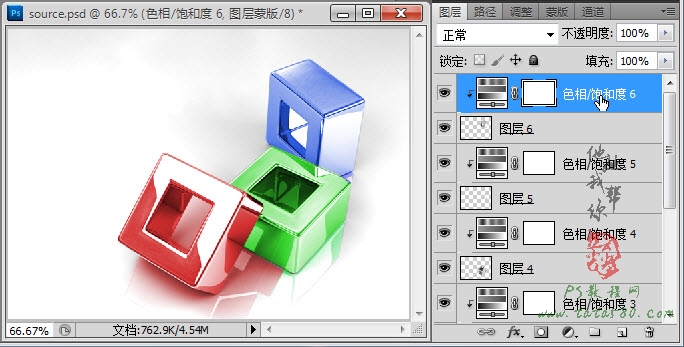
20、另外两个金属块及倒影部分的处理方法相同,唯一不同的就是“色相/饱和度”的值设置不同,最终处理的效果如下图所示:
学习 · 提示


相关教程