ps质感中性色调人物调色教程(3)
来源: 思缘论坛
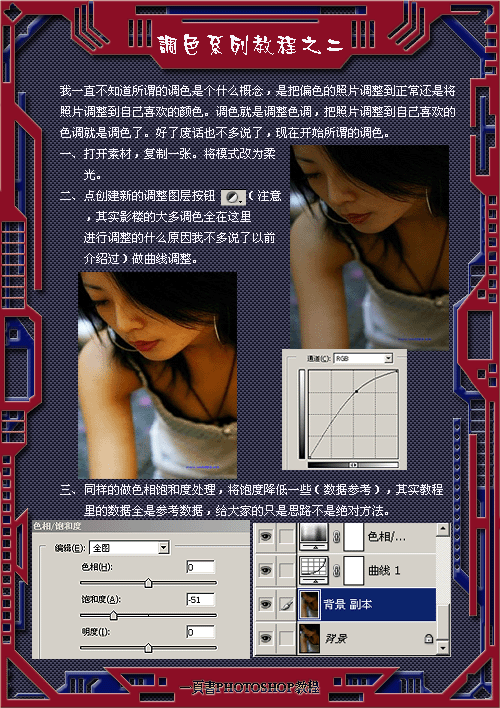
作者:Lily
学习:12284人次
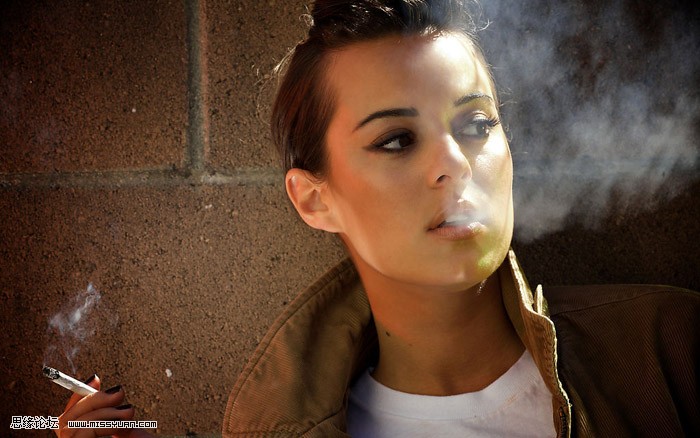
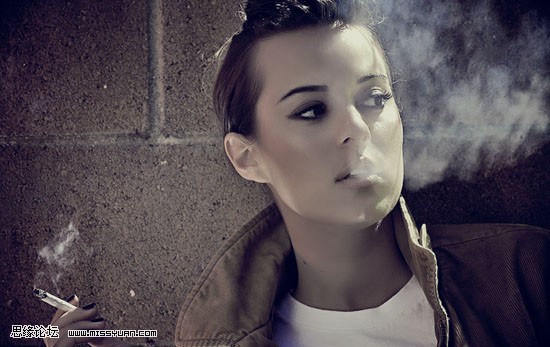
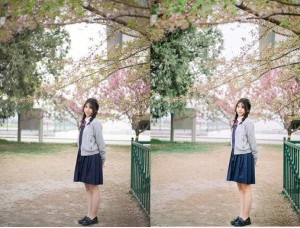
第一步:用Photoshop打开原图,复制一层(图层1),转入Portraiture滤镜进行磨皮
处理完了以后记得用黑色的画笔工具把除了人物傍边的地方擦出来(我们磨皮仅对人物皮肤来处理,其他的地方细节可以保留),效果如图:
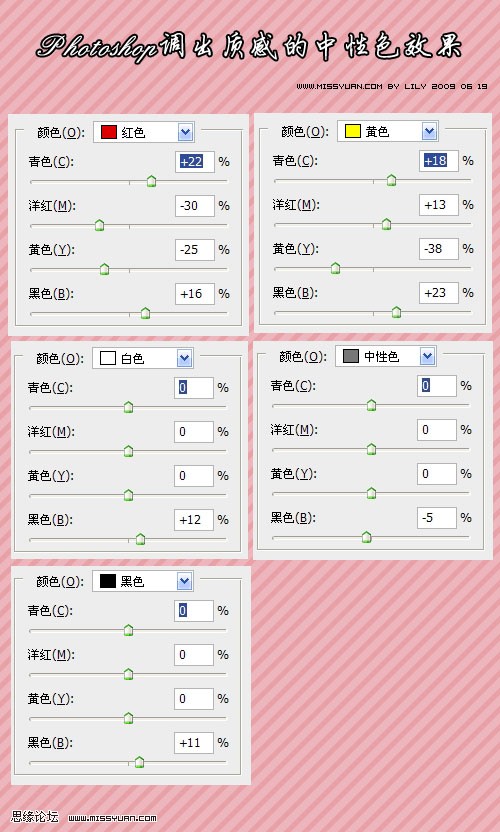
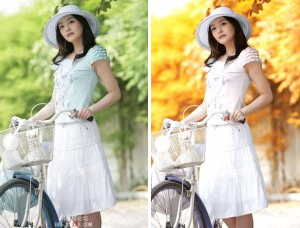
第二部:建立可选颜色调整图层,本别对红色,黄色,白色,中性色,黑色进行调整,参数如下:
相关教程;
操作完效果:

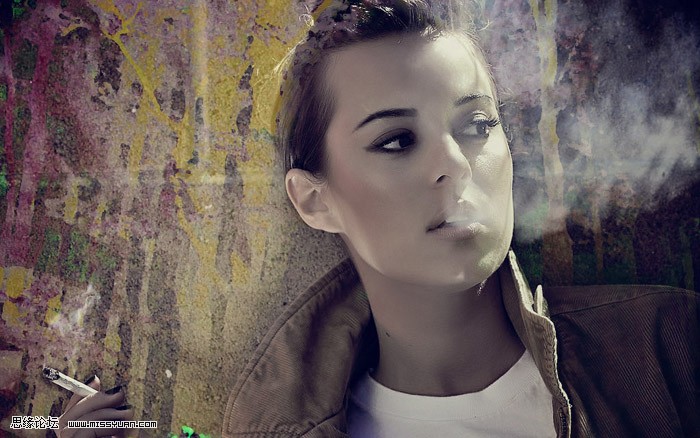
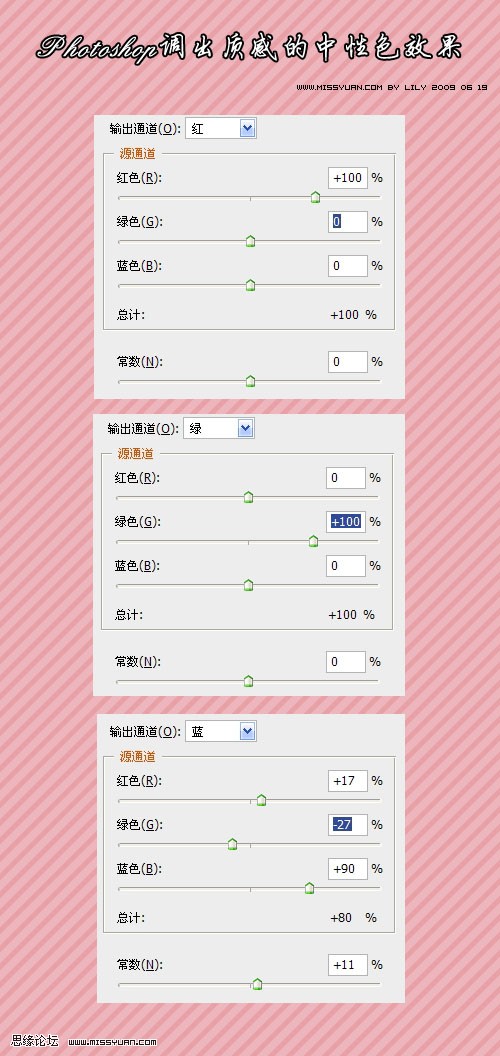
第三步:盖印图层得到图层2,建立通道混合器层,参数如下:
操作完效果
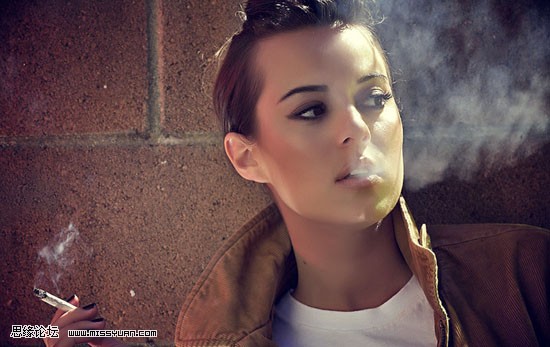
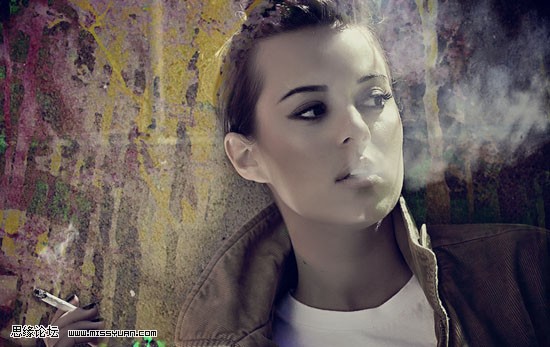
第四步:盖印图层得到图层3,其实到这部基本效果就出来了,如果感觉背景不搭配的朋友可以找一张颓废系列的背景来叠加一下,这里我们找了一张素材(结尾打包),打开素材拖入到我们做的图中放到最上层,图层模式选择-滤色,然后在素材层上面见图图层蒙版,使用画笔工具把人物擦出来,细心一点,操作完毕即可得到最终效果图:
素材:
学习 · 提示
相关教程
关注大神微博加入>>


网友求助,请回答!