Maya教程:Maya中测试摄像机投影解析之(3)
导言:
本教程继续“翻译教程:在Maya中测试摄像机投影解析之一”的教学,学习摄像机投影映射是非常简单的,但它也是相当难以掌握技术,本教程将演示如何创建一个摄像机投影映射的运动。
第01步
创建一个新的Phong材质,并命名为marble,调整透明度,添加一个大理石节点。(图01)
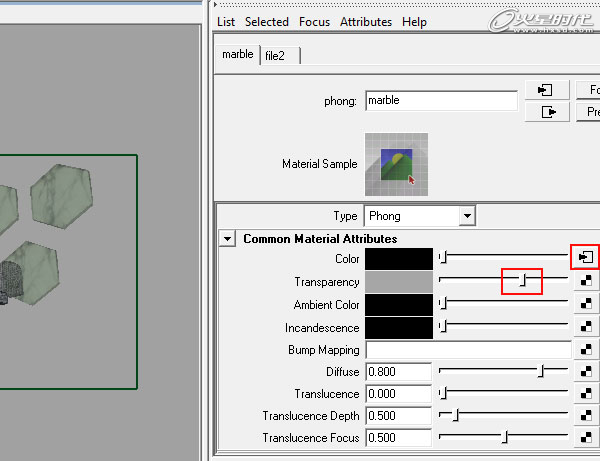
图01
第02步
重复两次前面的步骤,分别在两个Phong材质上添加不同的节点,使你有三个新的材质,分别命名为Urban_shader和motion_shader,将所有新建的材质球负于到相应的模型上,marble赋予给六边形,Urban_shade赋予给文字Urban,motion_shader赋予给文字Motion。(图02)
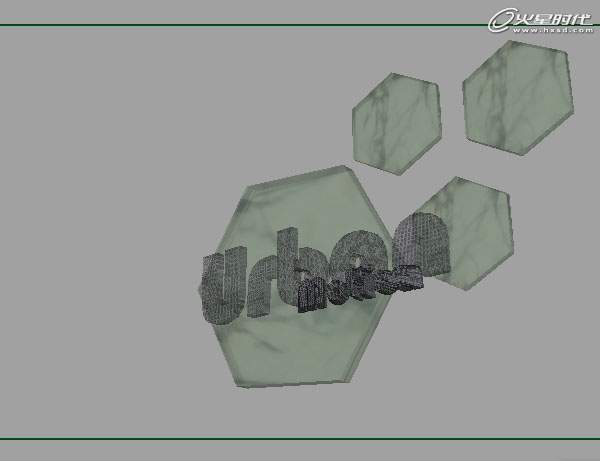
图02
第03步
选择场景中的对象,然后去渲染层编辑器并创建一个新层,分配对象编辑器来渲染。通过对新的图层,更改图层的名称为Master,然后点击保存。(图03)
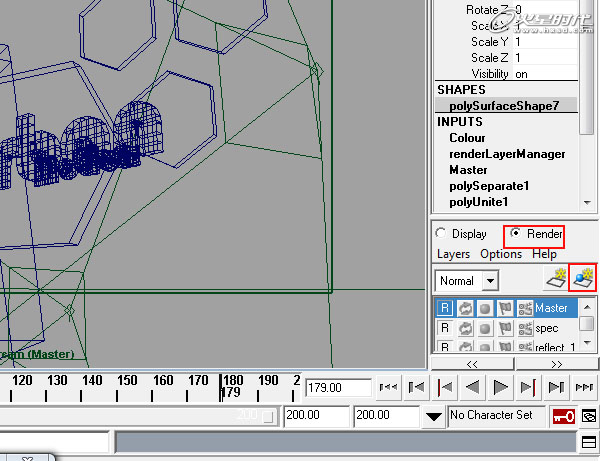
图03
第04步
创建三个新的层,并添加场景中所有对象,重命名这些层,分别是Occlusion、Specular、Reflection。(图04)

图04
第05步
创建一个新的Phong材质,命名为Spec_shader。参数如下图,并打开Specular层,负于给所有模型。(图05)
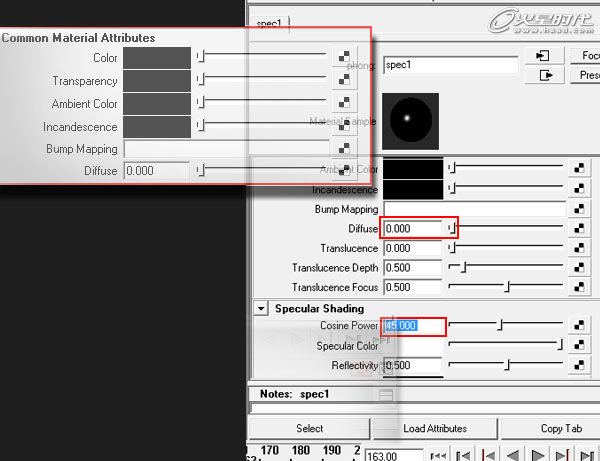
图05
第06步
按Ctrl+D复制刚刚创建的材质球,并将其命名为Reflect_shader,将Reflectivity设置最高数值为1,将这个材质球赋予给Reflection层的所有模型。(图06)

图06
第07步
现在你需要一个环境的渲染,创建一个球体,选择Create > Polygon Primatives > Sphere 。创建一个Lambert材质,单击颜色节点,并选择相同的环境图像,作为源图像投影。(图07)
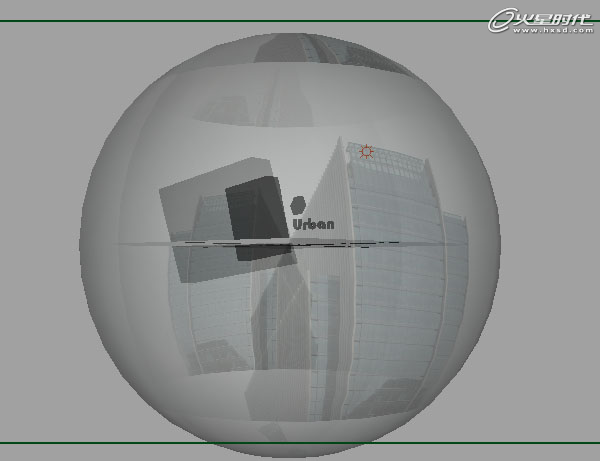
图07
第08步
渲染时我需要的是投影而不需要模型,因此按Ctrl+A弹出对象属性编辑器,打开Render Stats菜单,将Primary Visibility前面的勾去掉。(图08)
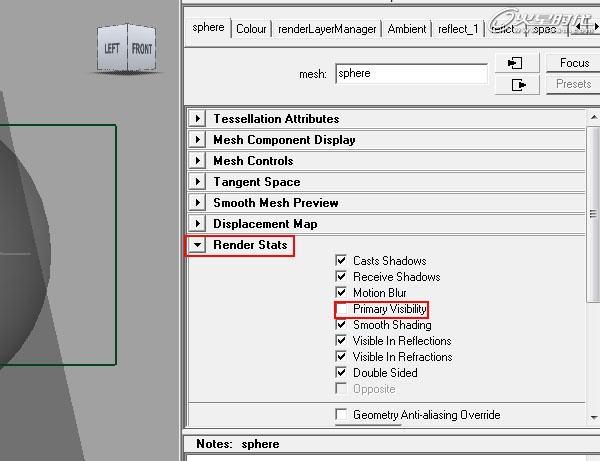
图08
第09步
做一个反射层测试渲染。(图09)
图09
第10步
打开渲染设置窗口,设置Common选项卡,该图像格式设置为PNG,结束帧设置为200。Renderable Camera设置为render_cam。转到mental ray选项卡,并设置质量预设为Production。(图10)
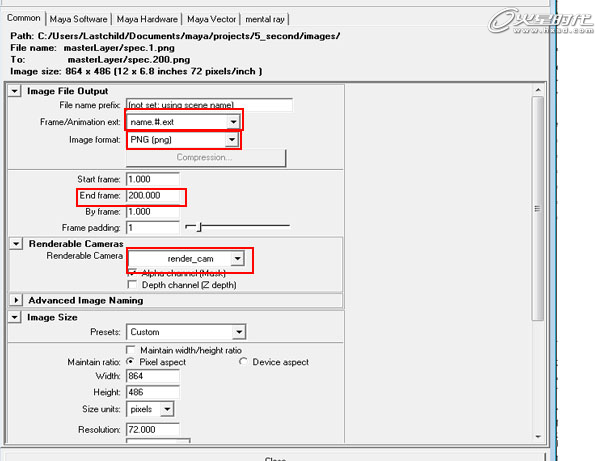
图10
第11步
选择Render > Batch Render开始渲染序列,等到渲染完成,然后再进行合成。(图11)
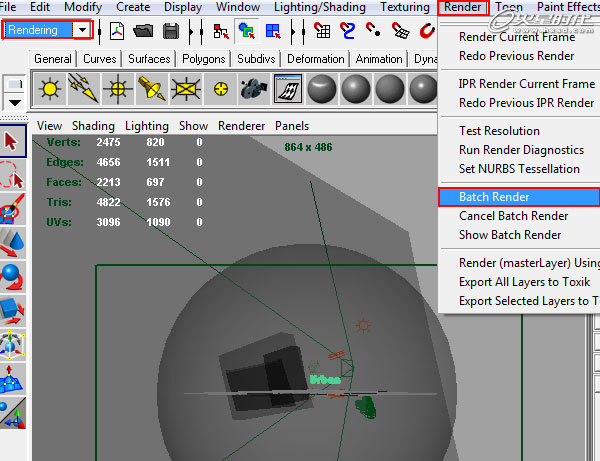
图11
第12步
全部渲染完成,打开After Effects,进行导入,选择File > Import > File。(图12)
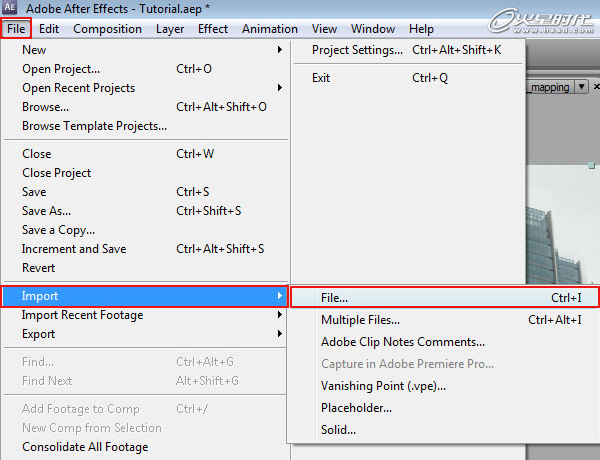
图12
第13步
找到渲染层命名的文件夹,打开Master,并点击序列中的第一个文件,确保PNG Sequence是被选中的,然后单击打开,按照这个方法打开所有的序列。(图13)
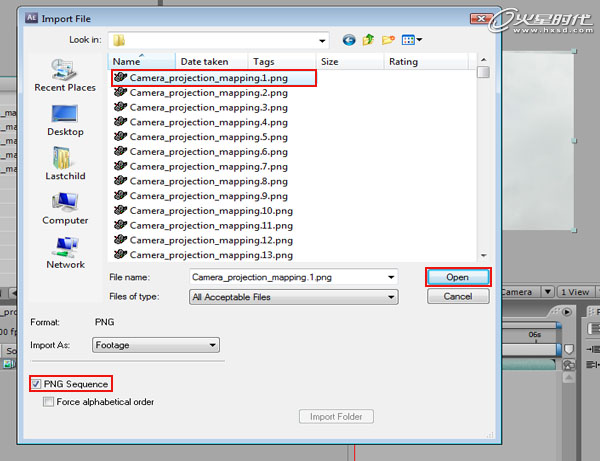
图13
第14步
通过拖动其中一个序列到新的合成,然后将其他的序列也拖近合成。(图14)
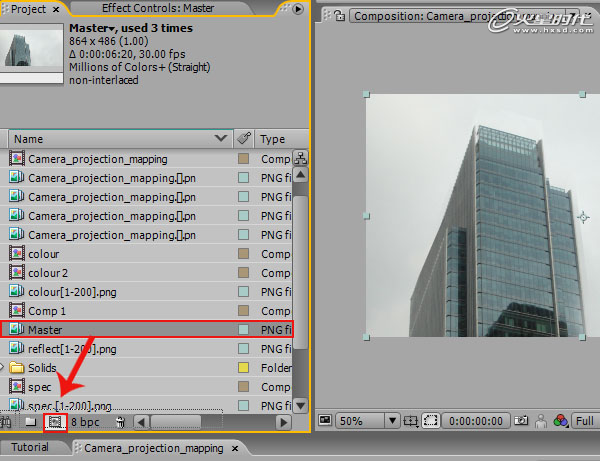
图14
第15步
通过模式切换点击Toggle Switches/Modes, 排列和叠加模式如下图。(图15)
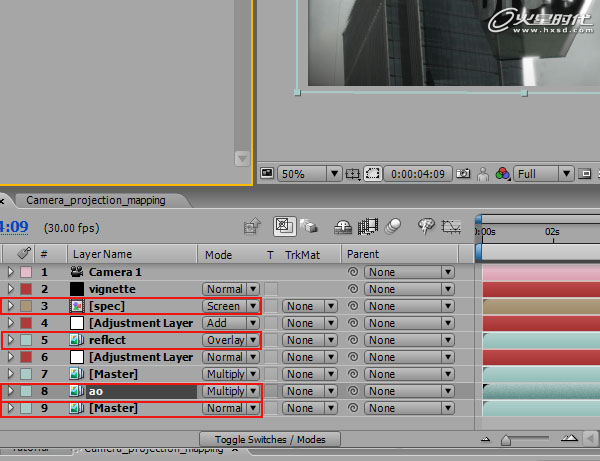
图15
第16步
要添加一个Adjustment Layer,创建一个新的调整层,调整这层的叠加模式和不透明度,直到你满意为止。(图16)
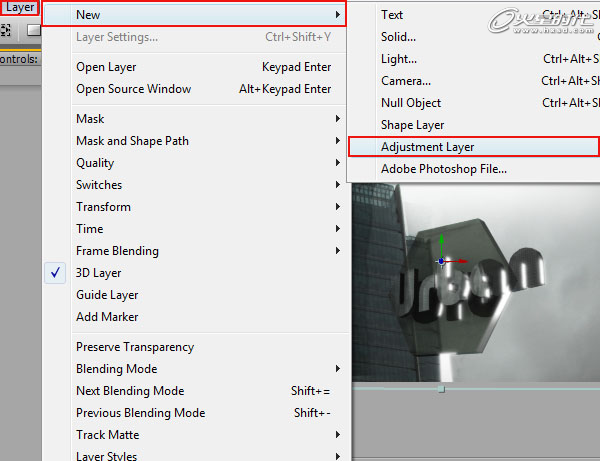
图16
第17步
这就是它,希望你能在这里学到新的东西!(图17)
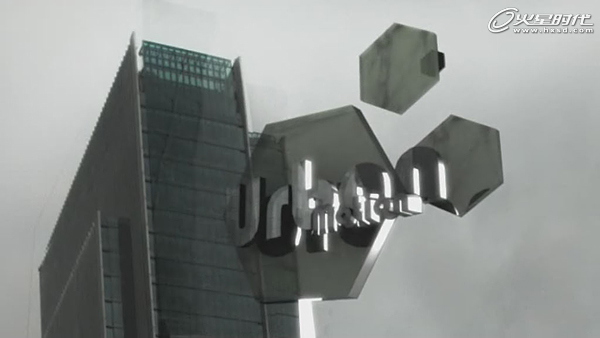
图17

- 打开ps,跟着教程做一遍,做完的图要到这里交作业:提交作业
- 教程有看不懂的地方,可以到论坛发帖提问:ps新手求助
- 加官方微信,随时随地,想学就能学:ps_bbs,或扫右侧二维码!
- 关注我们微博:@photoshop教程论坛
- 想学更多的同学,可以关注我们小程序,每天都有新教程:点我用微信扫一下

相关教程