3ds Max制作可怕的灵魂怪人教程(3)
使用软件:3ds Max, mental ray, ZBrush
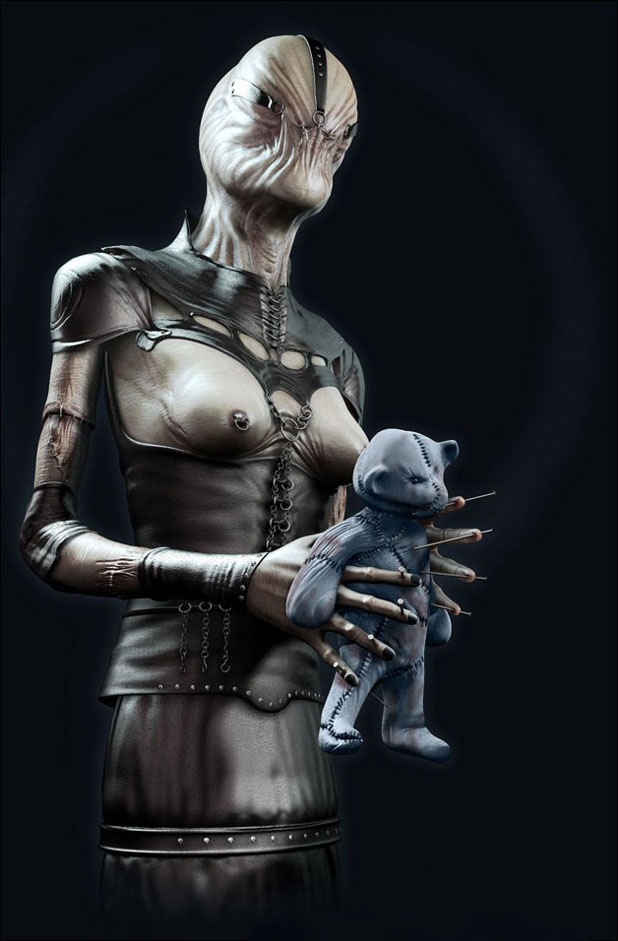
概念
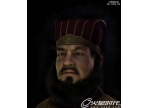
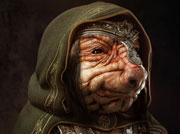
这个模型的创作概念来自于Clive Barker的“宇宙”。我是影片《猛鬼追魂1》和雕像《受折磨的灵魂》的忠实粉丝。所以我的 目的是创建自己的视觉,同时带有对Barker原版概念的敬仰。我想创作一个神秘的角色——既令人不安又具有吸引力——他的灵魂被囚禁在一具混合的、备受折磨的身体里。
总体工作流程
当我开始制作这个模型时,我决定尽可能使用Zbrush,因为这个工具可以发挥出最大的功效。这个模型是由很多部分组成的(头,手,胸,泰迪熊,衣服和配饰),这是为了提供计算机的存储资源,为每一部分做更加完美的细节。
为了有组织的调节各种部分,每一个步骤都是以前面一步的图片作为项目背景开始的(比如衣服)。这种办法可以在最后的组装时获得非常棒的精确效果。
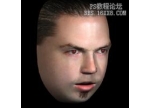
头部建模
头部的建模是以Zspheres为基础的,设定非常简单。选择好综合的形式后,我开始分割和精确网格。
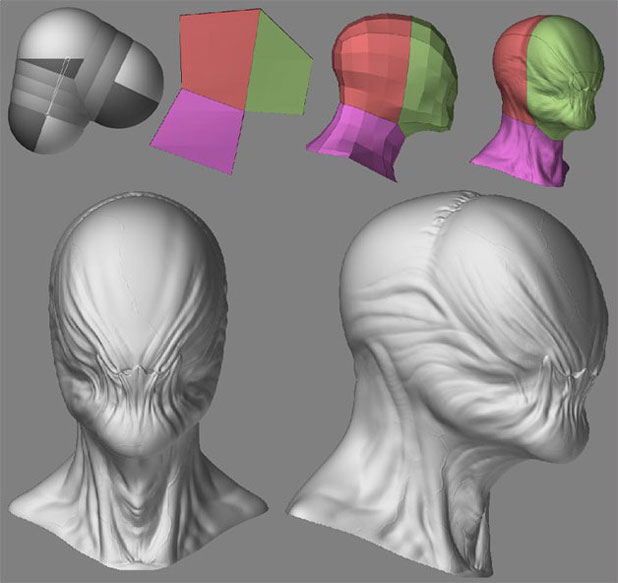
贴图使用的是AUV Tiles工具,我发现这个工具非常快而且有效率。多亏了ZAppLink工具,你就不需要在Photoshop中展开UV贴图和绘画平面贴图了。能够节省时间。漫反射和凹凸贴图都是用ZAppLink绘画的。

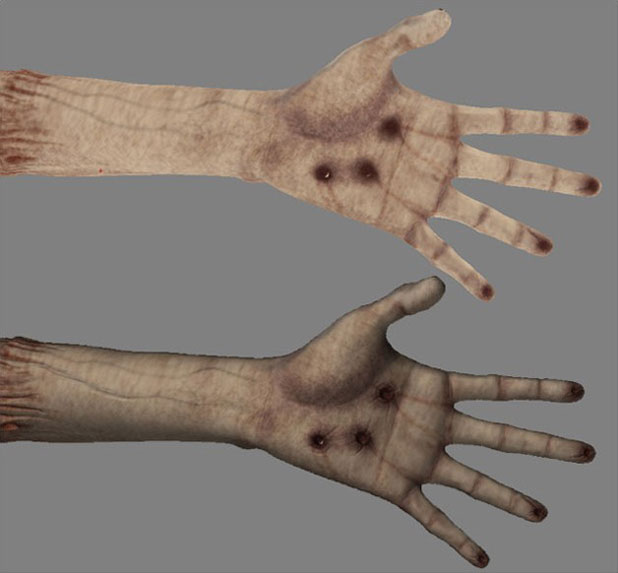
手臂建模
和头部建模一样,手臂建模也是基于Zsphere设定。做好一个很低的多边形网格后,我一个点一个点地调节拓扑。然后,分割、移动各个点,分割、移动更多的点……

纹理和头部纹理的绘画一样,使用的是ZAppLink。
胸部建模
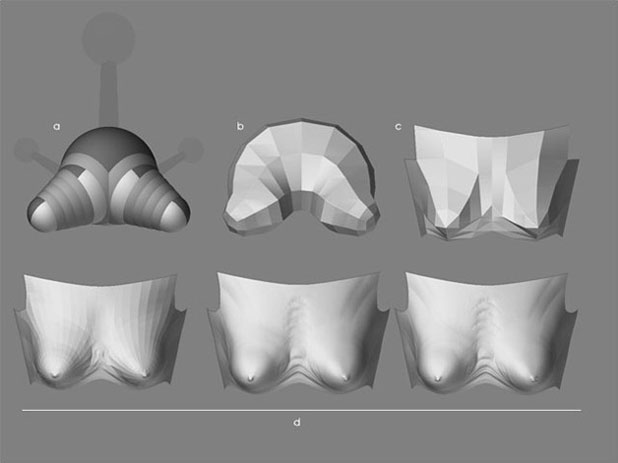
A.设定Zsphere
B.转换多边形网格
C.移动节点,删除多余的平面
D.精确和添加细节
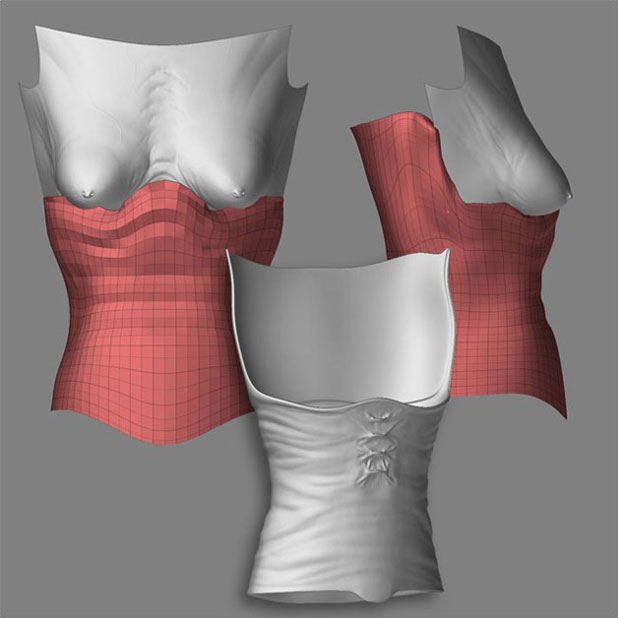
衣服的建模
衣服的建模我用的是一个圆柱体,然后转换为多边形网格。我用躯干的前面和右边作为背景(放在另一个图层)来调节了衣服。背景的深度信息极其有用,与标准的平面参考图片相比,它能够让当前部分更完美地适应身体。
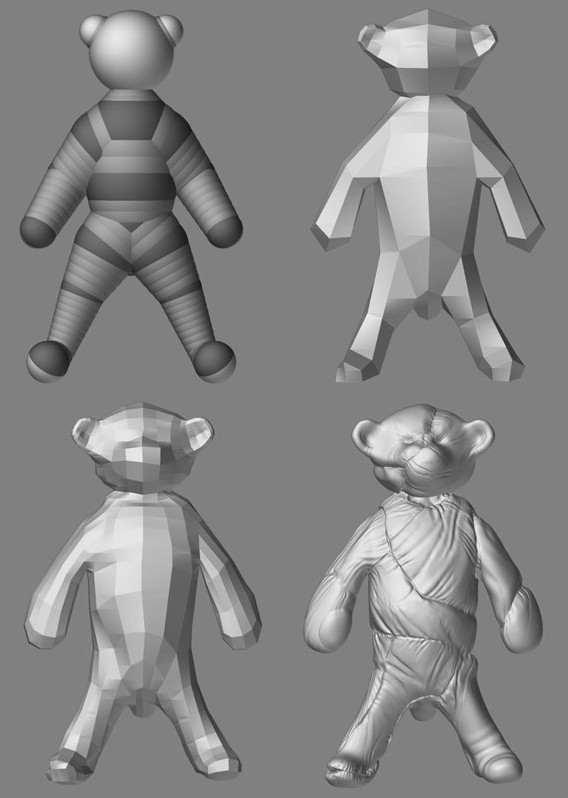
泰迪熊
输入与输出
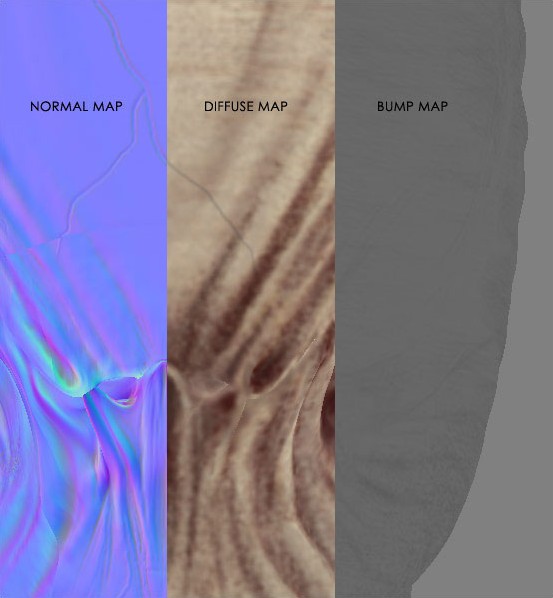
身体的每一部分都是以分割2到3次的水平从ZBrush软件中输出的,然后输入到我的动画制作程序中。法线贴图是用ZMapper生成的(我没有用位移贴图,我觉得计算和渲染会花太多的时间)。如果有需要的话,我在这里通过移动粒子扭曲了角色的造型。然后添加一些配饰,比如项链。

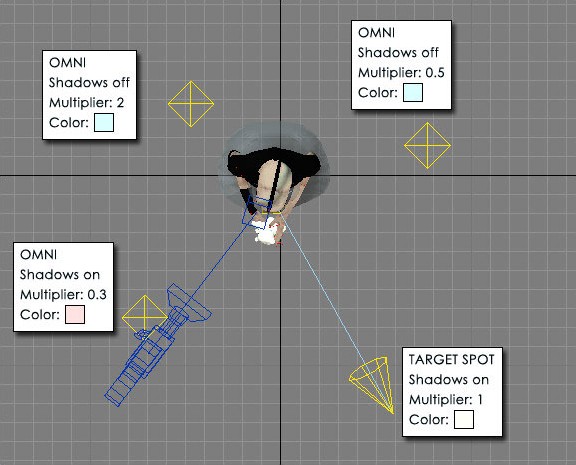
照明
我主要用了四个方位的照明。
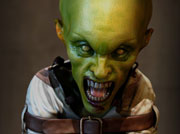
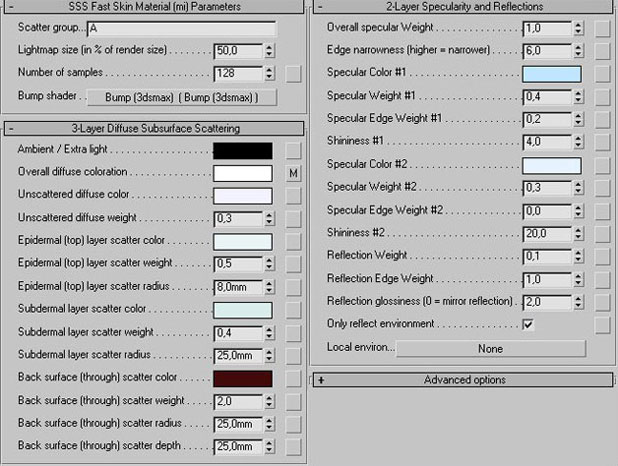
皮肤描影
我用了MR'SSS Fast Skin Material插件,做了一些扭曲。
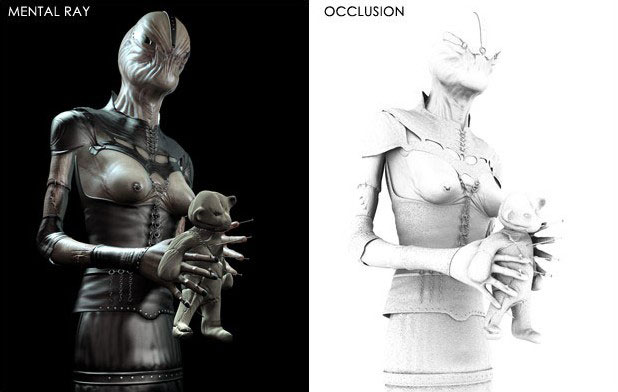
最终渲染
我在另一个通道里用闭塞做了最后的渲染。然后在Photoshop中进行合成。


- 打开ps,跟着教程做一遍,做完的图要到这里交作业:提交作业
- 教程有看不懂的地方,可以到论坛发帖提问:ps新手求助
- 加官方微信,随时随地,想学就能学:ps_bbs,或扫右侧二维码!
- 关注我们微博:@photoshop教程论坛
- 想学更多的同学,可以关注我们小程序,每天都有新教程:点我用微信扫一下

相关教程