photoshop合成实例:空岛
来源:未知
作者:kkfifgk
学习:7396人次
作者闪电儿 翻译 出处:网页教学网
本教程讲述用photoshop合成一个梦想的天堂景像,主要利用了photoshop的光线调整,把多个素材合成一起处理,要求掌握photoshop的基础工具的详细使用方法才能达到下面的效果。
最终效果:

首先我们找到一幅图片,然后调整图片大小,我们使用克隆图章工具把图中的月亮去掉。

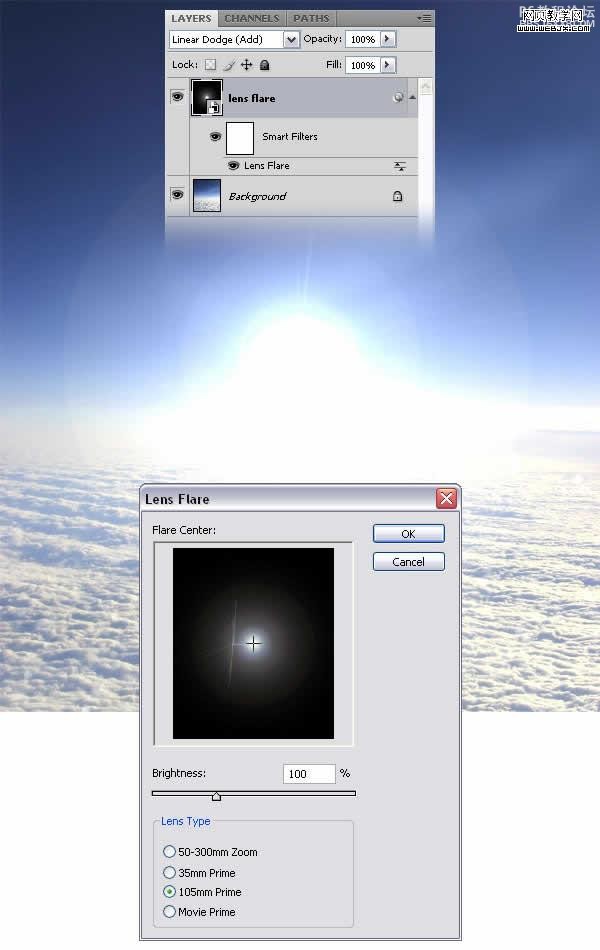
然后我们添加光效滤镜。创建一个新图层,填充为黑色,然后转换为智慧对象,我们添加光晕滤镜,图层模式调整为线性减淡,效果如下。
本教程讲述用photoshop合成一个梦想的天堂景像,主要利用了photoshop的光线调整,把多个素材合成一起处理,要求掌握photoshop的基础工具的详细使用方法才能达到下面的效果。
最终效果:
首先我们找到一幅图片,然后调整图片大小,我们使用克隆图章工具把图中的月亮去掉。
然后我们添加光效滤镜。创建一个新图层,填充为黑色,然后转换为智慧对象,我们添加光晕滤镜,图层模式调整为线性减淡,效果如下。
学习 · 提示
相关教程
关注大神微博加入>>


网友求助,请回答!