Photoshop应用图案图章工具做效果(5)
来源:
作者:
学习:592人次
作者:令彬 来源:Dadapai
步骤 1、打开图像素材。

步骤 2、编辑 >> 定义图案。
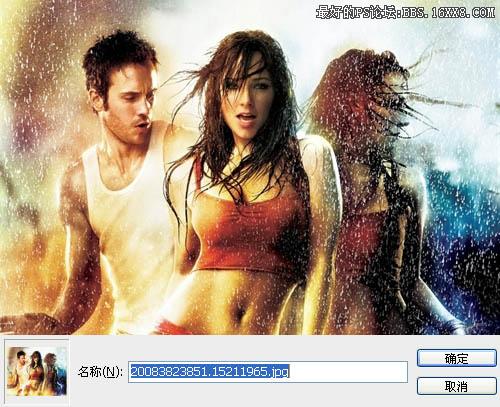
步骤 3、图像 >> 调整 >> 色相/饱和度。

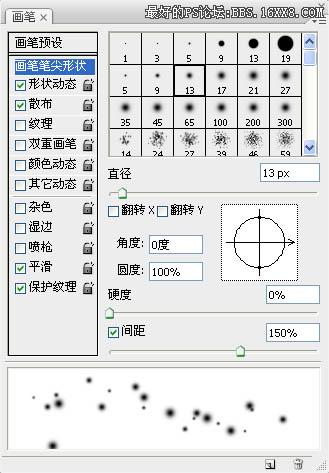
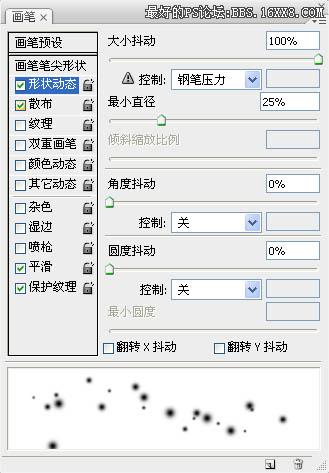
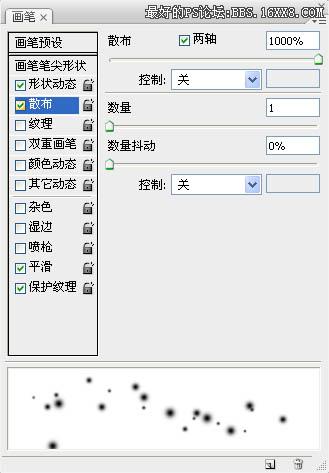
步骤 4、选择笔刷并设置笔刷属性。
步骤 5、创建新图层,并用上述笔刷描绘出如下光斑效果。

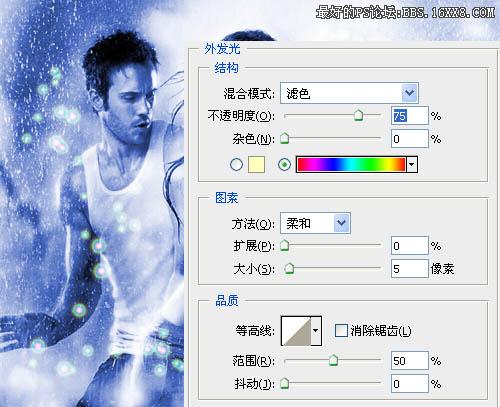
步骤 6、添加图层样式。
步骤 7、选择背景层,滤镜 >> 模糊 >> 径向模糊。
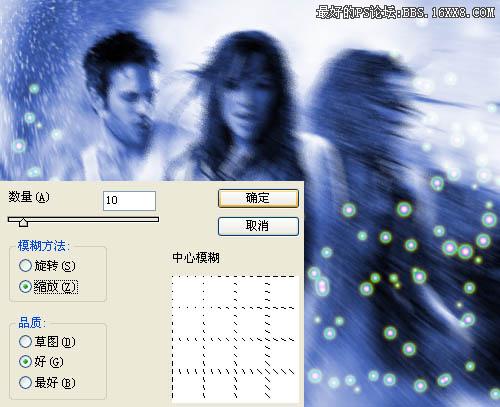
步骤 8、编辑 >> 渐隐径向模糊。

步骤 9、选择光斑层,重复步骤 7,步骤 8。

步骤 10、创建新图层,选择图案图章工具,并选择之前定义的图案。
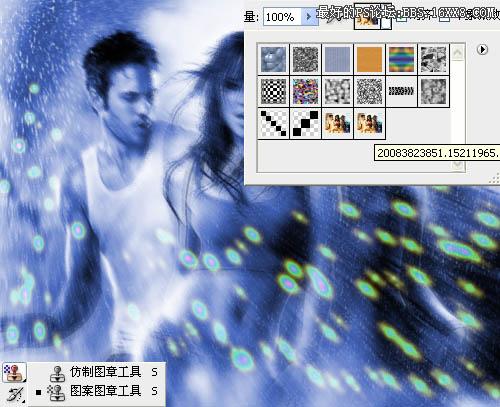
步骤 11、使用图案图章工具在新建图层中描绘画布得到如下效果。

步骤 1、打开图像素材。
步骤 2、编辑 >> 定义图案。
步骤 3、图像 >> 调整 >> 色相/饱和度。
步骤 4、选择笔刷并设置笔刷属性。
步骤 5、创建新图层,并用上述笔刷描绘出如下光斑效果。
步骤 6、添加图层样式。
步骤 7、选择背景层,滤镜 >> 模糊 >> 径向模糊。
步骤 8、编辑 >> 渐隐径向模糊。
步骤 9、选择光斑层,重复步骤 7,步骤 8。
步骤 10、创建新图层,选择图案图章工具,并选择之前定义的图案。
步骤 11、使用图案图章工具在新建图层中描绘画布得到如下效果。
学习 · 提示
相关教程
关注大神微博加入>>


网友求助,请回答!