Photoshop星光字效果制作教程(5)
来源:
作者:
学习:443人次
作者:令彬 来源:dadapai
步骤 1、创建黑色画布,并输入文字。

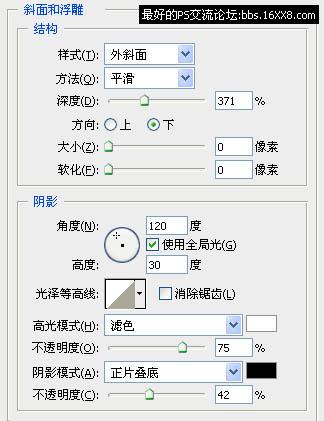
步骤 2、为文字层添加图层样式。
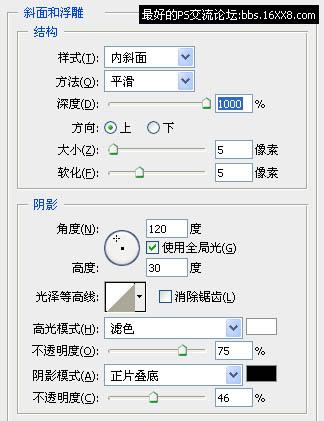
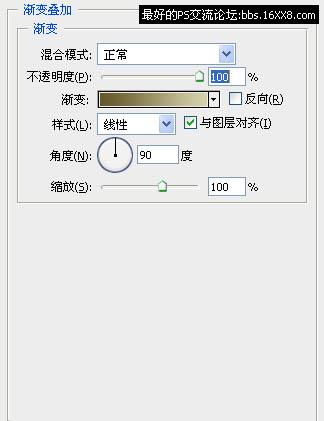
得到如下效果:

步骤 3、按住 Ctrl 键并点击文字层获得选区,选择 >> 修改 >> 收缩,收缩 5 px。
创建新图层,并用白色填充选区。

步骤 4、滤镜 >> 杂色 >> 添加杂色,数量40%,高斯分布,单色。
步骤 5、重复执行添加杂色滤镜两次。

步骤 6、滤镜 >> 杂色 >> 蒙尘与划痕,半径设为1,阀值130。

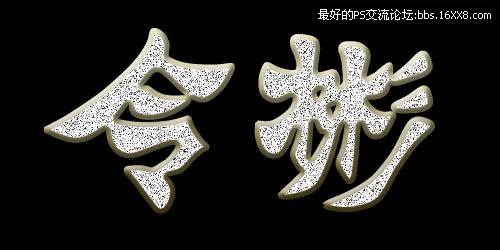
步骤 7、滤镜 >> 风格化 >> 浮雕效果,高度3,数量130。
步骤 8、为杂色层添加图层样式。
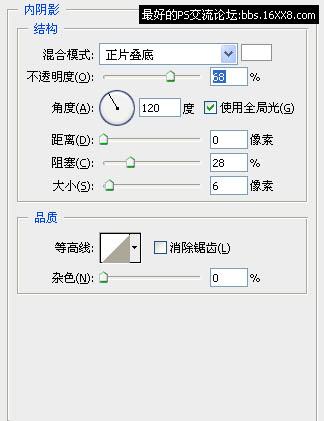
得到如下效果:
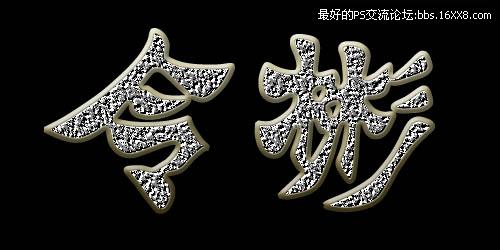
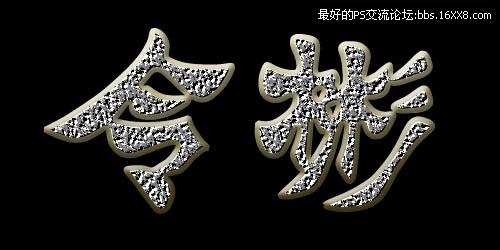
步骤 9、图像 >> 调整 >> 亮度/对比度,亮度+70,对比度-20。
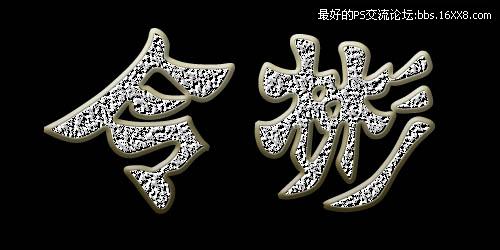
步骤 10、使用星光笔刷(点击下载)装饰文字。

步骤 1、创建黑色画布,并输入文字。
步骤 2、为文字层添加图层样式。
得到如下效果:
步骤 3、按住 Ctrl 键并点击文字层获得选区,选择 >> 修改 >> 收缩,收缩 5 px。
创建新图层,并用白色填充选区。
步骤 4、滤镜 >> 杂色 >> 添加杂色,数量40%,高斯分布,单色。
步骤 5、重复执行添加杂色滤镜两次。
步骤 6、滤镜 >> 杂色 >> 蒙尘与划痕,半径设为1,阀值130。
步骤 7、滤镜 >> 风格化 >> 浮雕效果,高度3,数量130。
步骤 8、为杂色层添加图层样式。
得到如下效果:
步骤 9、图像 >> 调整 >> 亮度/对比度,亮度+70,对比度-20。
步骤 10、使用星光笔刷(点击下载)装饰文字。
学习 · 提示

相关教程
关注大神微博加入>>


网友求助,请回答!