AI海报教程,用画笔制作线性数字海报(2)
大概知道了艺术笔刷怎么用之后,我们就开始今天的正题吧,如图用直线工具画一条直线,颜色随意,描边1pt:

选中对象以后,执行效果-扭曲和变换-变换:

将预览打上勾,副本那里输入20,垂直的数值视情况而定吧,我觉得3px就足够了,这样就复制出了20条直线的副本出来:

选中对象,执行对象-扩展外观,这样一组线条的图形就制作好了:

将它如前文所示拖进画笔面板,添加为艺术笔刷:

选一个合适的字体打上数字2,我这里选择的是华文细黑,描边无填充:

ctrl+shift+o或者鼠标右键将其轮廓化:

这里需要对字形进行调整,所以用小白工具选中不需要的部分后删除,别忘记取消编组以及释放复合路径噢:

将两个部分拼合在一起之后,选中两个对象然后点击路径查找器中的轮廓:

重新给一个描边色,就可以看到,刚才重合的那一部分线段被切割出来了:

删除重合的线段,对两个部分分别载入艺术笔刷:

接下来要进行字形的调整了,复制一个下半部分图形出来。
将上下两个对象拼合在一起,连接处用ctlt+j把路径连接起来,并且如图所示用小白工具去调整锚点:

将这个对象扩展以后取消编组,直接用小白选中对于的部分删除:

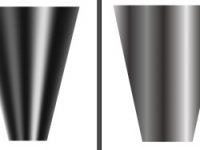
再将端点改为圆头:

同样的办法搞刚才复制出来的对象:

接着再对整体进行拼合调整,这里就不用多说了吧:

再来就是添加渐变色,这个也就不用说了:

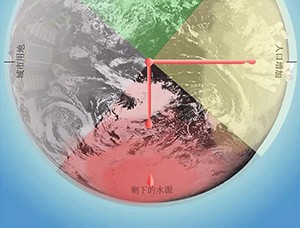
再参考原图把背景,还有其他形状都画出来:

给箭头所指出的对象添加效果-风格化-投影,参数大家看着办就好:

再进行细节的调整,按住shift键加选住箭头所指出的锚点,对齐工具中选择底部对齐:

再用钢笔工具在需要的地方补上几笔:

搞完大概这样:

基本上就搞定了,接下来最上面画一个和画板一样大小的矩形,全选对象右键创建剪切蒙版搞掉画板以外的部分:

最后码字排版导样机,老三样看看效果吧:

www.16xx8.com
本文由“野鹿志”发布
转载前请联系作者“马鹿野郎”
私转必究
只有动手制作
学习 · 提示
相关教程