光线效果,用PS给人物加上光束(4)
来源:PS联盟
作者:零下一度
学习:16649人次
本篇教程通过PS给舞蹈演员身体加上美丽的光环光束,主要用到了路径,画出整个形状,再加以画笔工具做出美丽闪耀的光环效果,步骤详细,过程易上手,同学们来练习下吧。
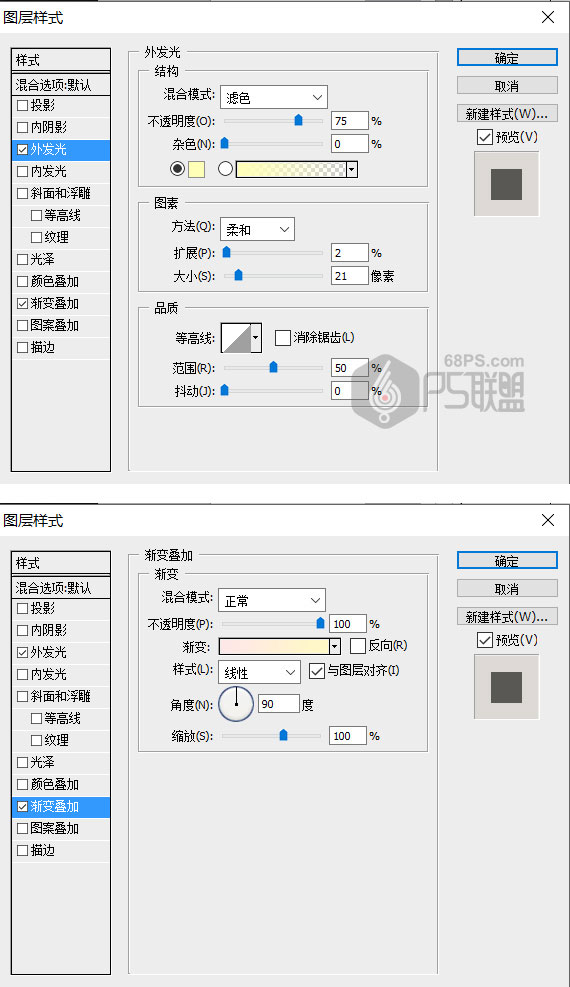
6、转到图层面板,新建图层2。选画笔工具(B),直径设为7px,硬度4%。转到路径面板,点用画笔描边路径按钮,并向下、向左移动,得到如下效果图。
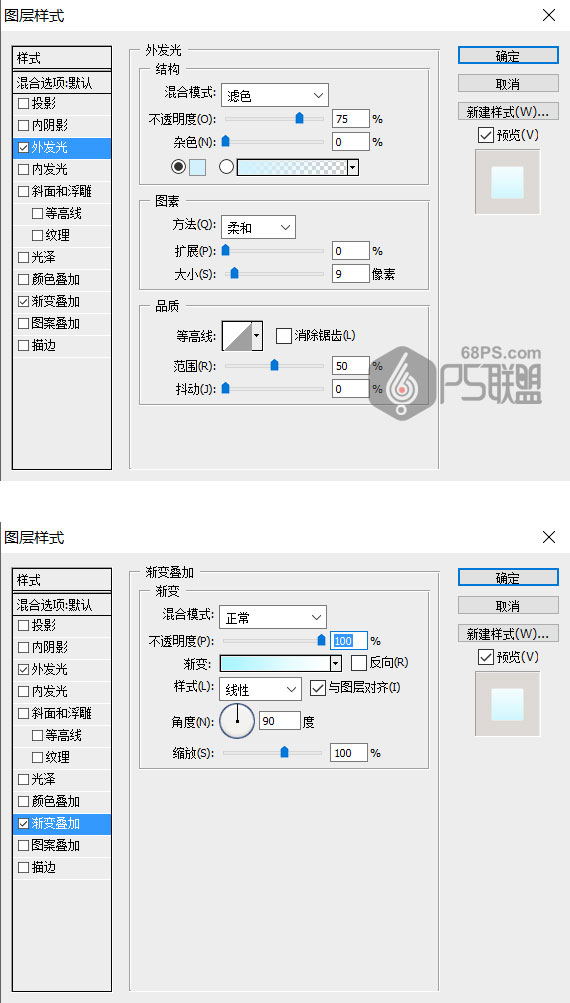
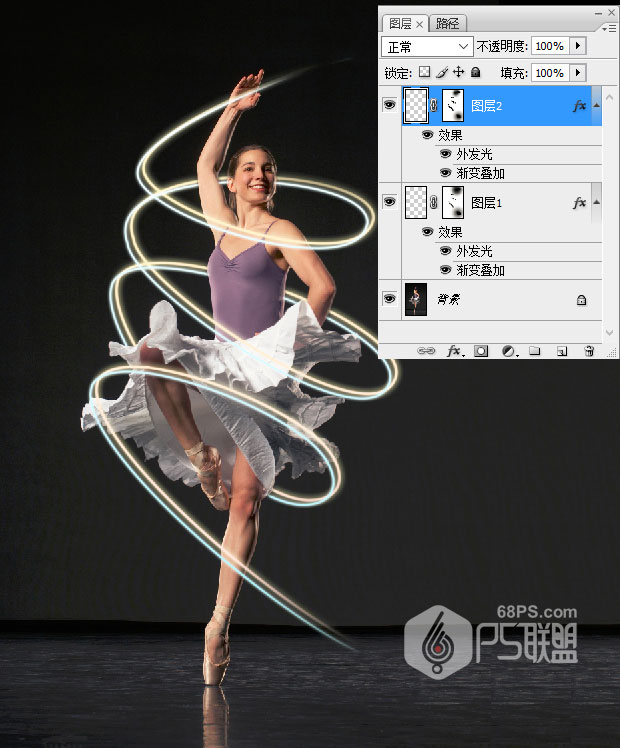
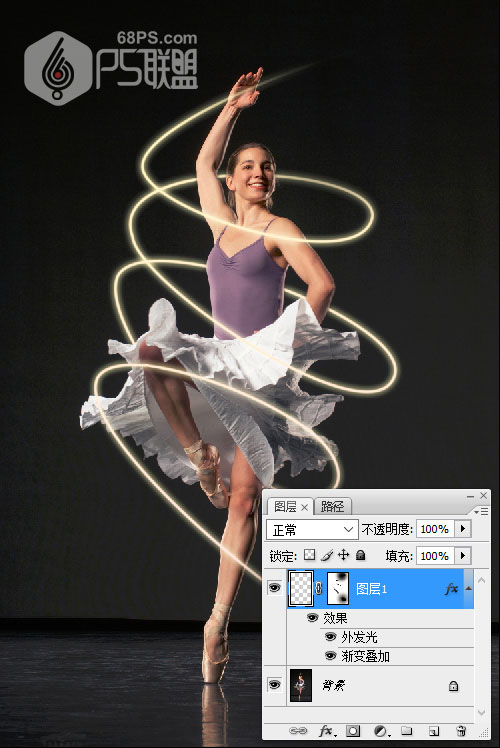
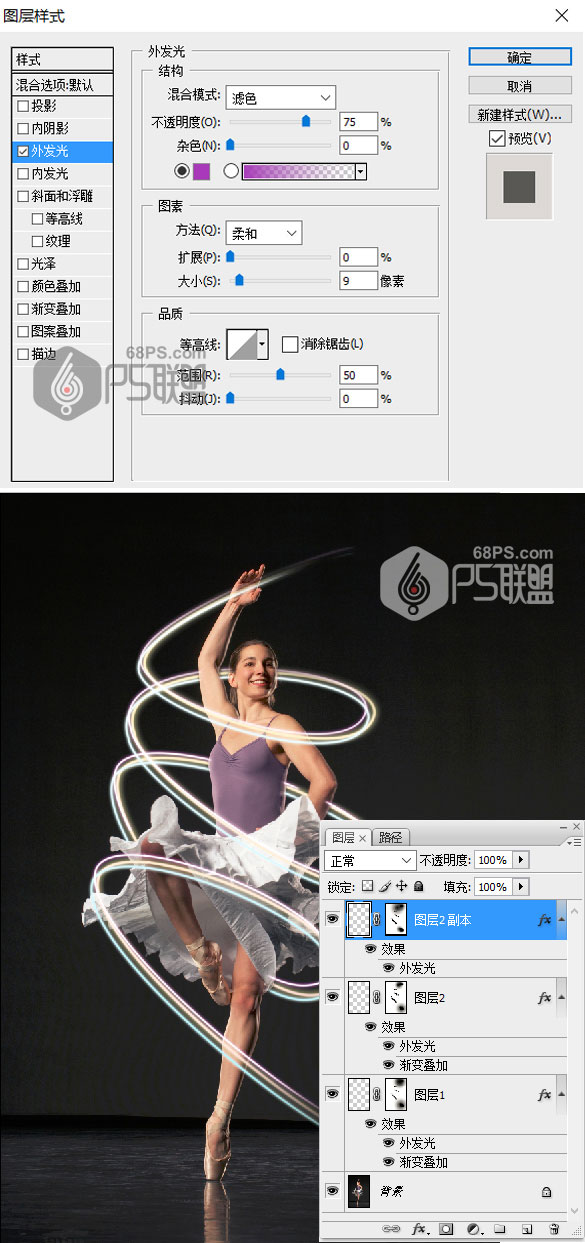
9、复制图层2,得到图层2副本,并向上向左移动击光环。双击图层打开图层样式,为图层添加外发光设置:颜色为紫色#8640bd,大小为9像素。
11、转到路径面板,点画笔描边路径按钮,得到如下效果。
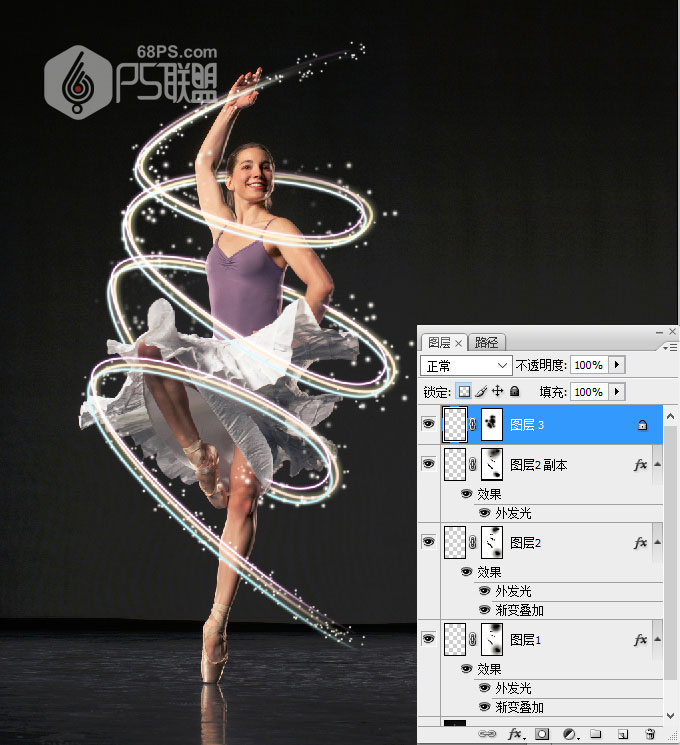
12、给图层3添加图层蒙版,选画笔工具(B),前景色为黑色,把不需要的点光涂抹掉。
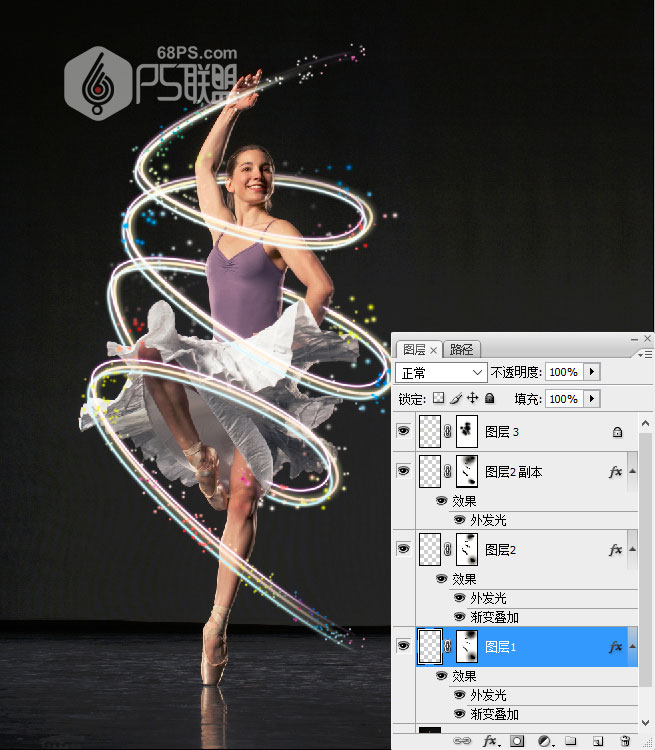
 13、转到图层,把图层3锁定,选画笔工具(B),用红色、黄色、蓝色、紫色涂点光,得到五彩的点光效果。
 14、转到图层,选图层1,转到滤镜-模糊-高斯模糊,半径3.5像素。
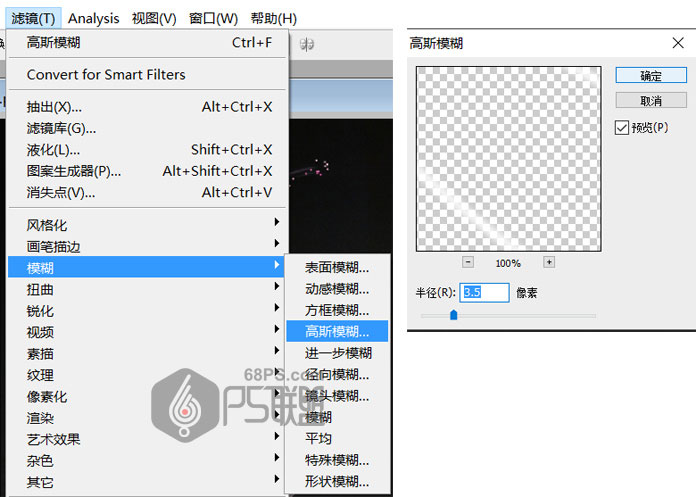 15、转到图层,选图层1,转到滤镜-模糊-高斯模糊,半径3.5像素,得到如下效果。
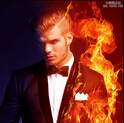
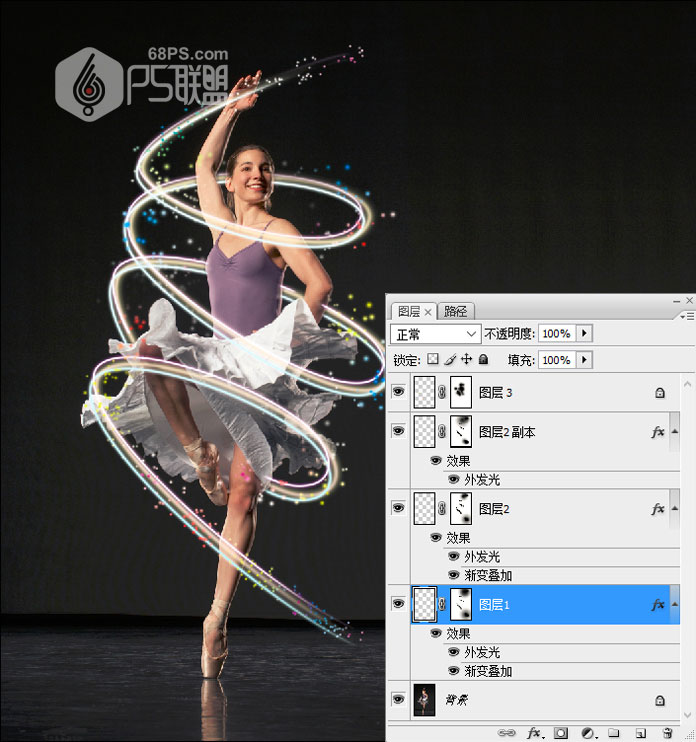 好了,完成后是不是画面看着很炫,最终效果图如下所示:
最终效果

www.16xx8.com
<点图片查看大图>
1、在photoshop中打开需要处理的人物图片。

<点图片查看大图>
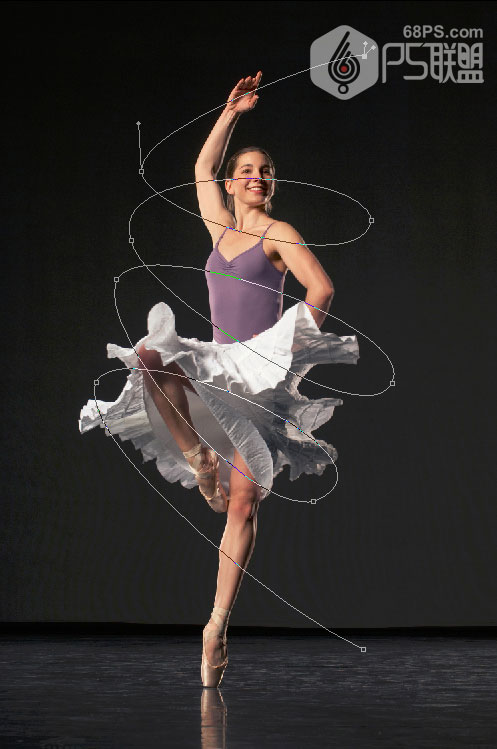
2、转到图层面板,新建图层,选钢笔工具(P),用钢笔工具围绕着人物画绕圈路径,路径不闭合。
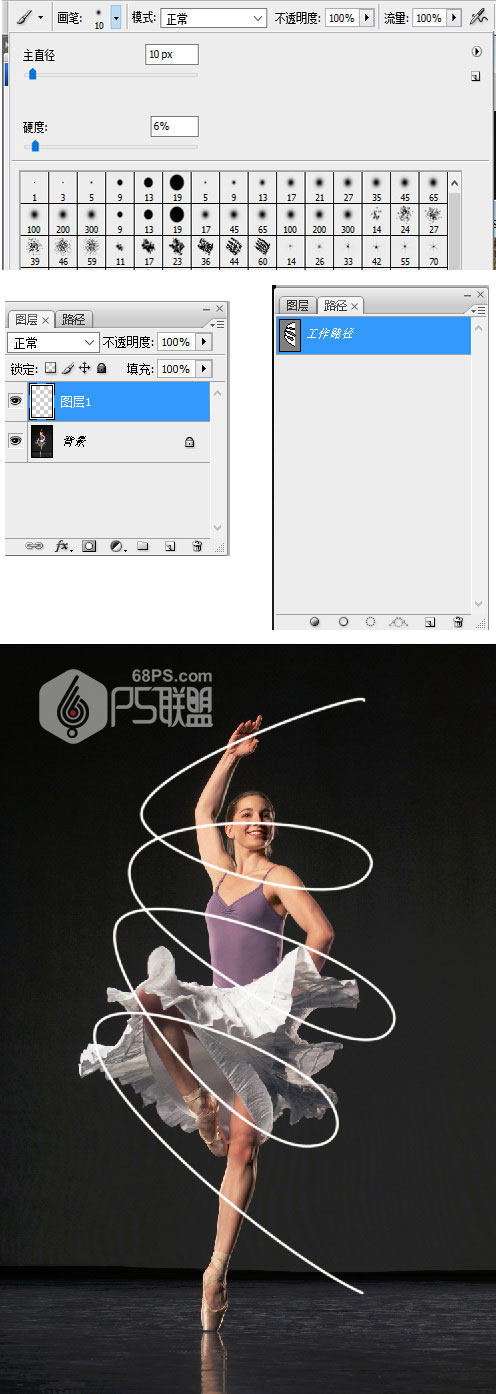
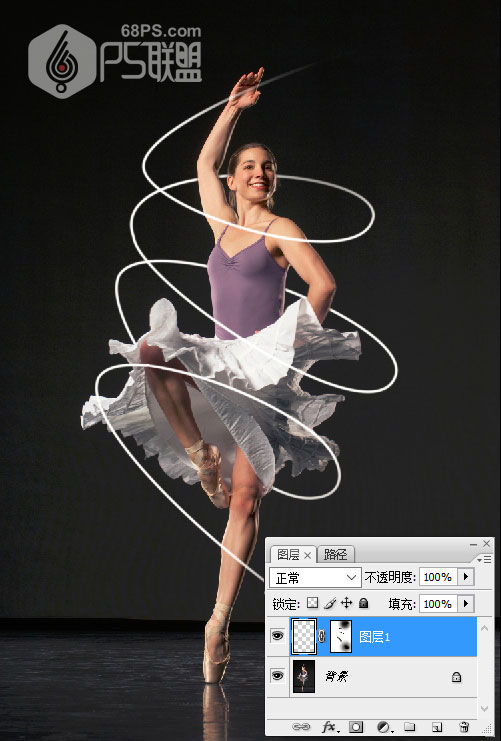
4、给图层添加图层蒙版,选画笔工具(B),前景色设为黑色,用画笔把人物身上的光线擦除,使其形成光线环绕效果。
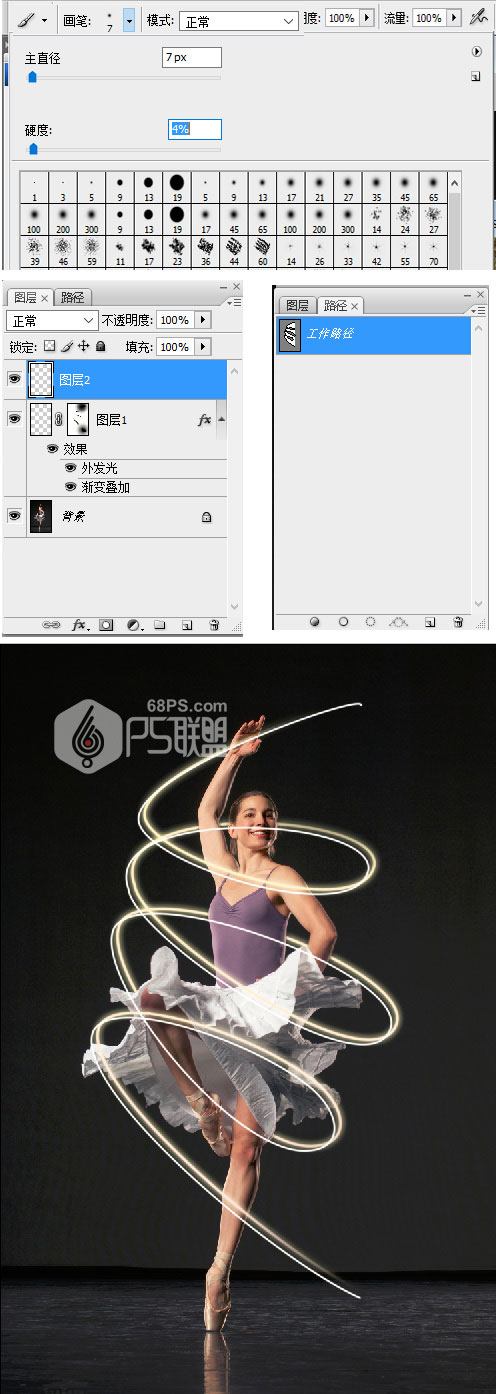
6、转到图层面板,新建图层2。选画笔工具(B),直径设为7px,硬度4%。转到路径面板,点用画笔描边路径按钮,并向下、向左移动,得到如下效果图。
7、给图层添加图层蒙版,选画笔工具(B),前景色设为黑色,用画笔把人物身上的光线擦除,使其形成光线环绕效果。

9、复制图层2,得到图层2副本,并向上向左移动击光环。双击图层打开图层样式,为图层添加外发光设置:颜色为紫色#8640bd,大小为9像素。
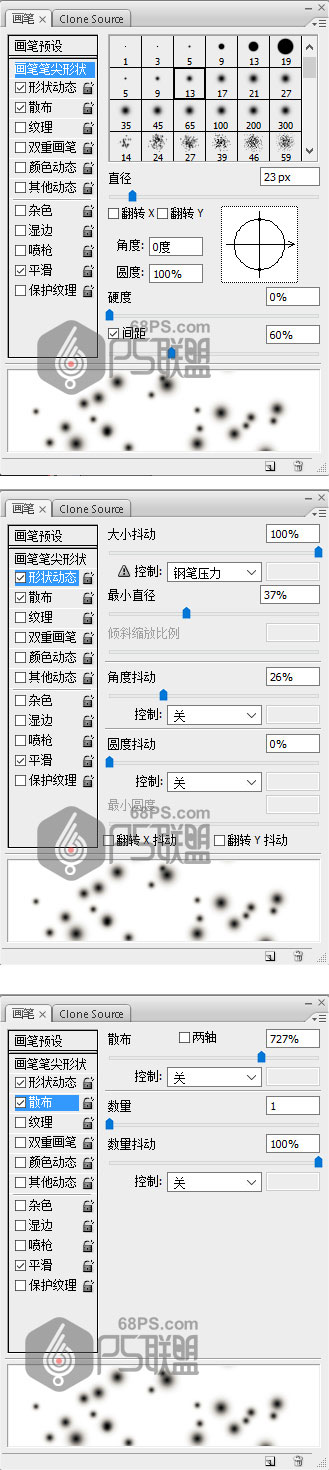
10、给光环加上点光效果,新建图层3,选画笔工具(B),对画笔进行如下设置:
笔尖形状:直径23px,硬度0%,间距60%。
形状动态: 最小直径37%,角度抖动26%。
散布:数量1,数量拉动100%。
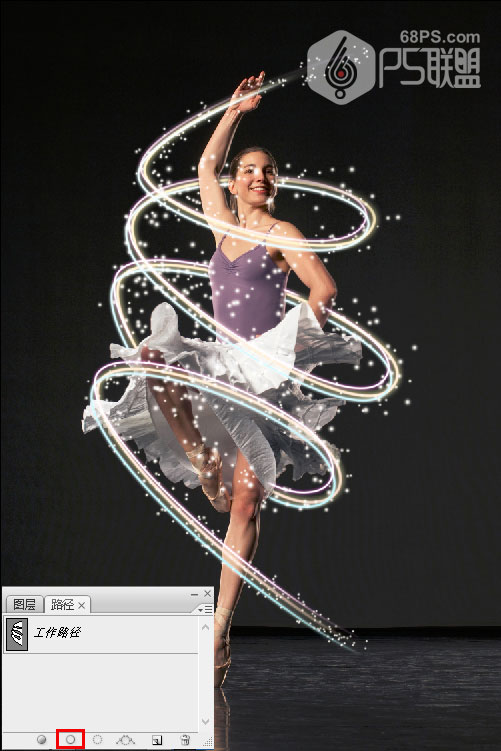
11、转到路径面板,点画笔描边路径按钮,得到如下效果。
12、给图层3添加图层蒙版,选画笔工具(B),前景色为黑色,把不需要的点光涂抹掉。
13、转到图层,把图层3锁定,选画笔工具(B),用红色、黄色、蓝色、紫色涂点光,得到五彩的点光效果。
14、转到图层,选图层1,转到滤镜-模糊-高斯模糊,半径3.5像素。
15、转到图层,选图层1,转到滤镜-模糊-高斯模糊,半径3.5像素,得到如下效果。
好了,完成后是不是画面看着很炫,最终效果图如下所示:
www.16xx8.com
<点图片查看大图>
学习 · 提示

相关教程
关注大神微博加入>>


网友求助,请回答!