ps调复古风格照片色彩(3)
来源:Mavis
作者:佚名
学习:7585人次
因为太多人说喜欢旧版的美式復古,所以把资料挖出来重写过,当然现在比以前写的时候又多会了一些皮毛,就顺手改进了一些步骤,废话不多说,以下请服用啦~
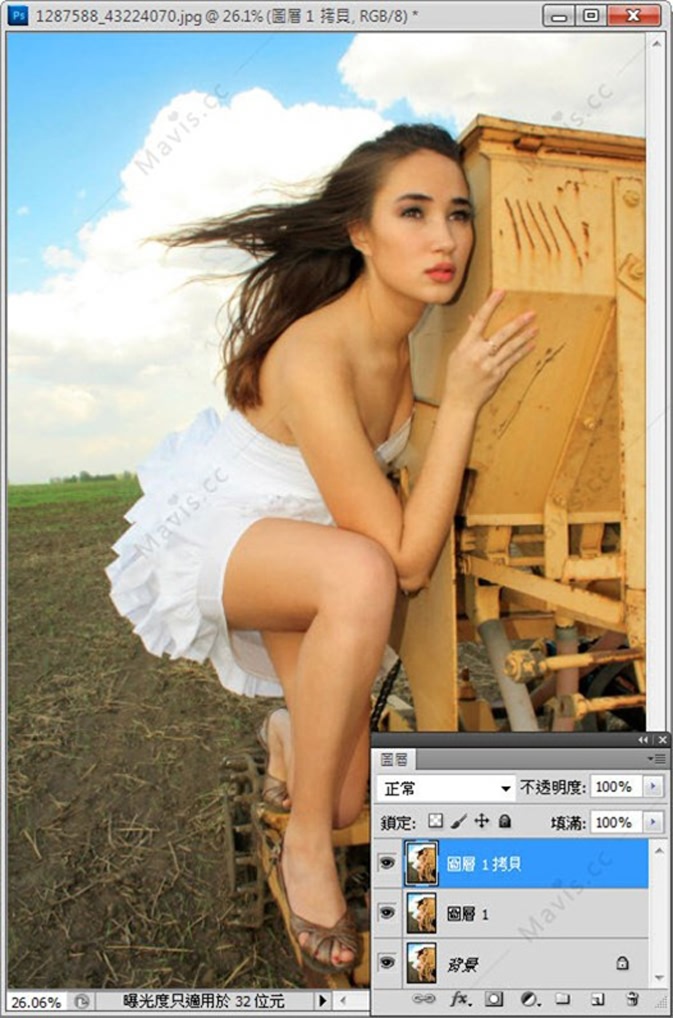
原图与效果图:

1.打开照片,CTRL+J重制两次。
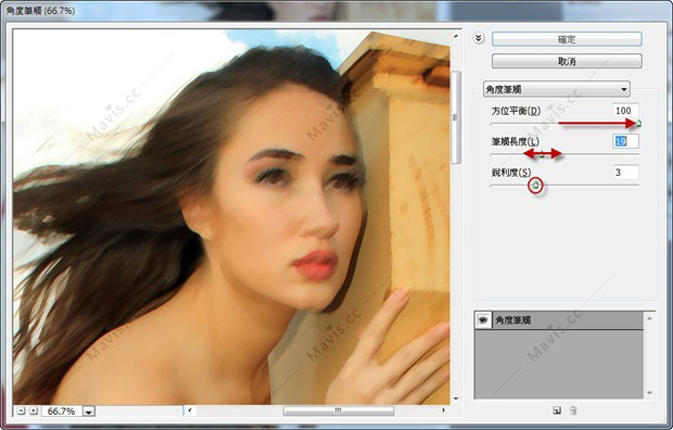
2.单选择【滤镜➜画笔描边➜成角的线条】,方位平衡100,笔触长度视照片大小而不同所以自订,锐利度3。
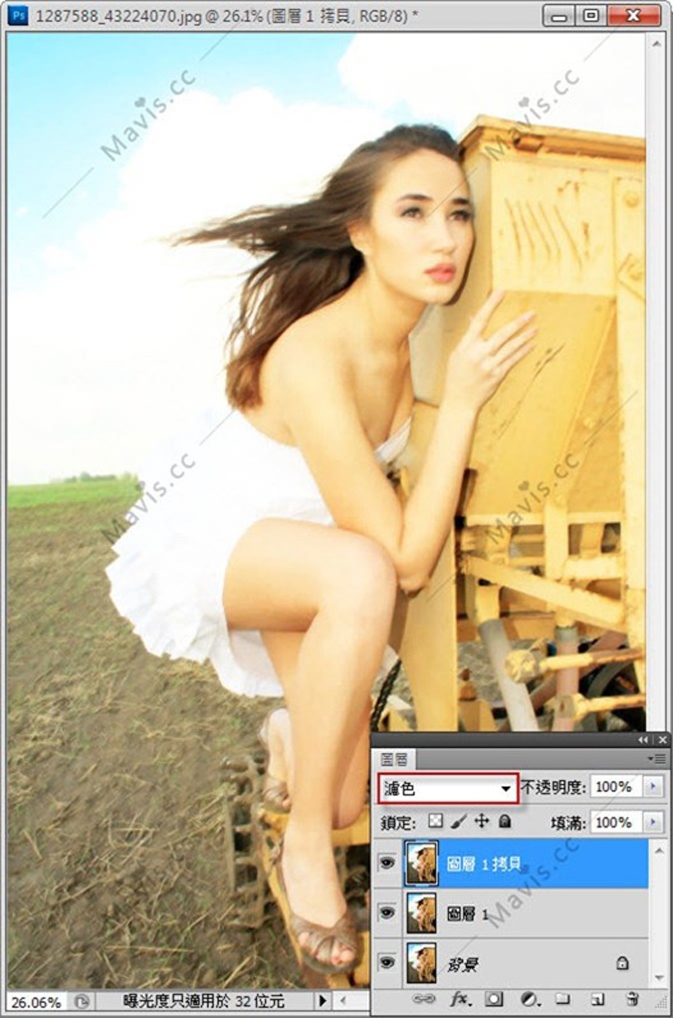
3.混合模式改为滤色。
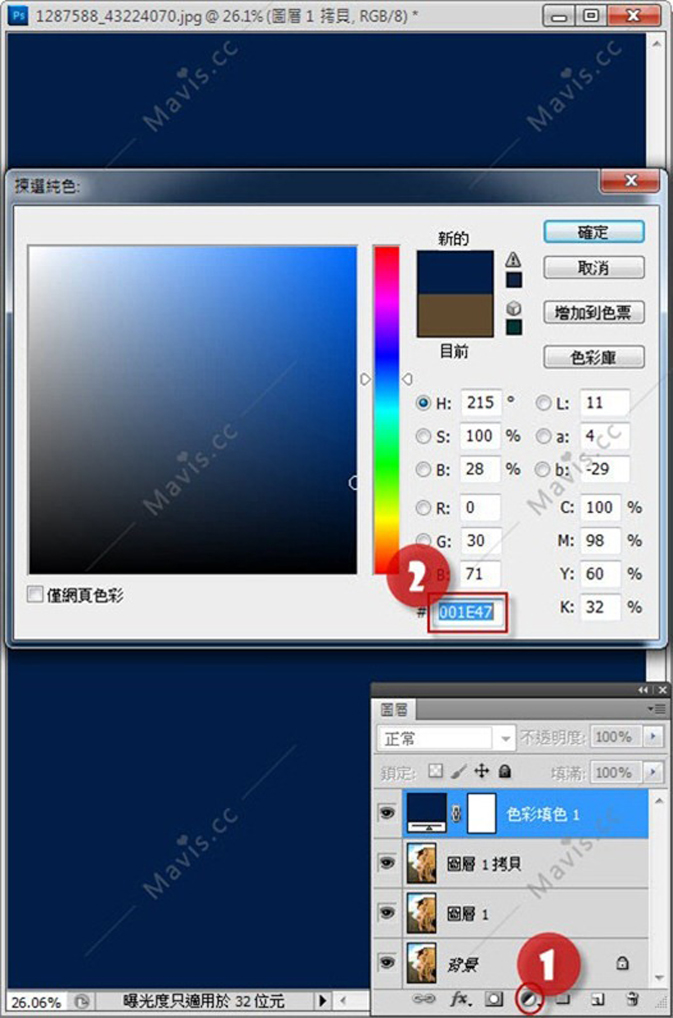
4.新增纯色调整图层,输入#001E47。
5.混合模式改为排除。
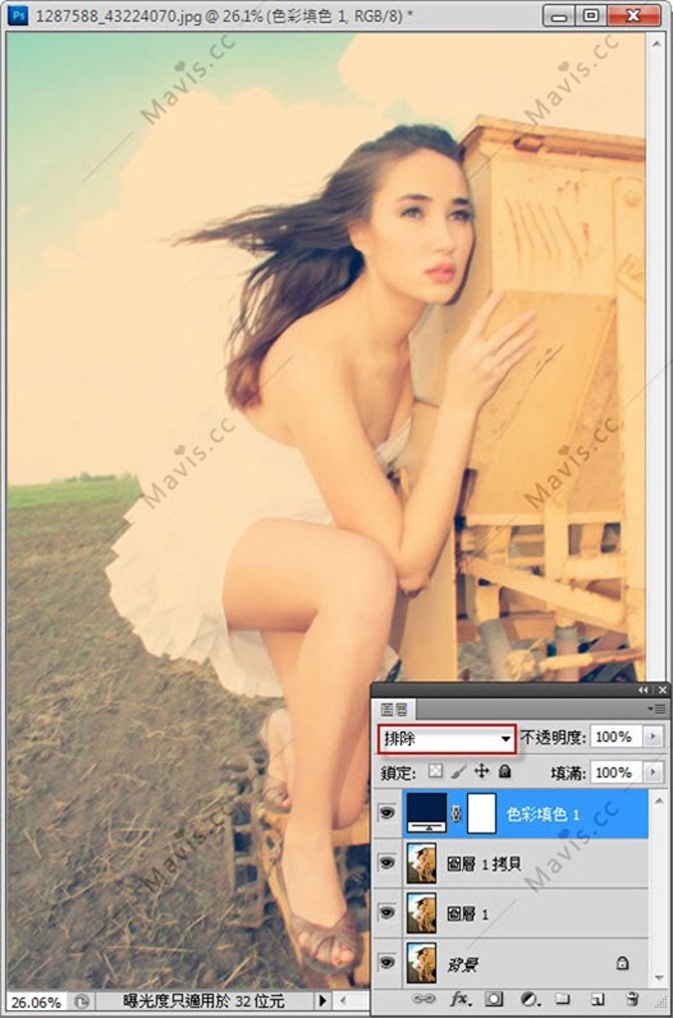
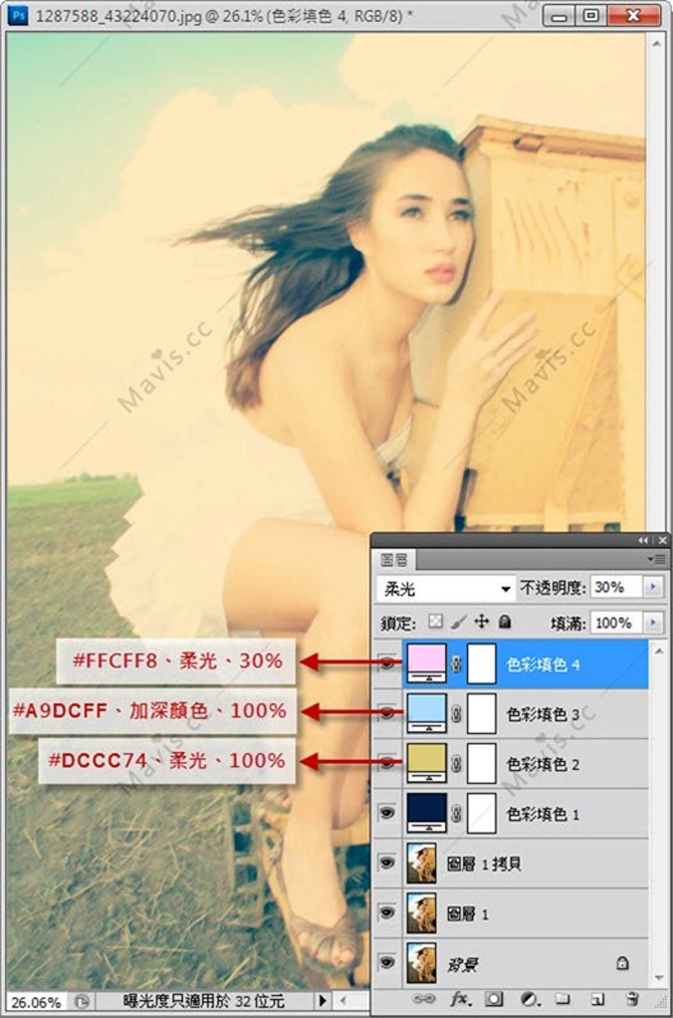
6.重复新增纯色调整图层的动作,设定其他三层如下:
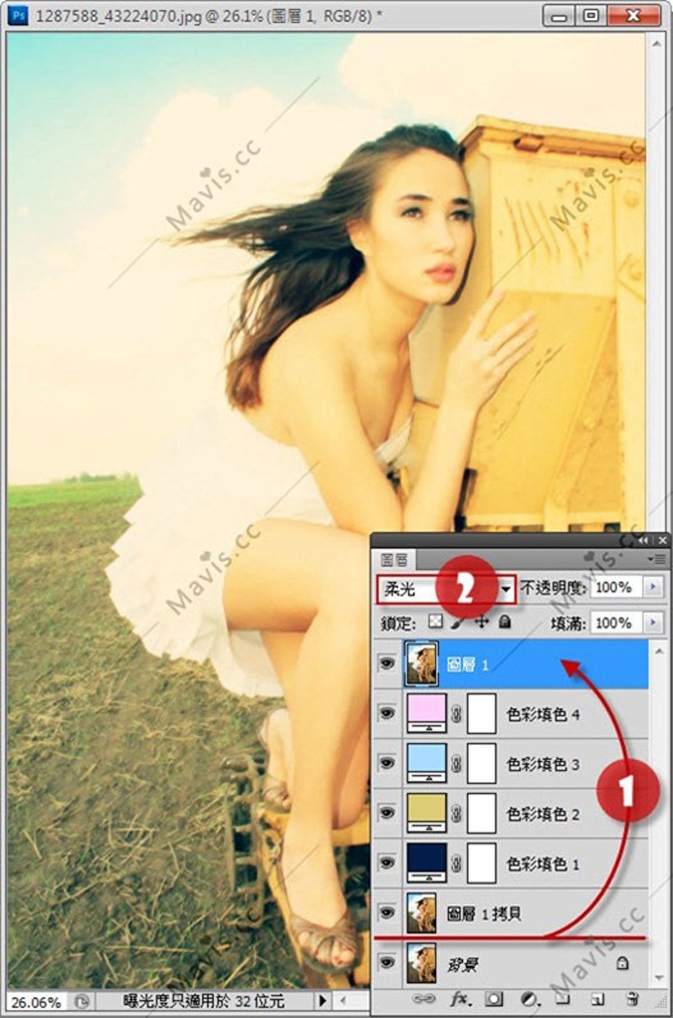
7.将夹在中间还没用过的照片图层拖曳到最上方,混合模式改为柔光。
8.利用【影像➜调整➜阴影/亮部】功能,视照片效果(即数值自订)逐一调整三个照片图层。
9.最后也最重要的是利用Photoshop-小心机微调光影,加亮所有亮面,加暗所有暗面和边缘。
完成最终效果对比图!
学习 · 提示
相关教程
关注大神微博加入>>


网友求助,请回答!