马上注册,结交更多好友,享用更多功能,让你轻松玩转社区。
您需要 登录 才可以下载或查看,没有账号?注册

x

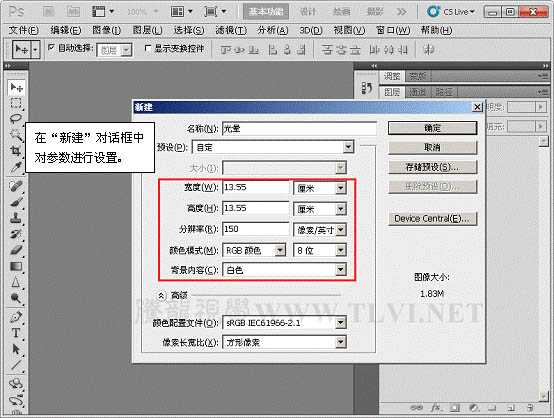
1、运行Photoshop,执行“文件”→“新建”命令,新建“光晕”文档。
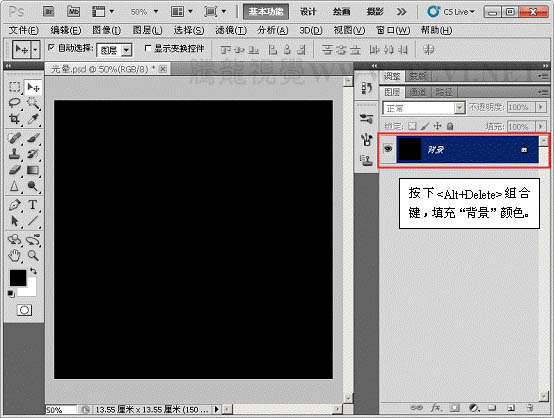
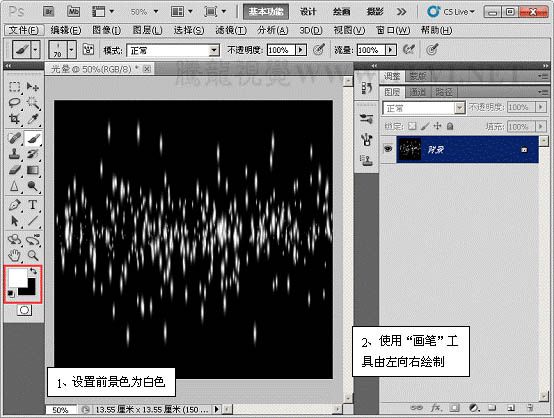
2、将“背景”图层填充为黑色。
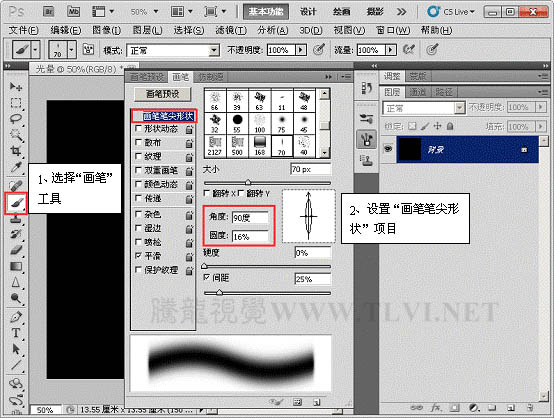
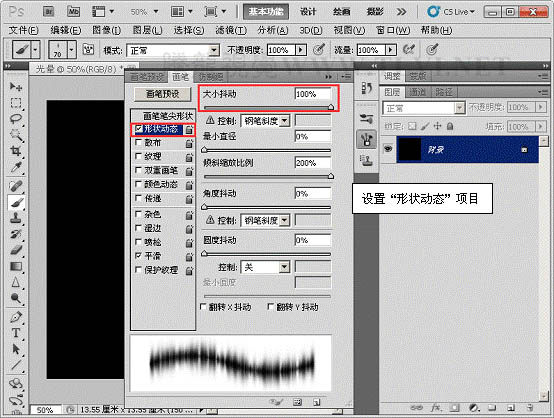
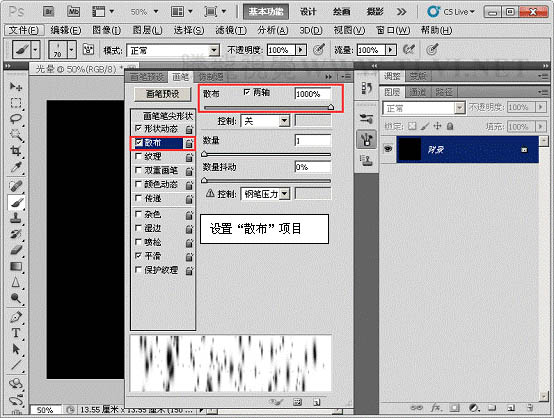
3、选择“画笔”工具,并对其运行设置。
4、设置前景色,使用“画笔”工具运行绘制。
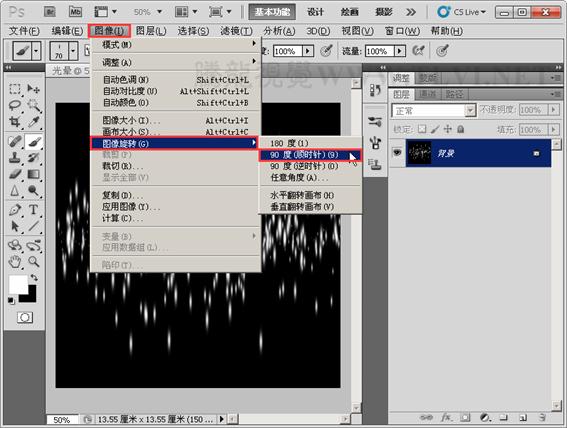
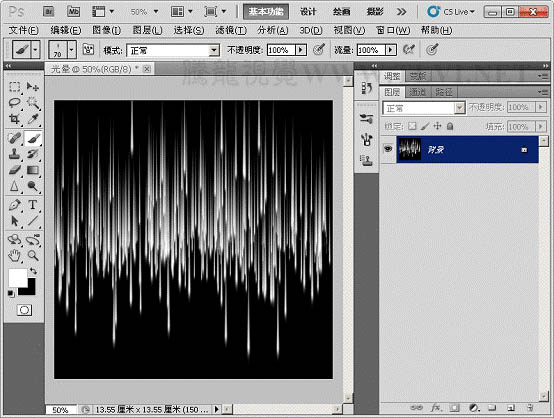
5、执行“图像”→“图像旋转”→“90度顺时针、”命令。
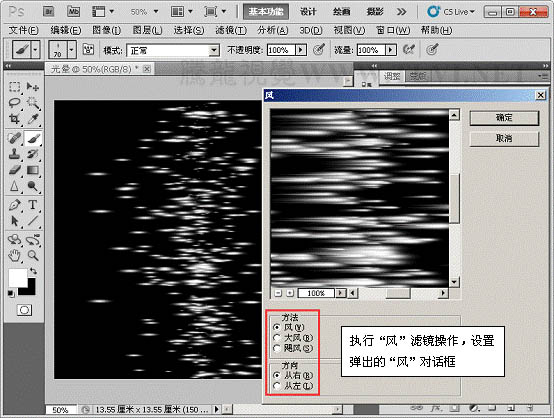
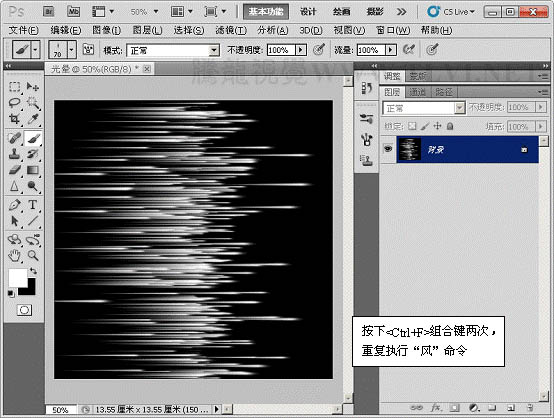
6、执行“滤镜”→“风格化”→“风”滤镜命令。
7、执行“图像”→“图像旋转”→“90度顺时针、”命令。
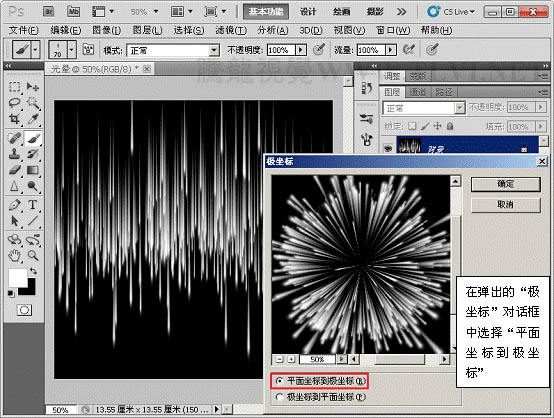
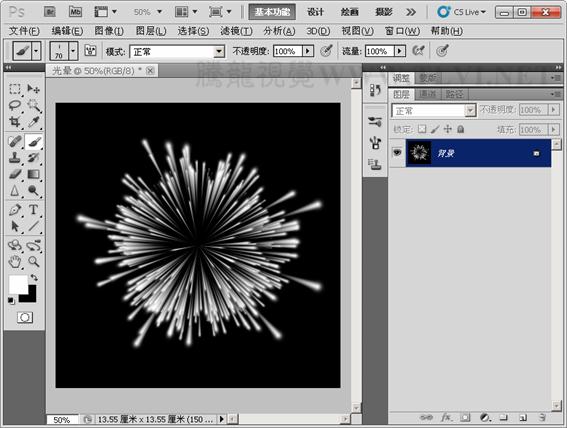
8、执行“滤镜”→“扭曲”→“极坐标”命令。
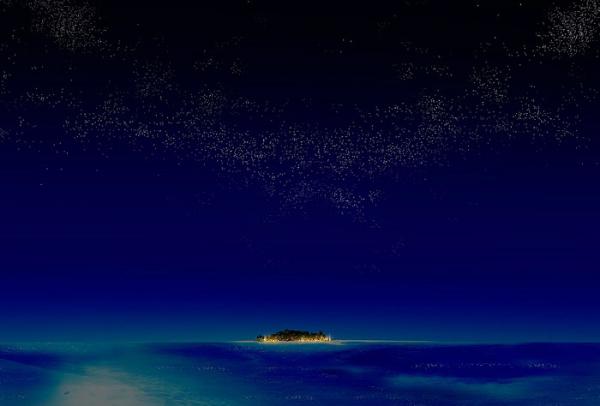
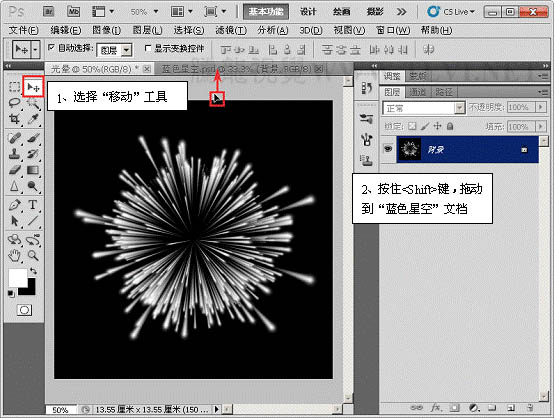
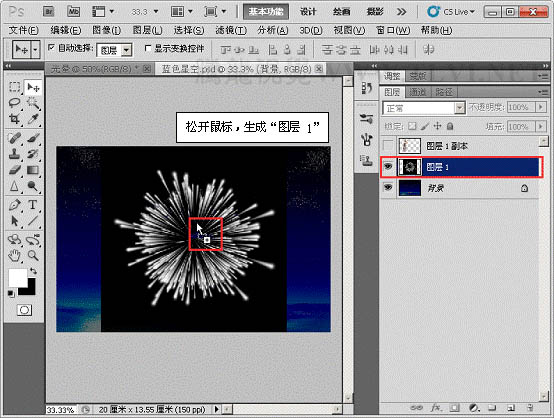
9、打开下图所示的背景,将“光晕”背景图层移到。
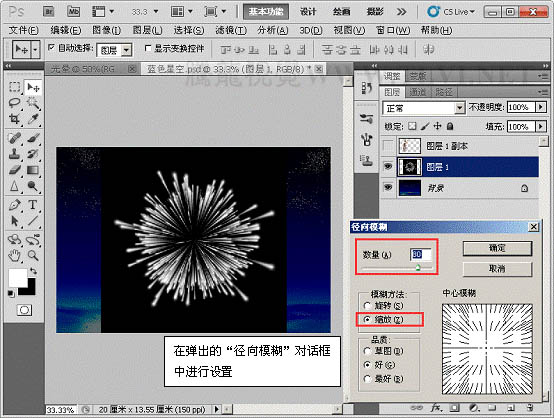
10、执行“滤镜”→“模糊”→“径向模糊”命令。
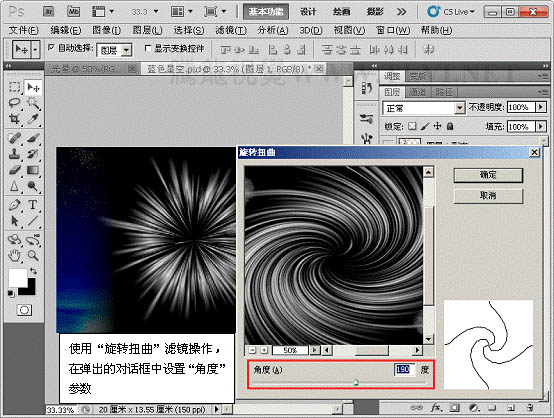
11、执行“滤镜”→“扭曲”→“旋转扭曲”命令。
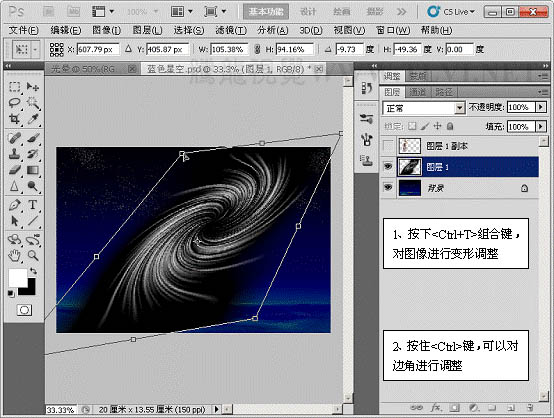
12、对“图层 1”运行“自由变换”操作。
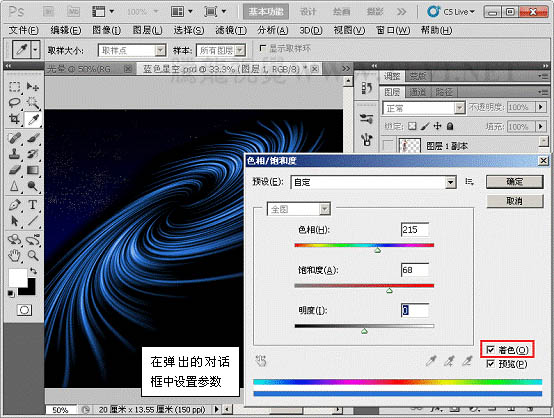
13、执行“图像”→“调整”→“色相/饱和度”命令。
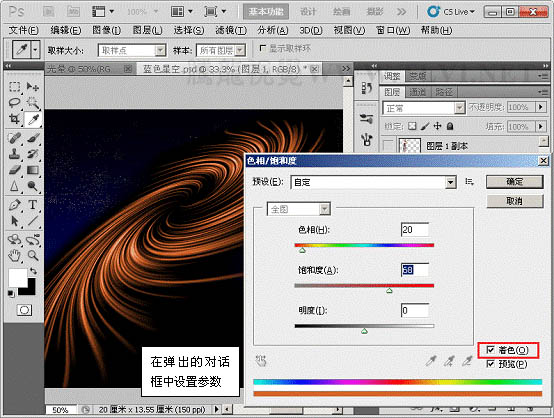
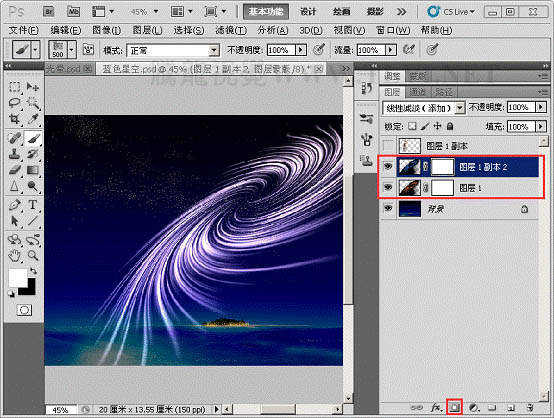
14、复制“图层 1”,并执行“图像”→“调整”→“色相/饱和度”命令。
15、更改“图层 1”与“图层 1 副本 2”的混合模式为“线性减淡添加、”模式。

16、为“图层 1”、“图层 1 副本 2”添加“蒙版”效果。
17、使用“画笔”工具在蒙版上对图像边缘修整。
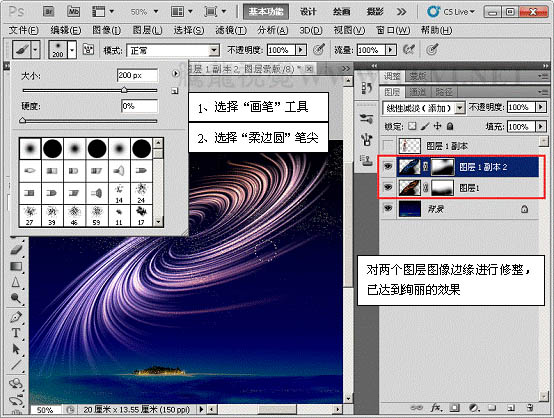
18、显示所有图层,完成实例做。
教程编号:111838 作者:佚名 出处:腾龙视觉 | 


 狗仔卡
狗仔卡 发表于 2012-11-24 19:16:46
 提升卡
提升卡 置顶卡
置顶卡 沉默卡
沉默卡 喧嚣卡
喧嚣卡 变色卡
变色卡 千斤顶
千斤顶 显身卡
显身卡 发表于 2012-11-25 21:51:39