PS毛绒质感写实案例鼠绘小猫制作详解(8)
来源:未知
作者:学photoshop
学习:2078人次
(5)绘制眼睛,首先使用“加深工具

”,加深眼球周围的颜色。在绘制比较复杂的物体时,图层的优势就体现的
十分的明显了,但是首先要合理的分配图层,在绘制前就要想到那个图层的作用是什么。
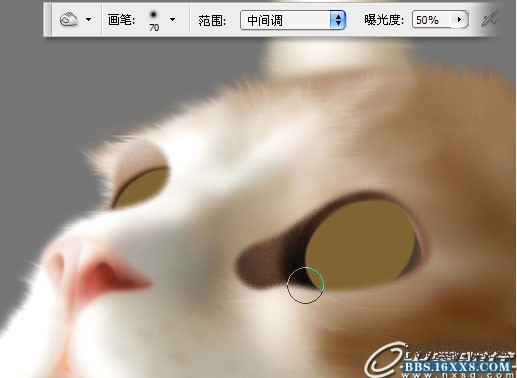
(6)在眼球的上方添加一个眼睑的效果,制作这个效果的方法可以很多,也比较简单,笔者使用了描边的方法,
再使用橡皮擦工具擦出多余部分。
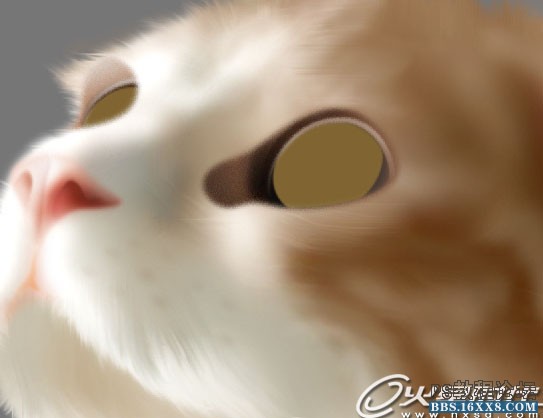
(7)配合眼球选区的收缩、羽化、反向等操作,将眼球的外缘部分的颜色调深。
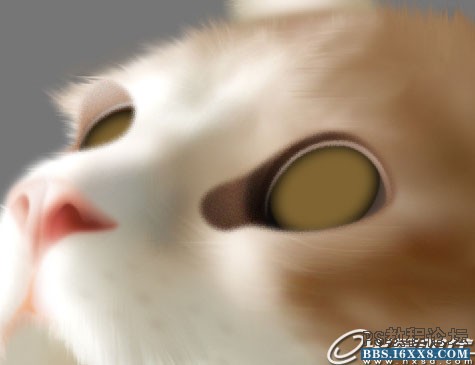
(8)选取眼球内部,交替使用工具箱中的“减淡工具

”与“加深工具
”,绘制眼球的立体感。
”,加深眼球周围的颜色。在绘制比较复杂的物体时,图层的优势就体现的
十分的明显了,但是首先要合理的分配图层,在绘制前就要想到那个图层的作用是什么。
(6)在眼球的上方添加一个眼睑的效果,制作这个效果的方法可以很多,也比较简单,笔者使用了描边的方法,
再使用橡皮擦工具擦出多余部分。
(7)配合眼球选区的收缩、羽化、反向等操作,将眼球的外缘部分的颜色调深。
(8)选取眼球内部,交替使用工具箱中的“减淡工具
”与“加深工具
”,绘制眼球的立体感。
学习 · 提示
相关教程
关注大神微博加入>>


网友求助,请回答!