photoshop图标制作:时钟(5)
来源:未知
作者:空来风
学习:1288人次
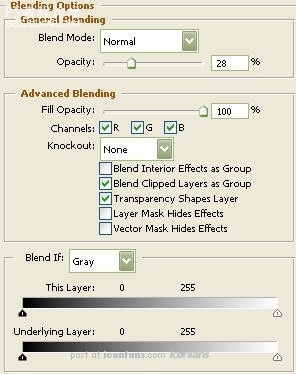
Step33 步骤33
Now click on "Outer Glow".点击“外发光”,参数如图:

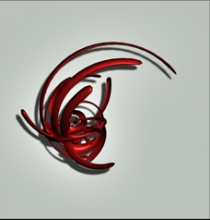
Step34 步骤34
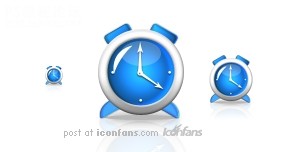
You should now have the below image.做完以上设置后,你应该就能得到下图所示效果了:

Step35 步骤35
The Results!!!最终结果~!!!
I'veadded some gloss to the face of the clock to give it a bitmore life.Todo this, I used the "Elipse Tool" with White as the color. I thenturned the Fill down. The curved glossy part, I used the "Pen Tool" andthat's it. I hope you enjoyed this tutorial.
我最后添加了一些高光,(大家自己也尝试添加一下吧),我使用到了“椭圆工具”和“钢笔工具”……教程结束,希望大家喜欢^_^(fairy插嘴,大家最后最好对自己的图图进行一定调整,比如阴影部分的透明度啦,模糊啦什么的,希望大家都能做出自己最满意的作业~!谢谢)
学习 · 提示
相关教程
关注大神微博加入>>


网友求助,请回答!