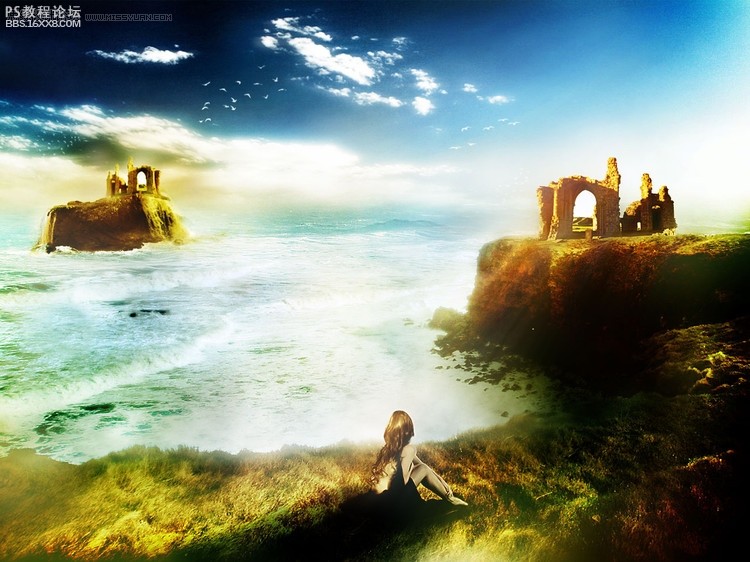
photoshop合成实例:遗址上的女孩
来源:未知
作者:oosodof
学习:533人次
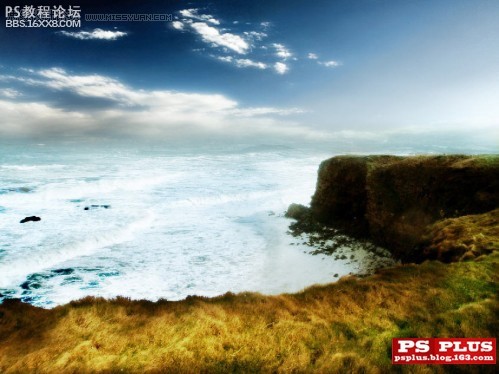
最终效果。
正式开始之前我们需要准备一下素材。这次非常好。这些图片都可以免费下载到。
http://fc03.deviantart.com/fs29/ ... y_fakethisstock.jpg
http://fc03.deviantart.com/fs26/ ... ight_fate_stock.jpg
http://fc04.deviantart.com/fs21/ ... perStreet_stock.jpg
http://fc04.deviantart.com/fs4/i ... aterfall___Full.jpg
http://fc07.deviantart.com/fs19/ ... y_mysticmorning.jpg
http://www.deviantart.com/download/87328004/Black_Silk7_by_faestock.zip
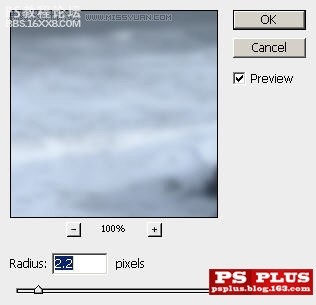
1.让我们先从Coastal Cliff Scene开始。在PS中打开图片。复制一层。在复制层上执行高斯模糊。设置如下。
复制模糊掉的这一层。设置新层混合模式为颜色加深。
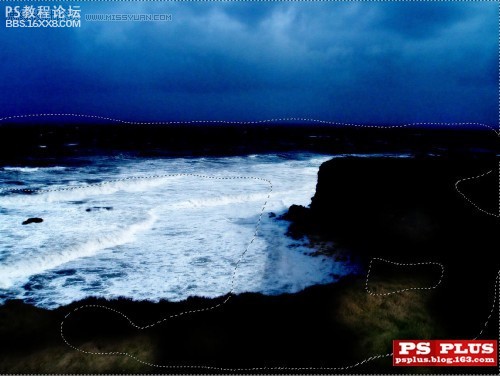
给这一层添加图层蒙版。用大而软的黑色画笔。遮挡住上图选区内的部分。也就是说。我们只让海面的白色部分和天空颜色加深。
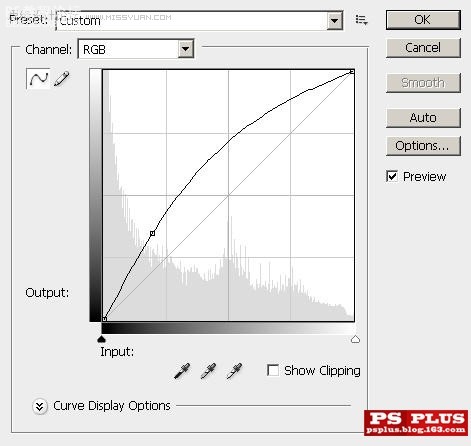
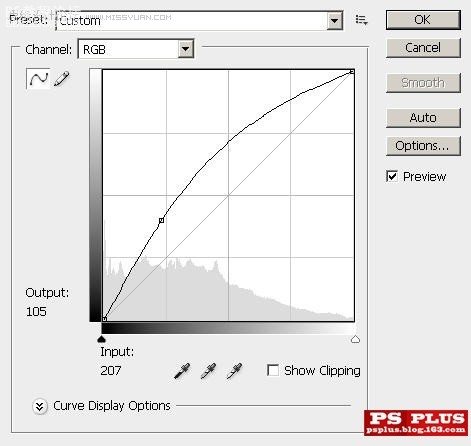
,现在在所有图层顶端添加一个曲线调整层。
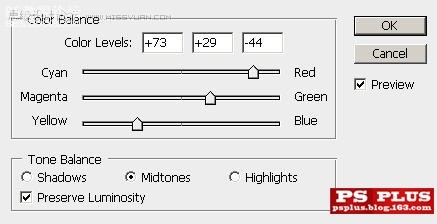
再添加一个色彩平衡调整层。
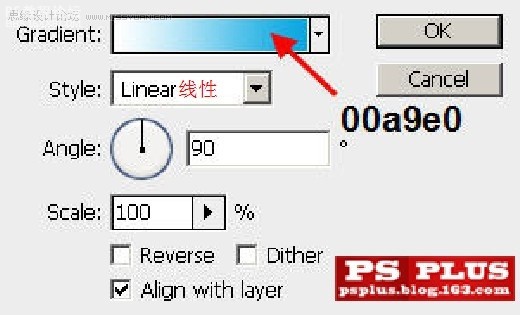
在所有图层顶端添加一个渐变填充层。
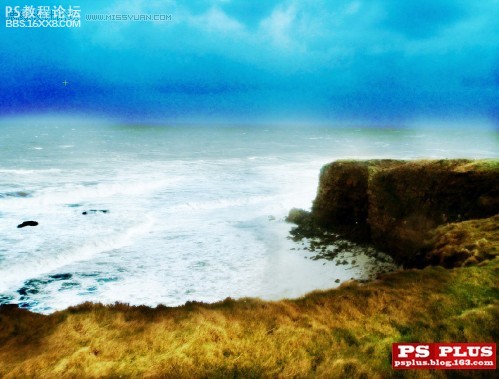
如果你作对了这些步骤。那你的图片看起来是这样的。
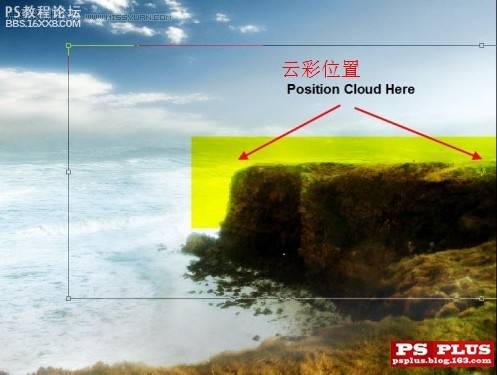
2.现在我们图像下部的草地已经很好了。但是天空部分就有点糟糕。我们把Island Sky放置到图层顶端。命名这一层为“天空”。CTRL+T。拉伸到如图所示。
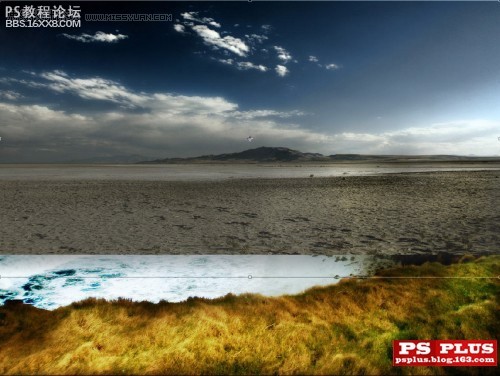
,用一个大而软的橡皮擦掉天空层的下半部分。只保留天空。
为天空层添加一个曲线调节层。注意。调节层要根据下面的天空层做为剪切蒙版。
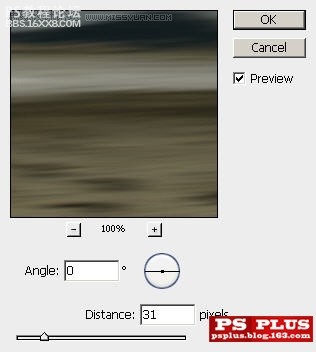
复制天空层。把新层拉到调节层上面。设置动感模糊。
设置动感模糊层混合模式为滤色。不透明度70%。
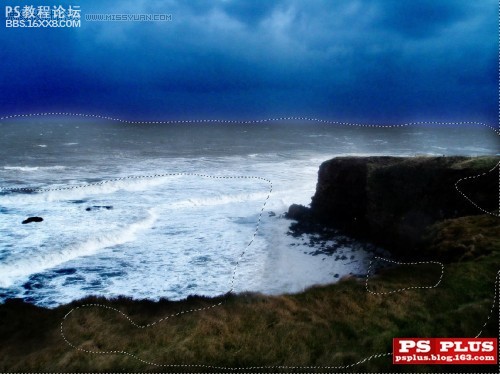
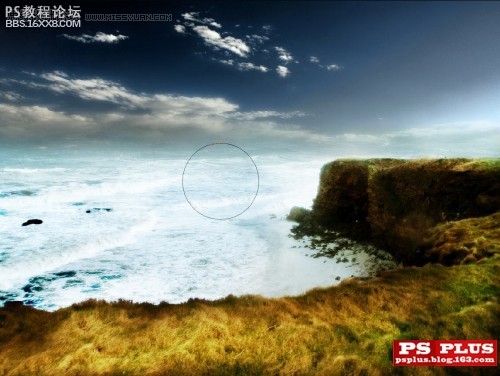
3.现在我们要给悬崖上添加一些漂亮的光线效果。在图层顶端新建一层。我们用羽化值为30个像素的套索工具。在悬崖边缘画出一个选区。如下图。现在设置前景色为白。背景色为深灰。执行滤镜 渲染 云彩。命名这一层为“底部光线”。设置这一层不透明度为70%。
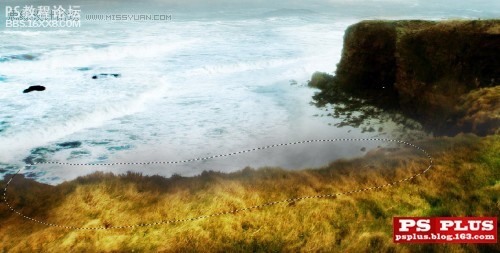
, 复制这一层。并设置新层混合模式为叠加。
至于右面的悬崖。我们就可以简单一点了。直接把底部悬崖层和其复制层复制到相应位置就行了。
为了制造出更丰富的光线变化。我们为其添加一个亮度对比度调整层。
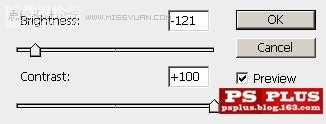
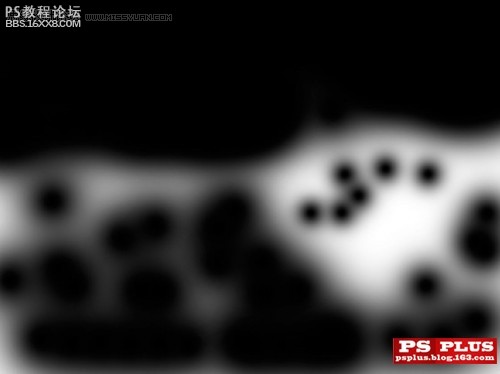
为调整层添加蒙版。蒙版涂画如下图所示。
正式开始之前我们需要准备一下素材。这次非常好。这些图片都可以免费下载到。
http://fc03.deviantart.com/fs29/ ... y_fakethisstock.jpg
http://fc03.deviantart.com/fs26/ ... ight_fate_stock.jpg
http://fc04.deviantart.com/fs21/ ... perStreet_stock.jpg
http://fc04.deviantart.com/fs4/i ... aterfall___Full.jpg
http://fc07.deviantart.com/fs19/ ... y_mysticmorning.jpg
http://www.deviantart.com/download/87328004/Black_Silk7_by_faestock.zip
1.让我们先从Coastal Cliff Scene开始。在PS中打开图片。复制一层。在复制层上执行高斯模糊。设置如下。
复制模糊掉的这一层。设置新层混合模式为颜色加深。
给这一层添加图层蒙版。用大而软的黑色画笔。遮挡住上图选区内的部分。也就是说。我们只让海面的白色部分和天空颜色加深。
,现在在所有图层顶端添加一个曲线调整层。
再添加一个色彩平衡调整层。
在所有图层顶端添加一个渐变填充层。
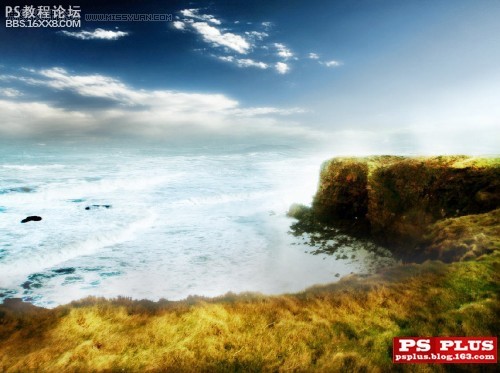
如果你作对了这些步骤。那你的图片看起来是这样的。
2.现在我们图像下部的草地已经很好了。但是天空部分就有点糟糕。我们把Island Sky放置到图层顶端。命名这一层为“天空”。CTRL+T。拉伸到如图所示。
,用一个大而软的橡皮擦掉天空层的下半部分。只保留天空。
为天空层添加一个曲线调节层。注意。调节层要根据下面的天空层做为剪切蒙版。
复制天空层。把新层拉到调节层上面。设置动感模糊。
设置动感模糊层混合模式为滤色。不透明度70%。
3.现在我们要给悬崖上添加一些漂亮的光线效果。在图层顶端新建一层。我们用羽化值为30个像素的套索工具。在悬崖边缘画出一个选区。如下图。现在设置前景色为白。背景色为深灰。执行滤镜 渲染 云彩。命名这一层为“底部光线”。设置这一层不透明度为70%。
, 复制这一层。并设置新层混合模式为叠加。
至于右面的悬崖。我们就可以简单一点了。直接把底部悬崖层和其复制层复制到相应位置就行了。
为了制造出更丰富的光线变化。我们为其添加一个亮度对比度调整层。
为调整层添加蒙版。蒙版涂画如下图所示。
学习 · 提示
相关教程
关注大神微博加入>>


网友求助,请回答!