[非主流PS教程] ps制作非主流颓废照片
来源:不详
作者:佚名
学习:163人次
ps制作非主流颓废照片本教程使用photoshop9.0
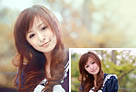
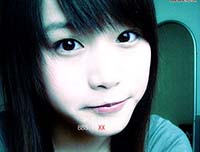
原图:
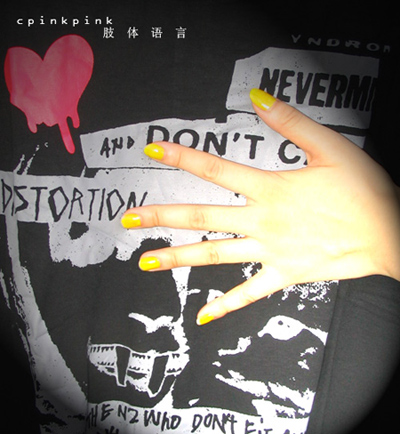
素材图
1.首先打开需要ps的图片,在图层面板处双击图片解锁,复制原图片;
2.前景色设置红色,(注:你的前景色设置不同的颜色,做出来的效果都不同哦!)
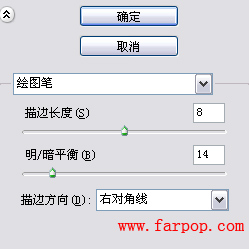
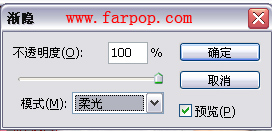
在工具栏处,滤镜-素描-绘画笔,设置如图:
3.编辑-渐隐绘画笔,模式选择柔光,透明度不变;
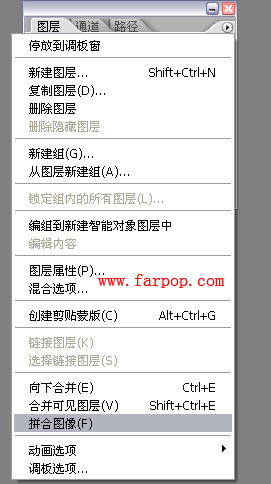
4.在图层面板,点击小三角-拼合图像;在图层面板处双击图片再次解锁;
5.打开素材图片,拖拽到原图片上;
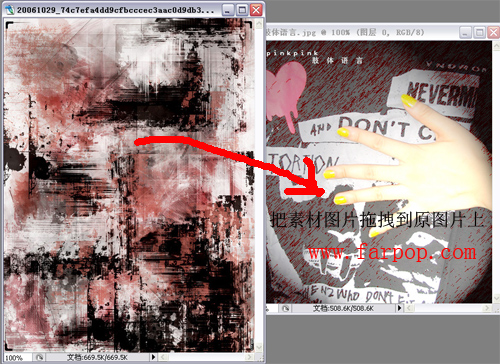
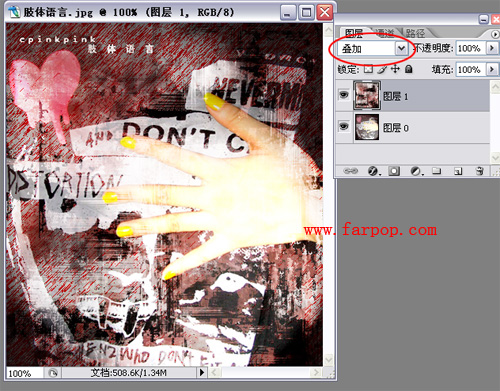
图层模式选择叠加;
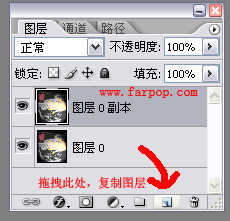
6.在图层面板上选择原图片(我这里是图层0),拖拽到创建新图层处,复制图层(复制出图层0副本);

7.把图层0副本移到最上面,图层模式设置柔光;
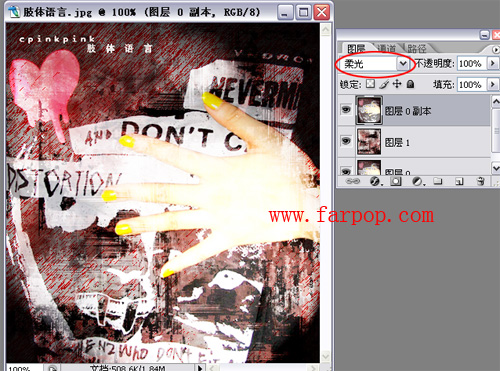
8.在图层面板点击创建新图层;在工具栏上,编辑-填充,为红色;
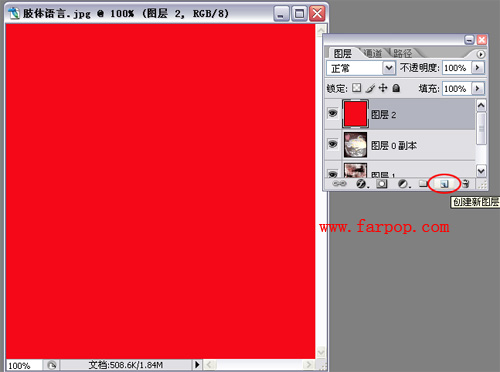
9.图层模式选择叠加;

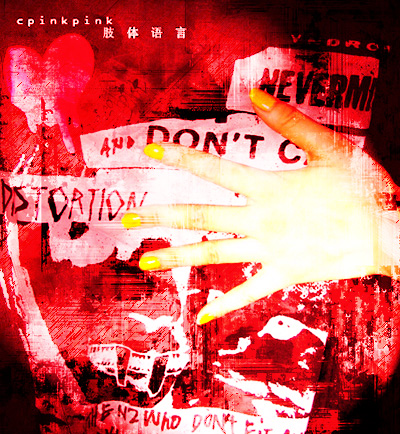
效果:

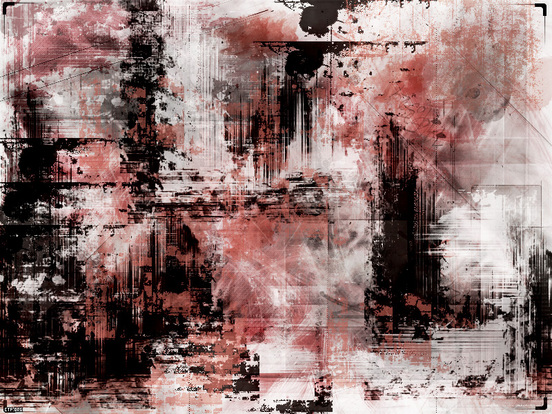
原图:
素材图
1.首先打开需要ps的图片,在图层面板处双击图片解锁,复制原图片;
2.前景色设置红色,(注:你的前景色设置不同的颜色,做出来的效果都不同哦!)
在工具栏处,滤镜-素描-绘画笔,设置如图:
3.编辑-渐隐绘画笔,模式选择柔光,透明度不变;
4.在图层面板,点击小三角-拼合图像;在图层面板处双击图片再次解锁;
5.打开素材图片,拖拽到原图片上;
图层模式选择叠加;
6.在图层面板上选择原图片(我这里是图层0),拖拽到创建新图层处,复制图层(复制出图层0副本);
7.把图层0副本移到最上面,图层模式设置柔光;
8.在图层面板点击创建新图层;在工具栏上,编辑-填充,为红色;
9.图层模式选择叠加;
效果:
学习 · 提示
相关教程
关注大神微博加入>>

![[非主流PS教程] 非主流局部颜色](http://pic.16xx8.com/article/UploadPic/2007/12/22/2007122211428478_lit.gif)
![[非主流PS教程] 非主流加眼睫毛教程](http://pic.16xx8.com/article/UploadPic/2007/10/26/2007102673341809_lit.jpg)
![[非主流PS教程] PS调整最佳颜色效果](http://pic.16xx8.com/article/UploadPic/2007/10/26/2007102674437666_lit.jpg)
![[非主流PS教程] 『新手教程』′_PS.●°③分钟打造艺术照-‘﹌](http://pic.16xx8.com/article/UploadPic/2007/10/26/2007102671627543_lit.jpg)
网友求助,请回答!