photoshop教程将风景照片打造成贺卡
来源:未知
作者:福特少普ps
学习:5769人次
用photoshop将风景照片处理为特效贺卡的过程,主要用到图层混合模式和各种滤镜。
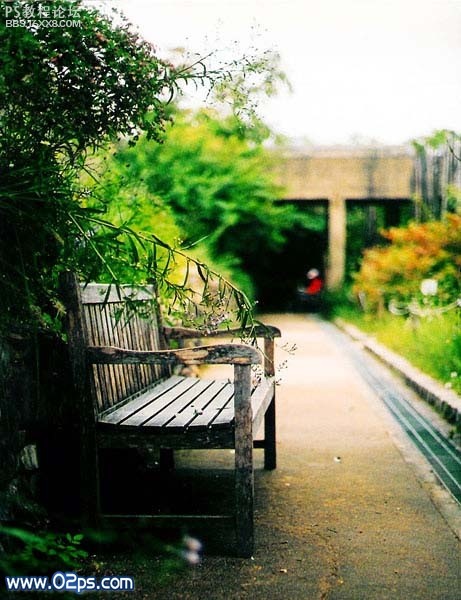
步骤 1、选择场景素材。
步骤 2、复制图层,并将复制层的混合模式设为“滤色”。
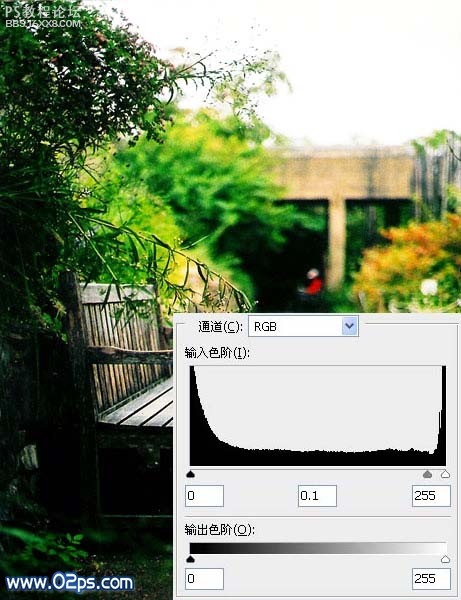
步骤 3、选择菜单“图像 调整 色阶”,做如下调整。
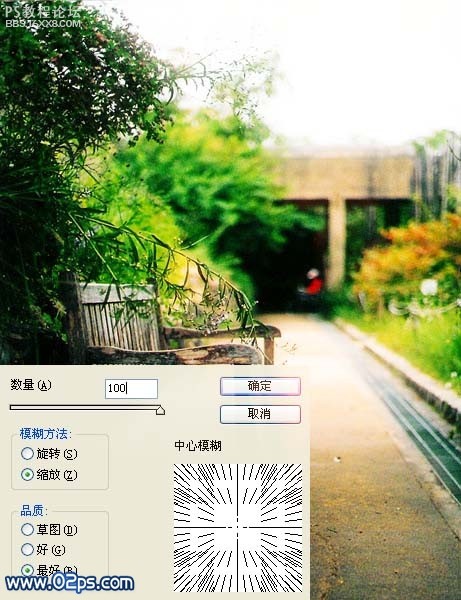
步骤 4、选择菜单“滤镜 模糊 径向模糊”,模拟浅景深效果。
步骤 5、选择菜单“图像 调整 自动色阶”。
步骤 6、连续复制两次图层(Ctrl J)。

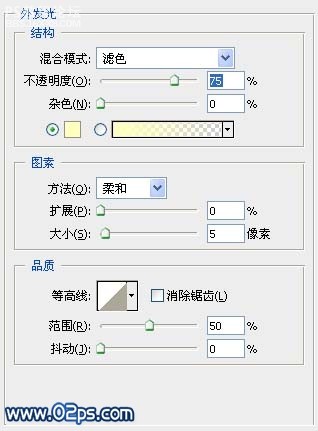
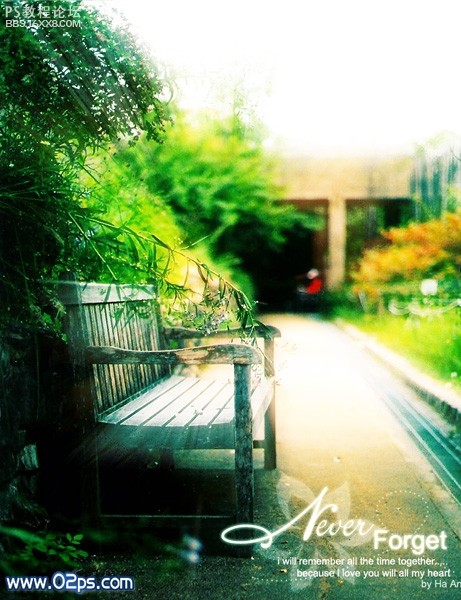
步骤 7、添加文字。这里文字分为4层,一层是大写的N,一层是ever(Never),一层是Forget,一层是个短句。其中Never Forget添加外发光效果。
步骤 8、盖印(Shift Alt Ctrl E)。
步骤 9、图层 新建调整图层 可选颜色。
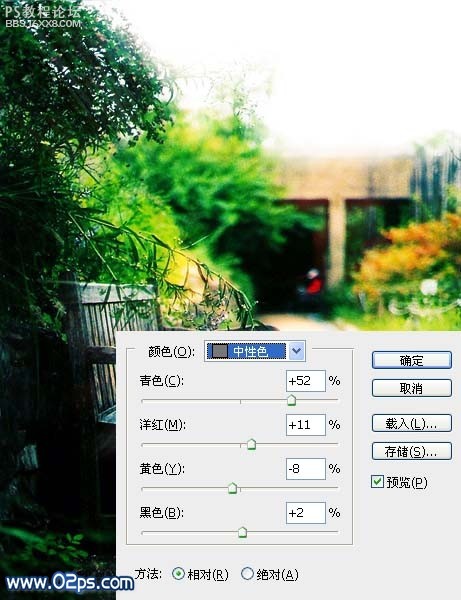
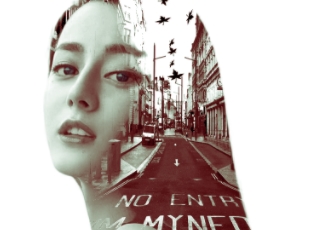
最终效果如下:
责任编辑:bbs.16xx8.com
作者: 未知 出处:網絡
步骤 1、选择场景素材。
步骤 2、复制图层,并将复制层的混合模式设为“滤色”。
步骤 3、选择菜单“图像 调整 色阶”,做如下调整。
步骤 4、选择菜单“滤镜 模糊 径向模糊”,模拟浅景深效果。
步骤 5、选择菜单“图像 调整 自动色阶”。
步骤 6、连续复制两次图层(Ctrl J)。
步骤 7、添加文字。这里文字分为4层,一层是大写的N,一层是ever(Never),一层是Forget,一层是个短句。其中Never Forget添加外发光效果。
步骤 8、盖印(Shift Alt Ctrl E)。
步骤 9、图层 新建调整图层 可选颜色。
最终效果如下:
责任编辑:bbs.16xx8.com
作者: 未知 出处:網絡
学习 · 提示
相关教程
关注大神微博加入>>


网友求助,请回答!