photoshop字体效果教程:几种质感字
来源:未知
作者:空来风
学习:403人次
以下 是效果
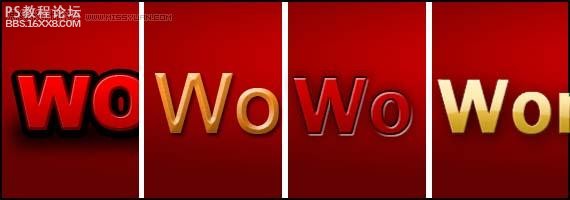
第一种:粗体
第一步:
先制作如下的背景
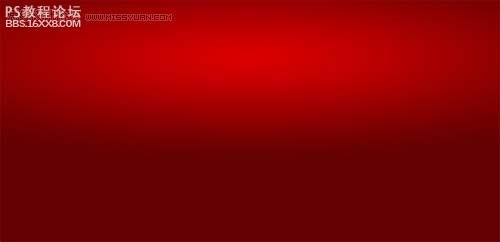
新建一个任意大小的文件,填充背景色为深红色:RGB(99,1,1)
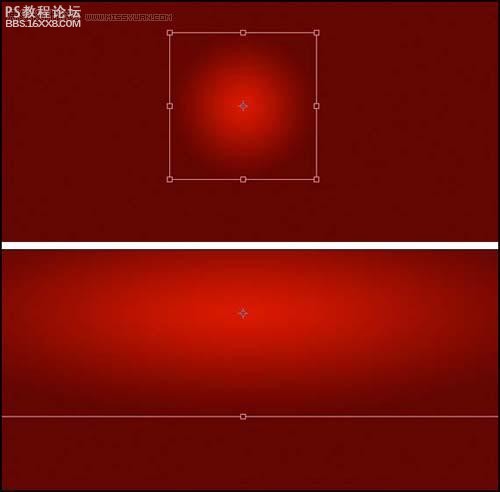
第二步:
新建一图层,选择渐变工具-径向渐变,调整颜色为红色(218,0,0)到透明色的渐变,快捷键ctrl+t选取,横向拖动达到下面效果:
第三步:
输入红色文字字体颜色为(218,0,0),字体选粗写的,我选择是Arial Black
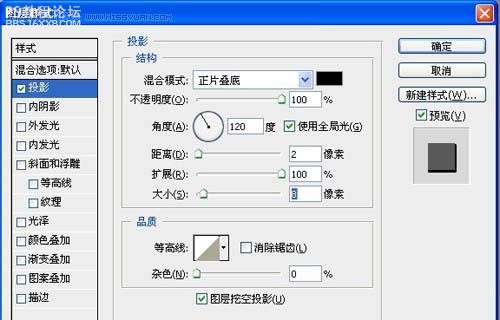
第四步:
设置字体样式,点击-添加图层样式-投影

第五步:
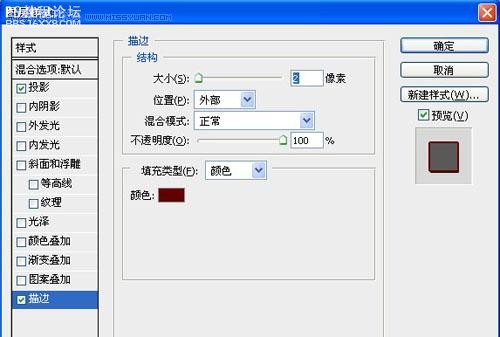
图层样式-2像素深红色描边
, 第六步:
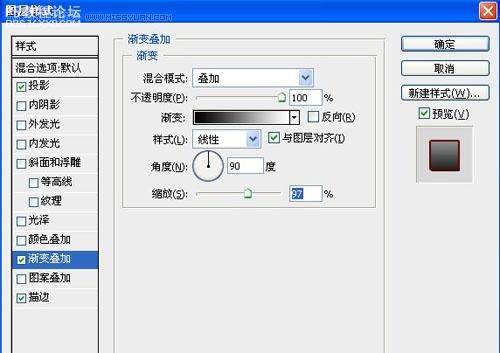
渐变叠加效果:
第七步:
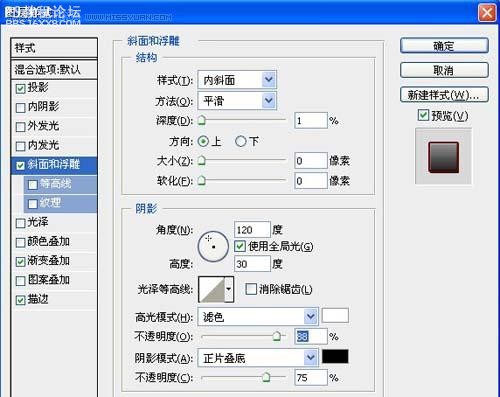
斜面浮雕效果:

第八步:制作投影
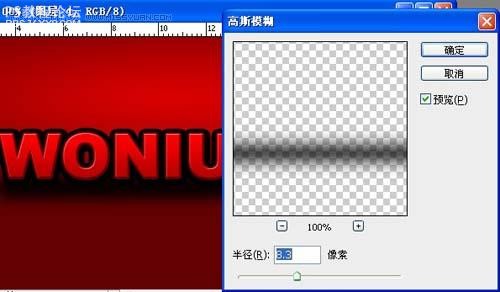
文字下面建一图层填充黑色

模糊--高斯模糊,参数如下
第九步:拉伸投影使两头都有做种效果:

访问更多photoshop教程
第一种:粗体
第一步:
先制作如下的背景
新建一个任意大小的文件,填充背景色为深红色:RGB(99,1,1)
第二步:
新建一图层,选择渐变工具-径向渐变,调整颜色为红色(218,0,0)到透明色的渐变,快捷键ctrl+t选取,横向拖动达到下面效果:
第三步:
输入红色文字字体颜色为(218,0,0),字体选粗写的,我选择是Arial Black
第四步:
设置字体样式,点击-添加图层样式-投影
第五步:
图层样式-2像素深红色描边
, 第六步:
渐变叠加效果:
第七步:
斜面浮雕效果:
第八步:制作投影
文字下面建一图层填充黑色
模糊--高斯模糊,参数如下
第九步:拉伸投影使两头都有做种效果:
访问更多photoshop教程
学习 · 提示
相关教程
关注大神微博加入>>


网友求助,请回答!