photoshop文字效果教程:岩石雕刻字
来源:未知
作者:福特少普ps
学习:1332人次
作者令彬 译 出处:外文翻译
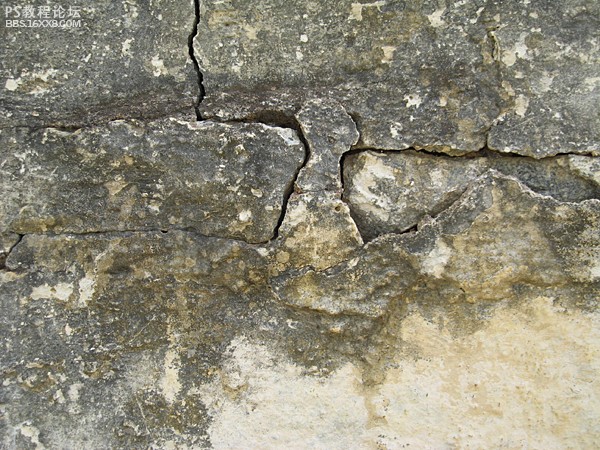
素材1:

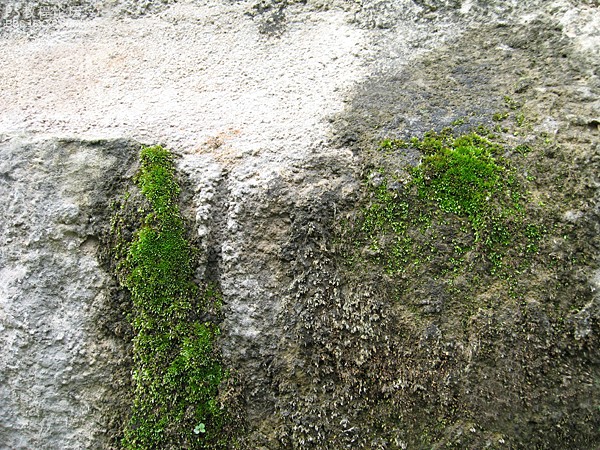
素材2:
素材3:
以下是详细的photoshop教程步骤:
步骤 1、打开素材1,新建图层,使用“横排文字蒙版工具”写入需要的文字。
注:建议使用比较粗的字体。
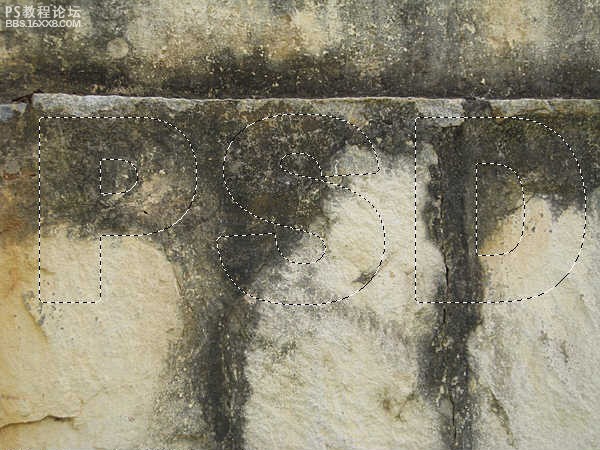
步骤 2、打开素材2,全选(Ctrl + A),复制(Ctrl + C),返回素材1,使用贴入命令(Ctrl + Shift + V)将素材2复制到之前建立的文字蒙版中,调整素材位置得到如下效果。
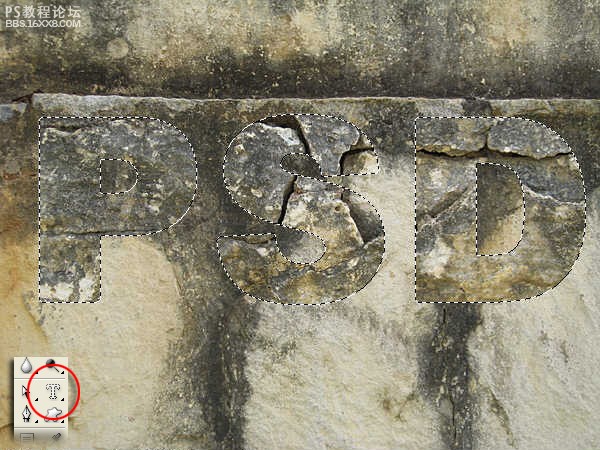
,步骤 3、设置图层样式。
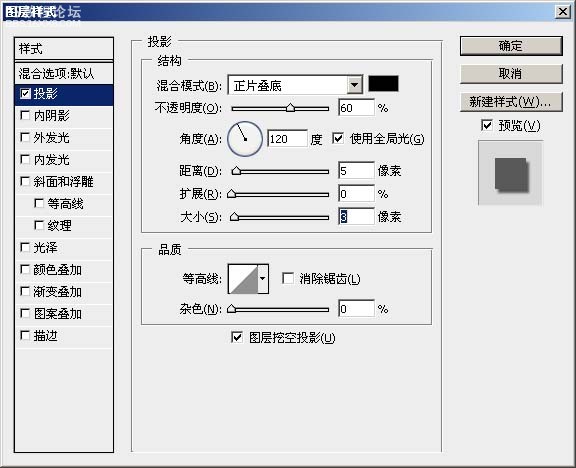
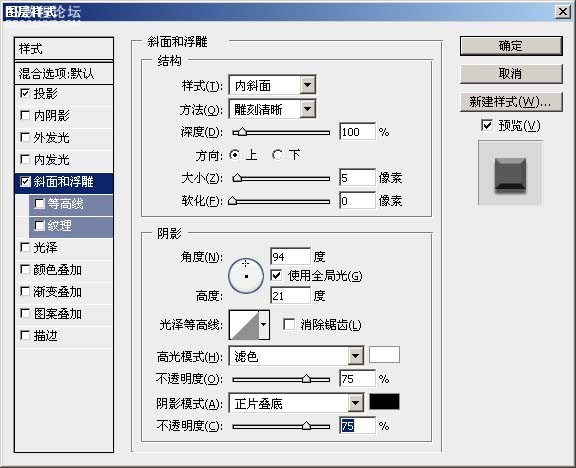
得到如下效果:
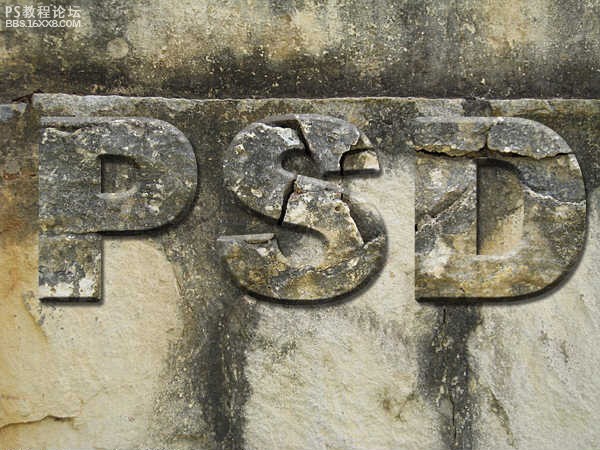
步骤 4、打开素材3,复制并粘贴到画布顶层,将图层混合模式设为“叠加”。
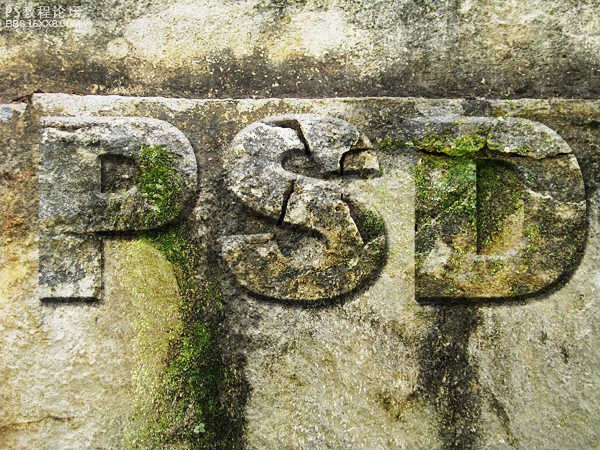
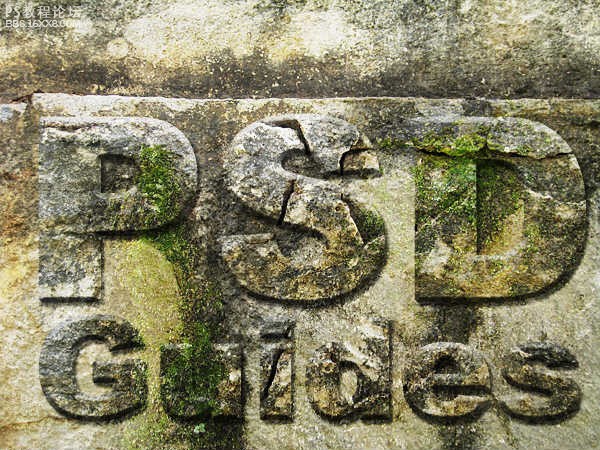
步骤 5、采用同样的方法添加其余文字得到最终效果。
素材1:
素材2:
素材3:
以下是详细的photoshop教程步骤:
步骤 1、打开素材1,新建图层,使用“横排文字蒙版工具”写入需要的文字。
注:建议使用比较粗的字体。
步骤 2、打开素材2,全选(Ctrl + A),复制(Ctrl + C),返回素材1,使用贴入命令(Ctrl + Shift + V)将素材2复制到之前建立的文字蒙版中,调整素材位置得到如下效果。
,步骤 3、设置图层样式。
得到如下效果:
步骤 4、打开素材3,复制并粘贴到画布顶层,将图层混合模式设为“叠加”。
步骤 5、采用同样的方法添加其余文字得到最终效果。
学习 · 提示
- 发评论 | 交作业 -
最新评论
若只如初见2018-11-06 09:55
很不错
回复
裤裆的纠结2017-05-28 11:14
今天练路考,师父叫我看看油还有多少,我拧开油箱盖看了半天也没看清楚,光线太暗。我顺手摸出打火机凑近油箱口,就在我准备按下打火机的时候师父一脚把我踹飞了,尼玛到现在劳资还在医院输液。我决定明天就退款,这师傅脾气太坏了。我要换驾校!!!
相关教程
关注大神微博加入>>


网友求助,请回答!