Photoshop铸造火焰之剑效果教程(3)
来源:作者:佚名 来源:78ps教程网
作者:admin
学习:561人次
9.按CTRL+U调整色相饱和度,记得勾选着色


10.用橡皮擦擦掉剑柄那些火焰

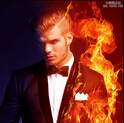
11.现在添加火焰,打开火焰素材,把它拖进图层1上面

12.把火焰素材的模式改为滤色

13.按CTRL+T调整火焰素材的大小,角度,用移动工具移到剑上


最好复制多几个火焰图层添加到剑上就可以了。完毕
学习 · 提示
相关教程
关注大神微博加入>>


网友求助,请回答!