Photoshop教程:动物毛皮制作教程
来源:不详
作者:佚名
学习:6590人次
Photoshop教程:动物毛皮制作教程作者:王伟光 来源:IT168.com
在寒冷的冬季,大多数野生动物都会换上厚厚的毛皮来抵御寒冷。这些毛皮飘逸若软,也是制作高档衣服的原料。下面我们就用Photoshop打造一款动物毛皮效果。
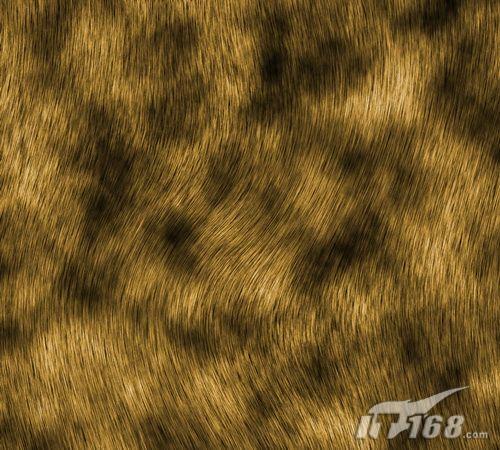
photoshop 最终效果图
1、新建一个宽度为12,高度为12,分辨率为300像素,模式为RGB的白色文件。
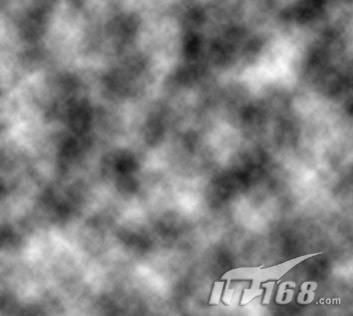
2、设置前景色和背景色分别为黑色和白色。执行菜单栏中的“滤镜”→“渲染”→“云彩”命令,效果如图01所示。
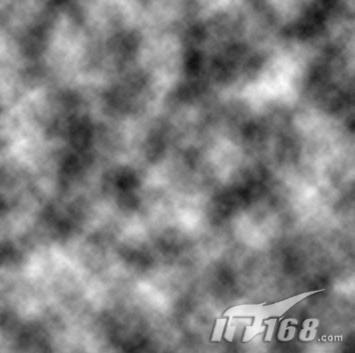
photoshop图1 Photoshop渲染云彩
3、切换至通道面板,在控制面板下方单击“创建新通道”按钮,生成新的通道Alpha 1。执行菜单栏中的“滤镜”→“杂色”→“添加杂色”命令,在弹出的添加杂色对话框中,将数量选项设置为300,勾选高斯分布和单色选项,如图02所示,图像效果如图03所示。
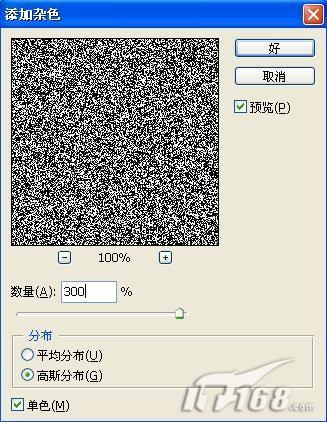
photoshop图2 Photoshop添加杂色
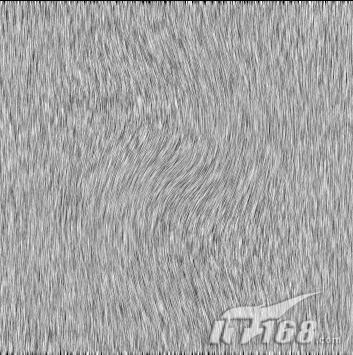
4、执行菜单栏中的“滤镜”→“模糊”→“动感模糊”命令,在弹出的动感模糊对话框中,设置角度为90,距离为36,如图04所示,图像效果如图05所示。

photoshop图4 Photoshop动感模糊
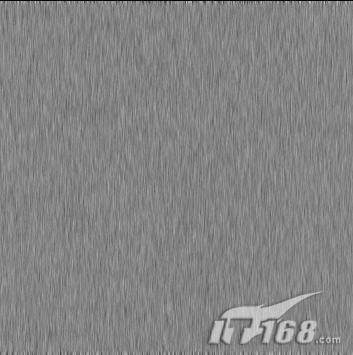
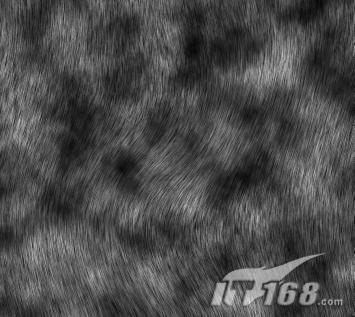
photoshop图5 图像效果 5、选择菜单栏中的“图像”→“调整”→“色阶”命令,在弹出的对话框中设置参数如图06所示,图像效果如图07所示。
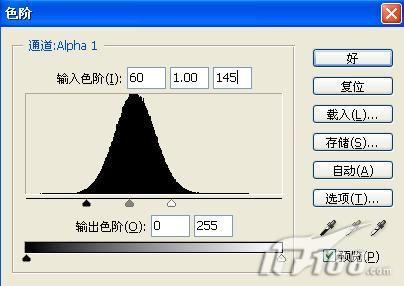
photoshop图6 Photoshop色阶设置
6、执行菜单栏中的“滤镜”→“扭曲”→“旋转扭曲”命令,在弹出的旋转扭曲对话框中设置角度为50,如图08所示,图像效果如图09所示。
photoshop图8 Photoshop旋转扭曲设置
photoshop图9 图像效果
7、执行菜单栏中的“滤镜”→“扭曲”→“波浪”命令,在弹出的波浪对话框中设置参数如图10所示,图像效果如图11所示。

photoshop图10 Photoshop波浪设置
8、将文件适当裁切,将多余的部分裁切掉。选择图层面板,复制背景图层为背景副本图层,切换至通道面板,按住Ctrl键单击通道Alpha 1,载入选区,回到图层面板,选中背景副本图层,按Delete键,将选中的图像删除,图像效果如图12所示。
photoshop图12 图像效果
9、在图层面板上方,设置背景副本的图层混合模式为差值,图像效果如图13所示。按Ctrl E键,将背景层和背景副本层合并。
photoshop图13 图像效果
10、选择菜单栏中的“图像”→“调整”→“色相/饱和度”命令,在弹出的对话框中勾选着色选项,设置参数如图14所示,图像最终效果如图15所示。
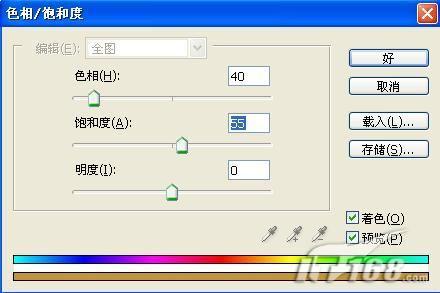
photoshop图14 Photoshop色相/饱和度
photoshop图15 最终效果图
在寒冷的冬季,大多数野生动物都会换上厚厚的毛皮来抵御寒冷。这些毛皮飘逸若软,也是制作高档衣服的原料。下面我们就用Photoshop打造一款动物毛皮效果。
photoshop 最终效果图
1、新建一个宽度为12,高度为12,分辨率为300像素,模式为RGB的白色文件。
2、设置前景色和背景色分别为黑色和白色。执行菜单栏中的“滤镜”→“渲染”→“云彩”命令,效果如图01所示。
photoshop图1 Photoshop渲染云彩
3、切换至通道面板,在控制面板下方单击“创建新通道”按钮,生成新的通道Alpha 1。执行菜单栏中的“滤镜”→“杂色”→“添加杂色”命令,在弹出的添加杂色对话框中,将数量选项设置为300,勾选高斯分布和单色选项,如图02所示,图像效果如图03所示。
photoshop图2 Photoshop添加杂色
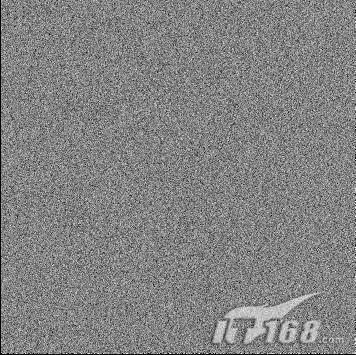
photoshop
图3 图像效果
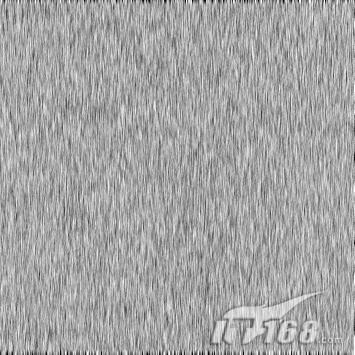
4、执行菜单栏中的“滤镜”→“模糊”→“动感模糊”命令,在弹出的动感模糊对话框中,设置角度为90,距离为36,如图04所示,图像效果如图05所示。
photoshop图4 Photoshop动感模糊
photoshop图5 图像效果 5、选择菜单栏中的“图像”→“调整”→“色阶”命令,在弹出的对话框中设置参数如图06所示,图像效果如图07所示。
photoshop图6 Photoshop色阶设置
photoshop
图7 图像效果
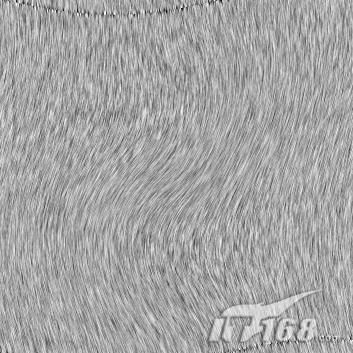
6、执行菜单栏中的“滤镜”→“扭曲”→“旋转扭曲”命令,在弹出的旋转扭曲对话框中设置角度为50,如图08所示,图像效果如图09所示。
photoshop图8 Photoshop旋转扭曲设置
photoshop图9 图像效果
7、执行菜单栏中的“滤镜”→“扭曲”→“波浪”命令,在弹出的波浪对话框中设置参数如图10所示,图像效果如图11所示。
photoshop图10 Photoshop波浪设置
photoshop
图11 图像效果
8、将文件适当裁切,将多余的部分裁切掉。选择图层面板,复制背景图层为背景副本图层,切换至通道面板,按住Ctrl键单击通道Alpha 1,载入选区,回到图层面板,选中背景副本图层,按Delete键,将选中的图像删除,图像效果如图12所示。
photoshop图12 图像效果
9、在图层面板上方,设置背景副本的图层混合模式为差值,图像效果如图13所示。按Ctrl E键,将背景层和背景副本层合并。
photoshop图13 图像效果
10、选择菜单栏中的“图像”→“调整”→“色相/饱和度”命令,在弹出的对话框中勾选着色选项,设置参数如图14所示,图像最终效果如图15所示。
photoshop图14 Photoshop色相/饱和度
photoshop图15 最终效果图
学习 · 提示
相关教程
关注大神微博加入>>


网友求助,请回答!