利用PhotoShop制作精美字体
来源:不详
作者:佚名
学习:5791人次
利用PhotoShop制作精美字体1. 创建新的画布,并输入所需文字。

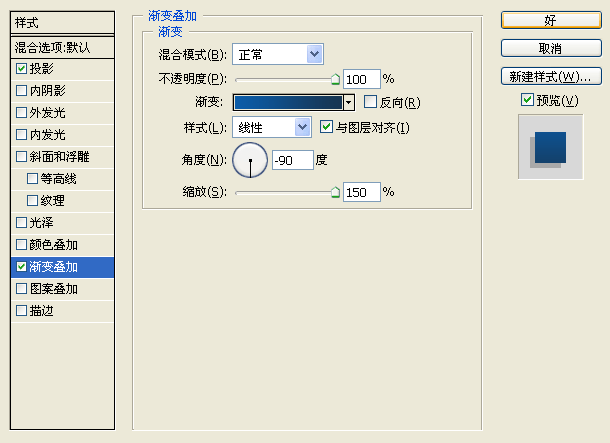
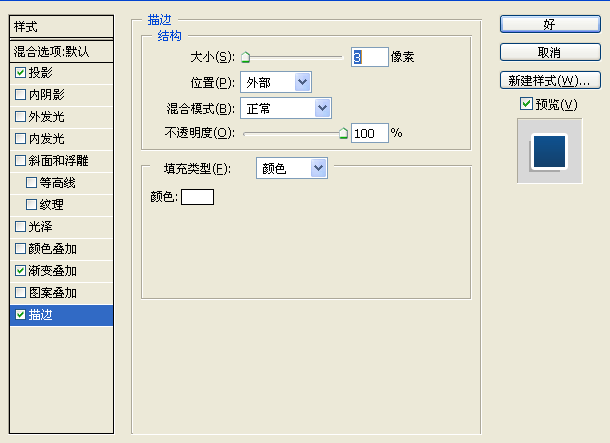
2. 右键点击文字层,并选择“混合选项”,并按如下所示分别设置投影、渐变叠加和描边效果。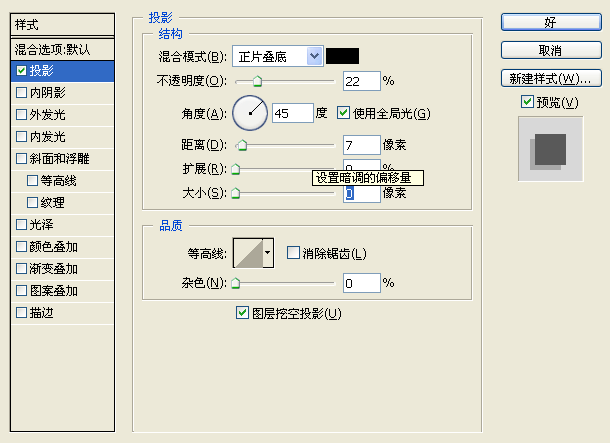
最终效果:


2. 右键点击文字层,并选择“混合选项”,并按如下所示分别设置投影、渐变叠加和描边效果。
最终效果:
学习 · 提示
相关教程
关注大神微博加入>>


网友求助,请回答!