PS初学者实例教程——修图的常用方法与技巧二
来源:不详
作者:佚名
学习:6829人次
PS初学者实例教程——修图的常用方法与技巧二 作者:玄烜 教程来源:中国教程网论坛
接着上一课的内容,我们继续说说修图的方法与技巧:
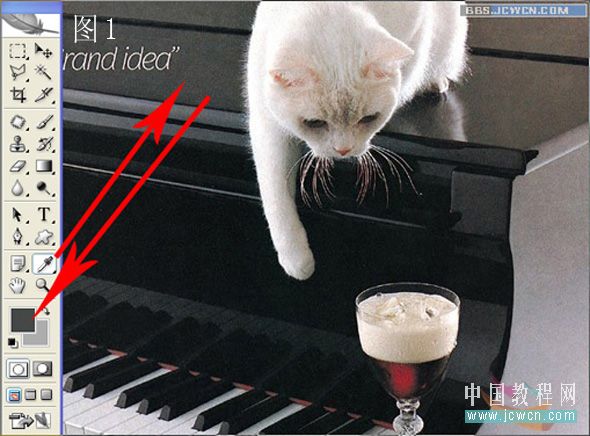
下面这张图要把钢琴上的猫去掉,应该怎么来作呢?我们先来分析一下这张图,其特点是:要修改的部位和整体图像的颜色反差极大,具有渐变光线,并且棱角分明,线条突出。我看采用常规方法是很难修好的,怎么办?既然修不好不妨试试重新画上去如何?对,就以绘制为主结合变换选区的办法来做。开始吧!
原图:

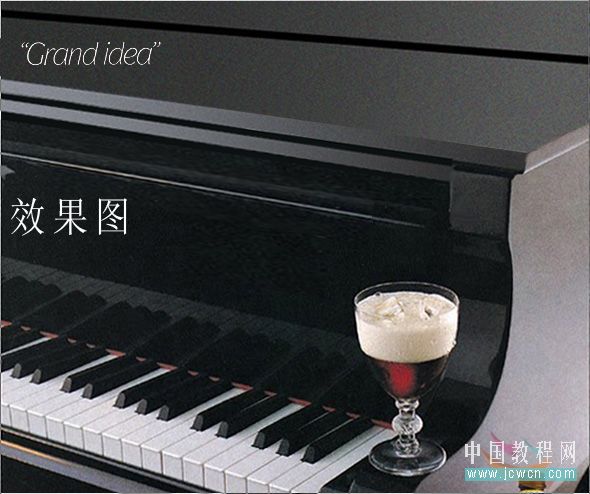
效果图:
本新闻共5
1、用吸管工具在钢琴盖上提取原始颜色。见图1
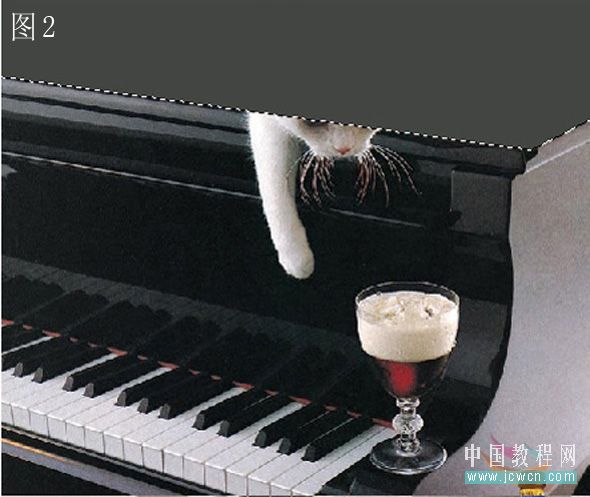
2、用多边形套索工具在琴盖上画出选区,用画笔涂上已经提取的颜色。见图2
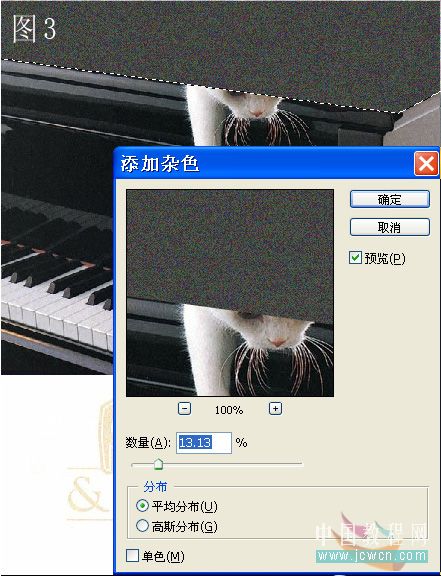
3、为了增强质感,给选区添加一个杂色,分别点击滤镜——杂色——添加杂色,具体设置见图3
本新闻共5
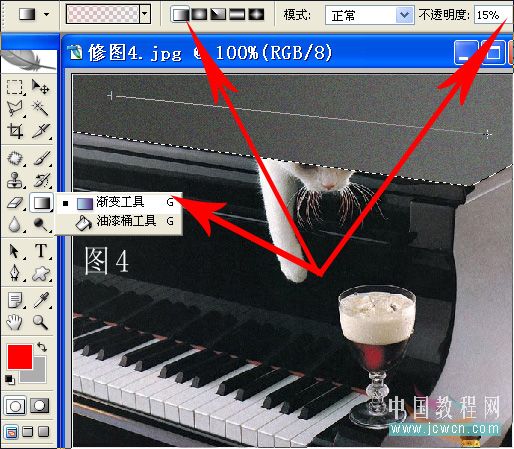
4、执行渐变效果,设置线性渐变,不透明度15——20%,在选区从左至右拉动。见图4
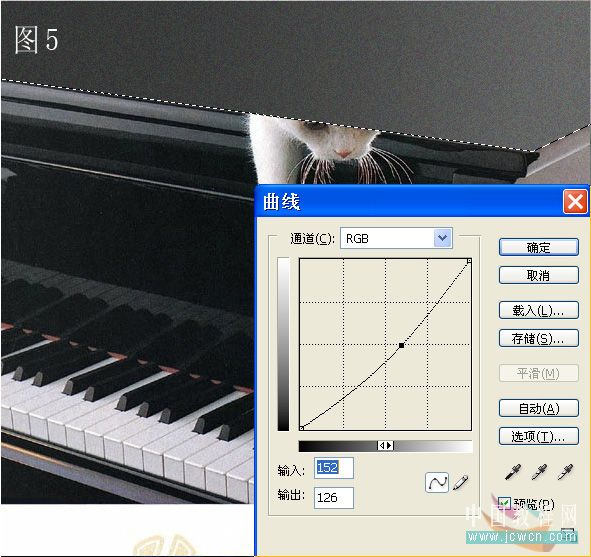
5、用曲线调整选区的明暗度和整体图像协调。见图5
6、画出琴盖上面的缝隙,用多边形套索工具在适当位置建立一条宽度适合的直线,用画笔填充黑色。见图6、图7


本新闻共5
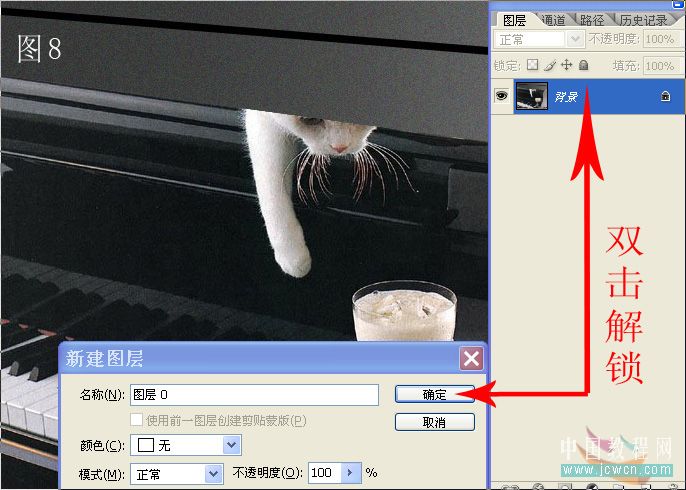
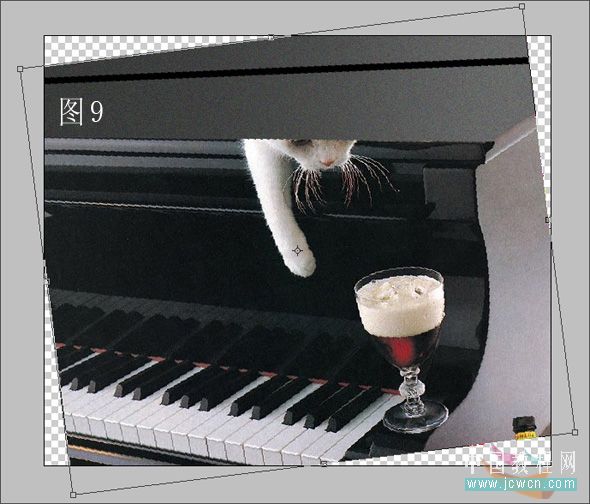
7、下面用变换选区的办法对琴盖前端进行处理,大家注意看,现在琴前端的几条线都是斜线,此项操作的前提必须要把斜线调整成平行线。办法如下:用鼠标双击图层面板上的背景层,点击确定对图层解锁。按ctrl t,当鼠标出现月牙型双箭头时对图像进行旋转至水平状态。见图8、图9
本新闻共5
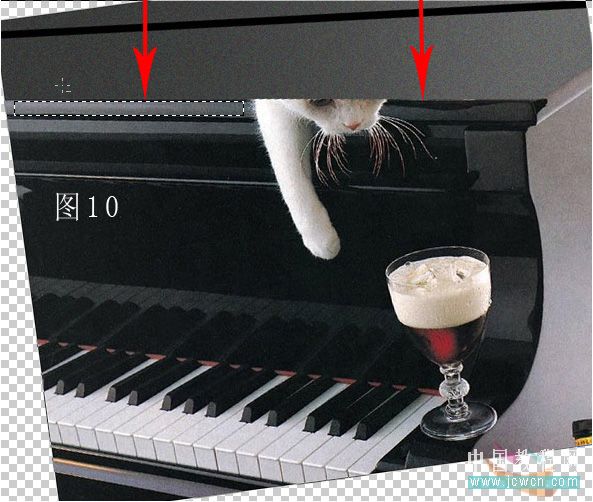
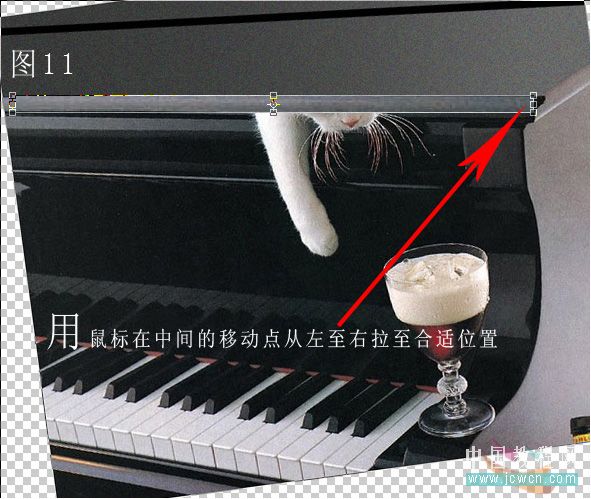
8、用矩形选框工具在适当位置拉动一个选区,按ctrl t自由变换,用鼠标在中间的移动点从左至右拉动到合适位置,其实这个办法就是把选区进行放大来覆盖要修复的位置。见图10、图11
9、用同样方法继续修复其他部位,(需要注意的是要随时调整水平线,否则会偏离要覆盖的位置)把琴盖上的英文复制过来就OK了,看看效果是不是很棒呀!见效果图
简单的,我们教你,深奥的,你来分享,非主流照片|qqkongjian|feizhuliu|tupian|luntan|psjiaocheng|bishua|ruanjian|chajian|xiazai|psxiazai|qqkongjiandaima
接着上一课的内容,我们继续说说修图的方法与技巧:
下面这张图要把钢琴上的猫去掉,应该怎么来作呢?我们先来分析一下这张图,其特点是:要修改的部位和整体图像的颜色反差极大,具有渐变光线,并且棱角分明,线条突出。我看采用常规方法是很难修好的,怎么办?既然修不好不妨试试重新画上去如何?对,就以绘制为主结合变换选区的办法来做。开始吧!
原图:
效果图:
本新闻共5
1、用吸管工具在钢琴盖上提取原始颜色。见图1
2、用多边形套索工具在琴盖上画出选区,用画笔涂上已经提取的颜色。见图2
3、为了增强质感,给选区添加一个杂色,分别点击滤镜——杂色——添加杂色,具体设置见图3
本新闻共5
4、执行渐变效果,设置线性渐变,不透明度15——20%,在选区从左至右拉动。见图4
5、用曲线调整选区的明暗度和整体图像协调。见图5
6、画出琴盖上面的缝隙,用多边形套索工具在适当位置建立一条宽度适合的直线,用画笔填充黑色。见图6、图7
本新闻共5
7、下面用变换选区的办法对琴盖前端进行处理,大家注意看,现在琴前端的几条线都是斜线,此项操作的前提必须要把斜线调整成平行线。办法如下:用鼠标双击图层面板上的背景层,点击确定对图层解锁。按ctrl t,当鼠标出现月牙型双箭头时对图像进行旋转至水平状态。见图8、图9
本新闻共5
8、用矩形选框工具在适当位置拉动一个选区,按ctrl t自由变换,用鼠标在中间的移动点从左至右拉动到合适位置,其实这个办法就是把选区进行放大来覆盖要修复的位置。见图10、图11
9、用同样方法继续修复其他部位,(需要注意的是要随时调整水平线,否则会偏离要覆盖的位置)把琴盖上的英文复制过来就OK了,看看效果是不是很棒呀!见效果图
简单的,我们教你,深奥的,你来分享,非主流照片|qqkongjian|feizhuliu|tupian|luntan|psjiaocheng|bishua|ruanjian|chajian|xiazai|psxiazai|qqkongjiandaima
学习 · 提示
相关教程
关注大神微博加入>>


网友求助,请回答!