用Photoshop把知了“挪”到树叶上
先看一下效果:
制作工具:Photoshop CS
制作过程:
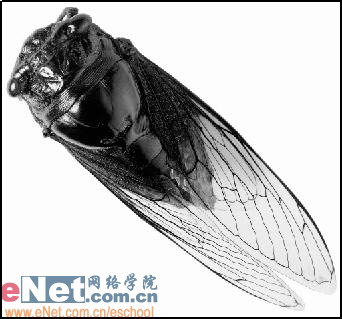
1、打开一幅素材图片,如图01所示。
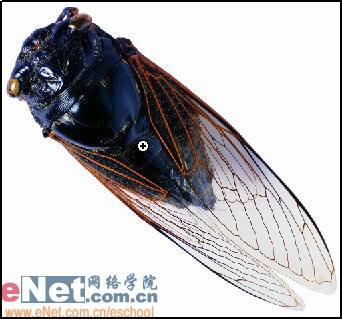
图01
2、打开通道面板,由于蓝色通道的黑白对比较强,翅膀轮廓明显,所以选择蓝色通道进行操作。复制蓝色通道为蓝副本通道,如图02所示。
图02
3、按Ctrl I键把“蓝副本通道”进行反相处理,效果如图03所示。
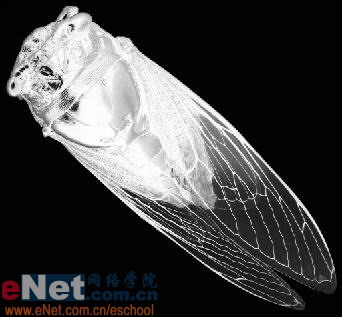
图03
4、经过反相蝉变成白色的了,但是头部上面还有灰色。用多边形套索工具选择蝉的头部并进行曲线调整(把不需要透明的部分变成白色),为了做出来的效果自然,多边形套索工具要设置一个较大的羽化值30像素,选择消除锯齿选项,参数设置如图04所示,选区效果如图05所示。

图04

图05
5、接着用曲线工具调整它的明暗度,按Ctrl M键弹出曲线对话框,参数设置如图06所示,调整后头部变为白色,如图07所示。
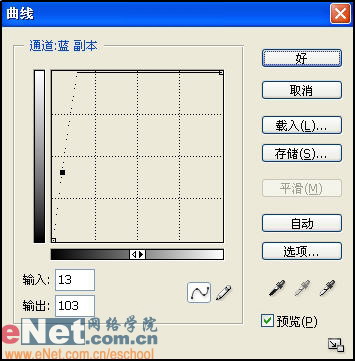
图06
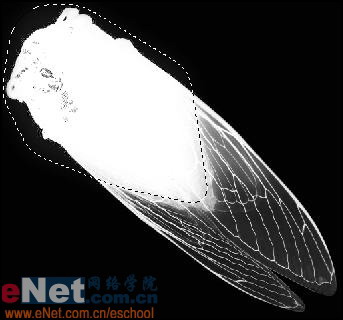
图07
6、选择工具箱中的画笔工具,调整蝉的头部的某些细节,画的过程中注意设置画笔的压力和大小,效果如图08所示。

图08
7、边缘发灰的部分,按Ctrl L键弹出色阶对话框,用白色吸管吸取所选择区域内的灰色部分,如图09所示。
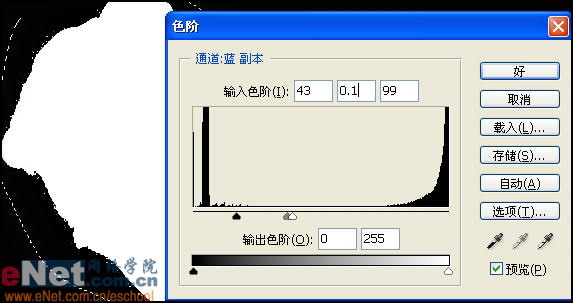
图09
8、蝉的翅膀必须保留那些半透明的部分。选择工具箱中的多边形套索工具,设置好羽化值,羽化值大小决定边缘的效果,所以数值可以适当设置大一点,用多边形套索工具选择小而薄的左翅膀,如图10所示。选择后,按Ctrl L键打开色阶对话框做调整,使一些不太明显的浅灰部分变亮,一些深灰变暗,如图11所示。
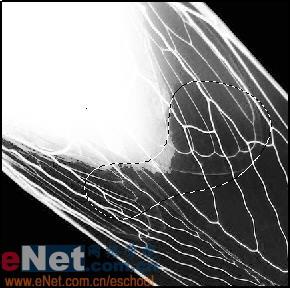
图10
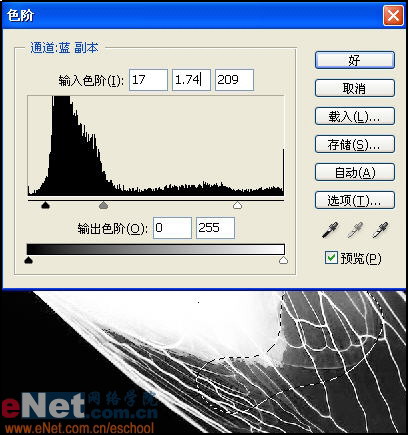
图11
9、用多边形套索工具选择蝉的腹部,如图12所示,依旧用色阶命令适当调整,局部的灰色用画笔工具将其涂抹掉,如图13所示。
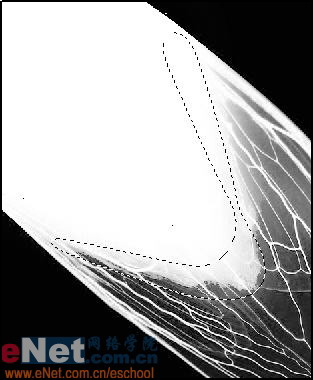
图12
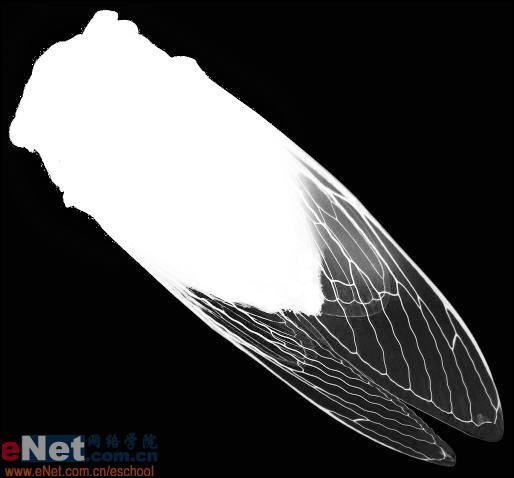
图13
10、按Ctrl键单击蓝副本通道,把它载入选区,回到图层面板,如图14所示,在背景图层上按Ctrl J键将蝉拷贝到新图层,形成图层1,效果如图15所示。

图14
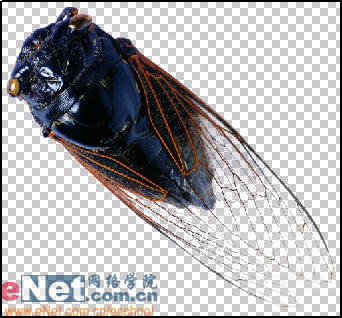
图15
图16

学习 · 提示
相关教程