PHOTOSHOP简易抠图大法
来源:不详
作者:佚名
学习:1381人次
PHOTOSHOP简易抠图大法PHOTOSHOP简易抠图大法老规矩,先看效果,汗,不过作者没有给出最终效果,所以小编我只能自己抠一个了。

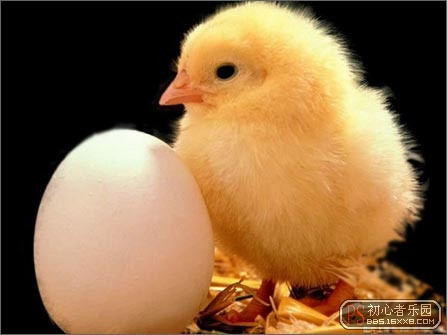
 1.jpg (58.88 KB)
2007-6-26 11:30
下图为原图
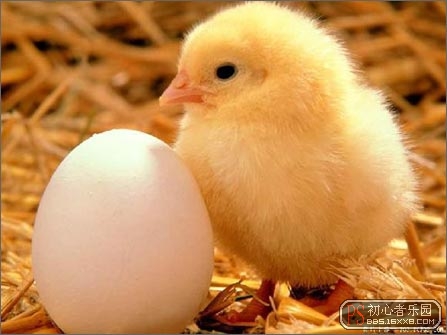 2.jpg (77.32 KB)
2007-6-26 11:30
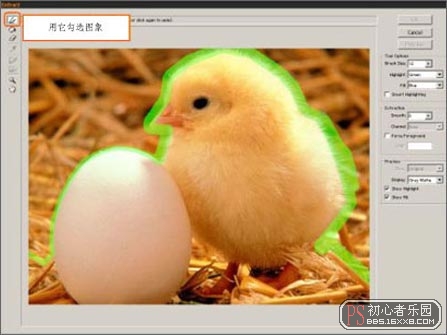
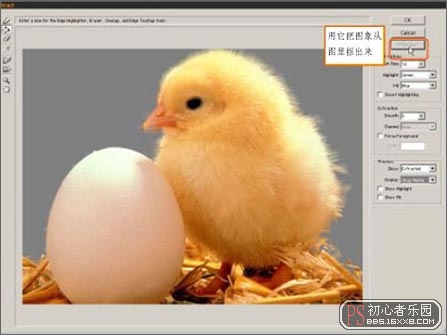
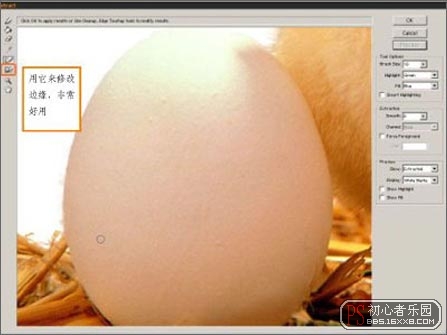
1、选择“滤镜--抽出”进入抽出界面。用“边缘高光器工具”勾出小鸡和鸡蛋的边缘,笔触大小选择35,因为小鸡背部的毛毛长一些。把边缘全部覆盖,注意边缘也要封闭。
 3.jpg (74.06 KB)
2007-6-26 11:30
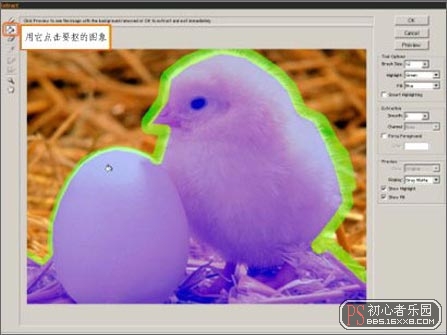
2、选填充工具把里面填上色,颜色随意,用默认的就行。目的是告诉PHOTOSHOP哪些地方需要保留。
 4.jpg (71.58 KB)
2007-6-26 11:30
3、点“预览”可以看一下效果。
 5.jpg (61.26 KB)
2007-6-26 11:30
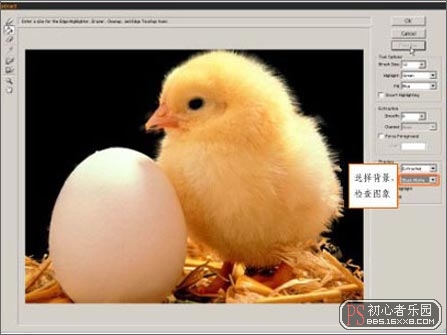
4、背景色填成黑色,突出对比效果。
 6.jpg (63.6 KB)
2007-6-26 11:30
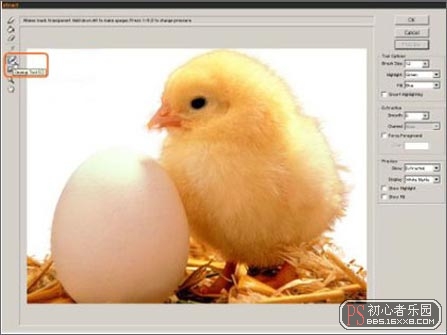
5、用清除工具修改细节。
 7.jpg (59.06 KB)
2007-6-26 11:30
6、仔细用清除工具擦干净边缘。
 8.jpg (55.9 KB)
2007-6-26 11:30
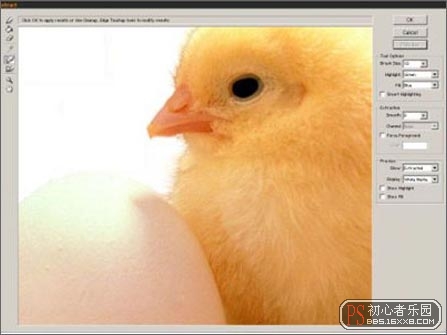
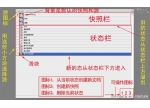
7、有拿不准的地方点这里查看原始图像,多做对比。
 9.jpg (61.74 KB)
2007-6-26 11:30
8、再看一下效果。边缘我模糊处理了一下,效果更好一点。
 10.jpg (77.75 KB)
2007-6-26 11:30
1.jpg (58.88 KB)2007-6-26 11:30
下图为原图
2.jpg (77.32 KB)2007-6-26 11:30
1、选择“滤镜--抽出”进入抽出界面。用“边缘高光器工具”勾出小鸡和鸡蛋的边缘,笔触大小选择35,因为小鸡背部的毛毛长一些。把边缘全部覆盖,注意边缘也要封闭。
3.jpg (74.06 KB)2007-6-26 11:30
2、选填充工具把里面填上色,颜色随意,用默认的就行。目的是告诉PHOTOSHOP哪些地方需要保留。
4.jpg (71.58 KB)2007-6-26 11:30
3、点“预览”可以看一下效果。
5.jpg (61.26 KB)2007-6-26 11:30
4、背景色填成黑色,突出对比效果。
6.jpg (63.6 KB)2007-6-26 11:30
5、用清除工具修改细节。
7.jpg (59.06 KB)2007-6-26 11:30
6、仔细用清除工具擦干净边缘。
8.jpg (55.9 KB)2007-6-26 11:30
7、有拿不准的地方点这里查看原始图像,多做对比。
9.jpg (61.74 KB)2007-6-26 11:30
8、再看一下效果。边缘我模糊处理了一下,效果更好一点。
10.jpg (77.75 KB)2007-6-26 11:30
学习 · 提示
相关教程
关注大神微博加入>>
网友求助,请回答!