液体效果,通过PS把手制作成蓝色液体效果(2)
12、创建曲线调整图层,把RGB通道调亮,参数及效果如下:
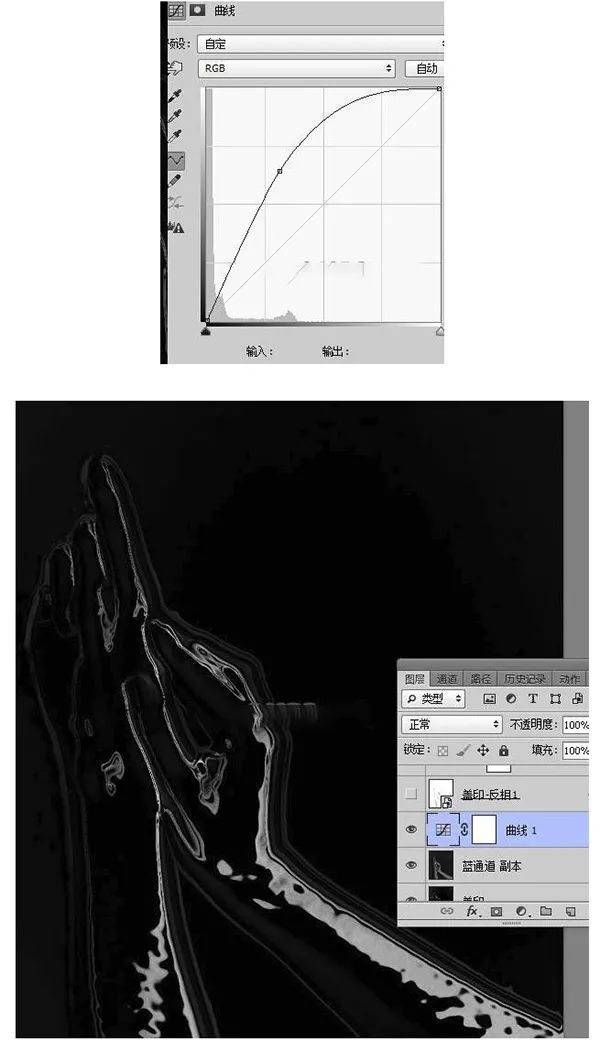
13、把蓝通道图层复制一层,按ctrl+shift+]置顶,按ctrl+l调整色阶,调亮一点,效果如下:
14、选择菜单:滤镜—滤镜库—素描—铬黄渐变,参数设置不变。

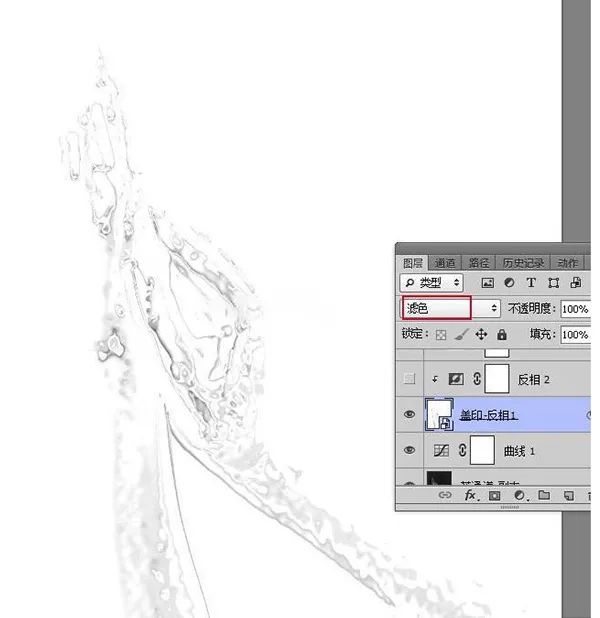
15、把当前图层混合模式改为滤色,如下图:
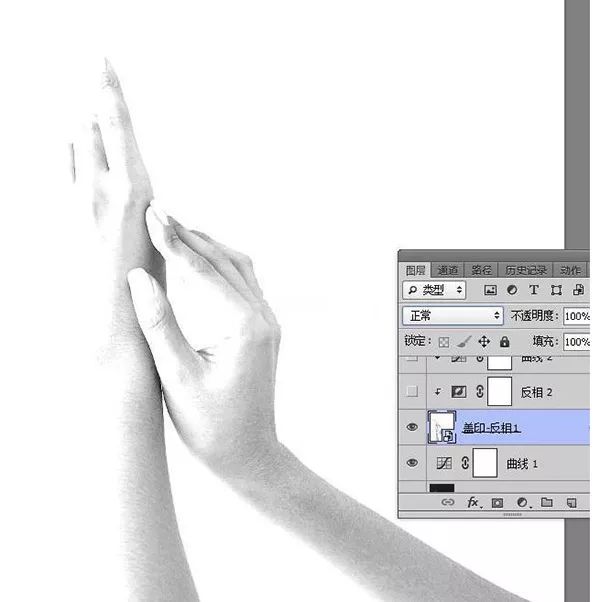
16、创建一个反向调整图层,确定后按ctrl+alt+g创建剪切蒙版http://www.16xx8.com/tags/38847/。
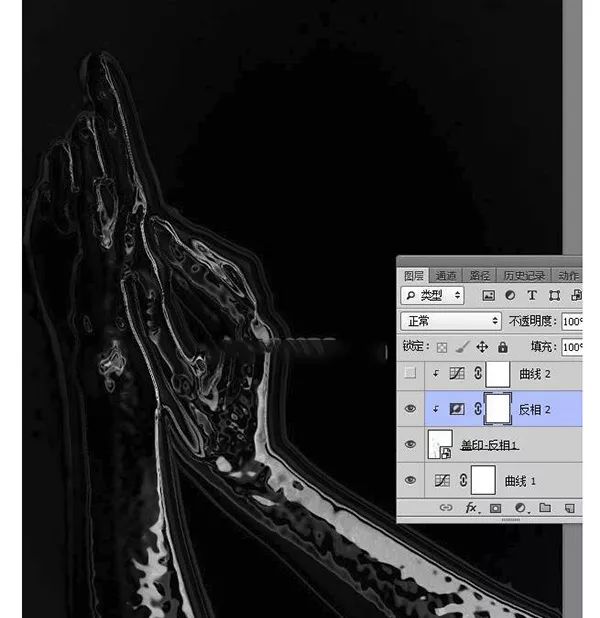
17、创建曲线调整图层,把RGB通道调亮,参数设置如下图,确定后创建剪切蒙版。
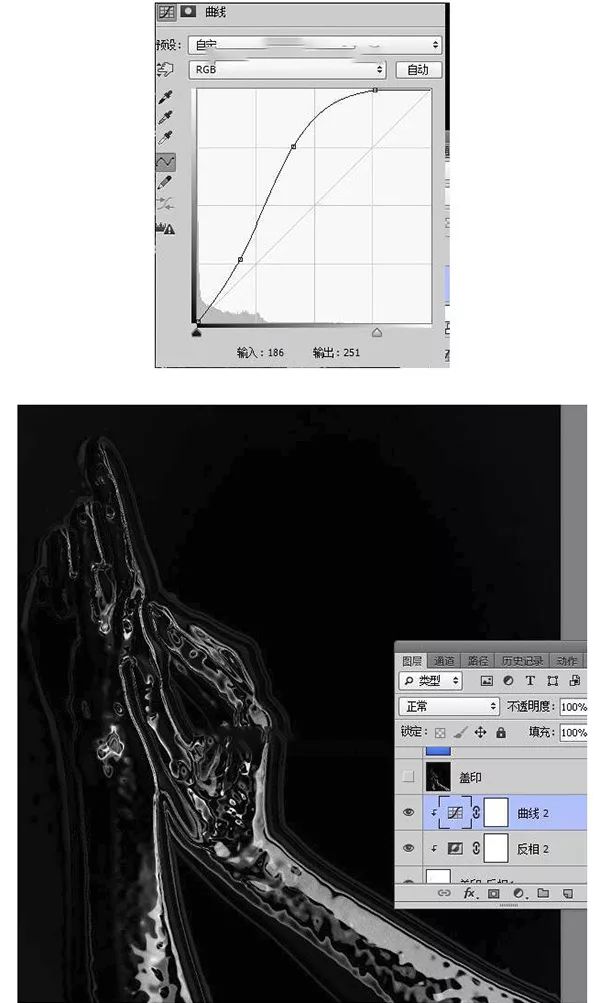
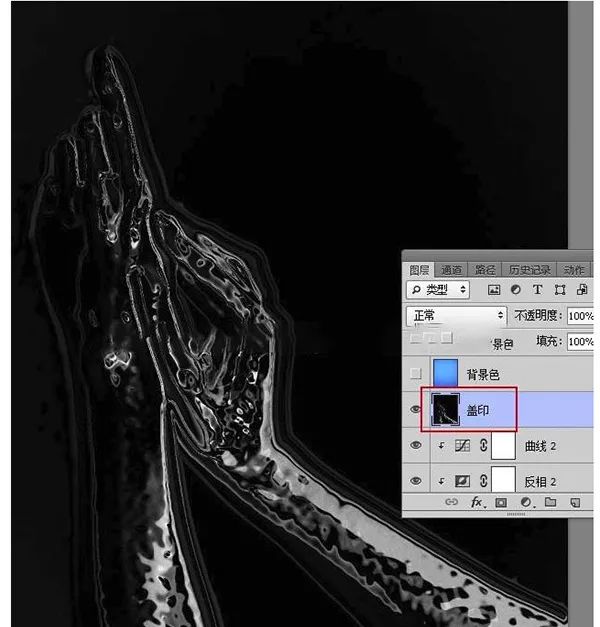
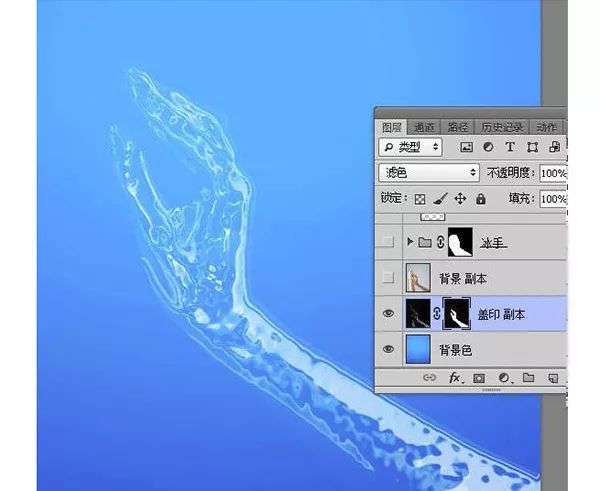
18、新建一个空白图层,按ctrl+alt+shift+e盖印图层,并把图层命名为盖印,如下图:
19、打开下面的背景素材,用移动工具拖进来,调整好位置。
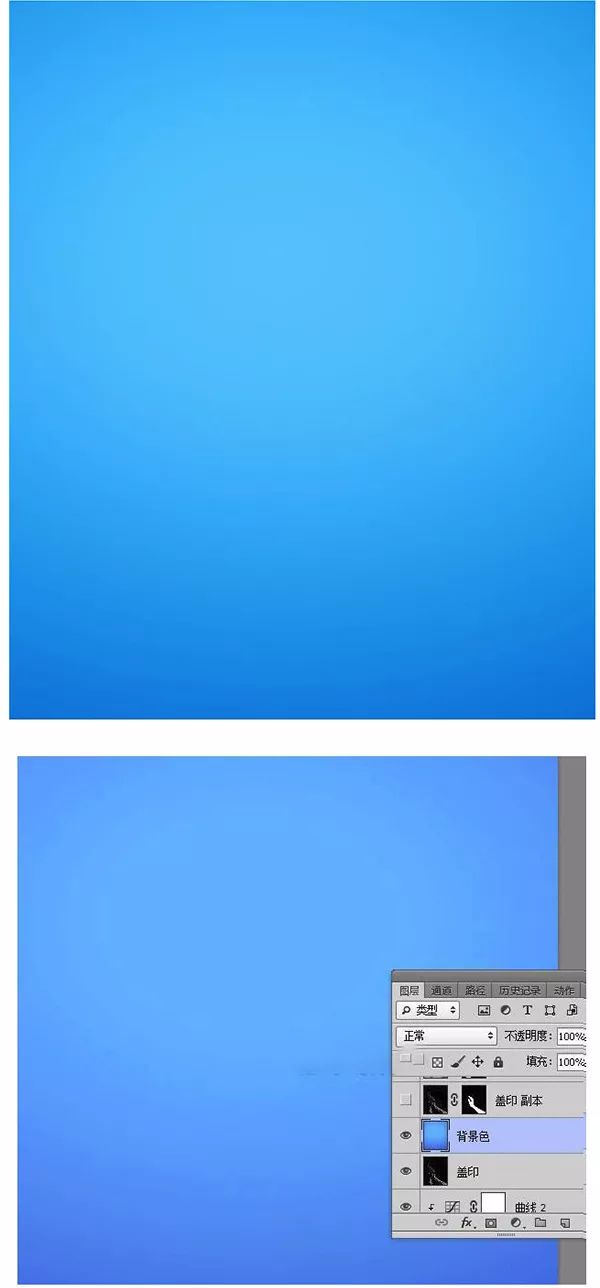
20、把盖印图层复制一层,移到刚才的背景色图层上面,混合模式改为滤色,如下图:
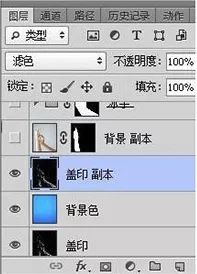
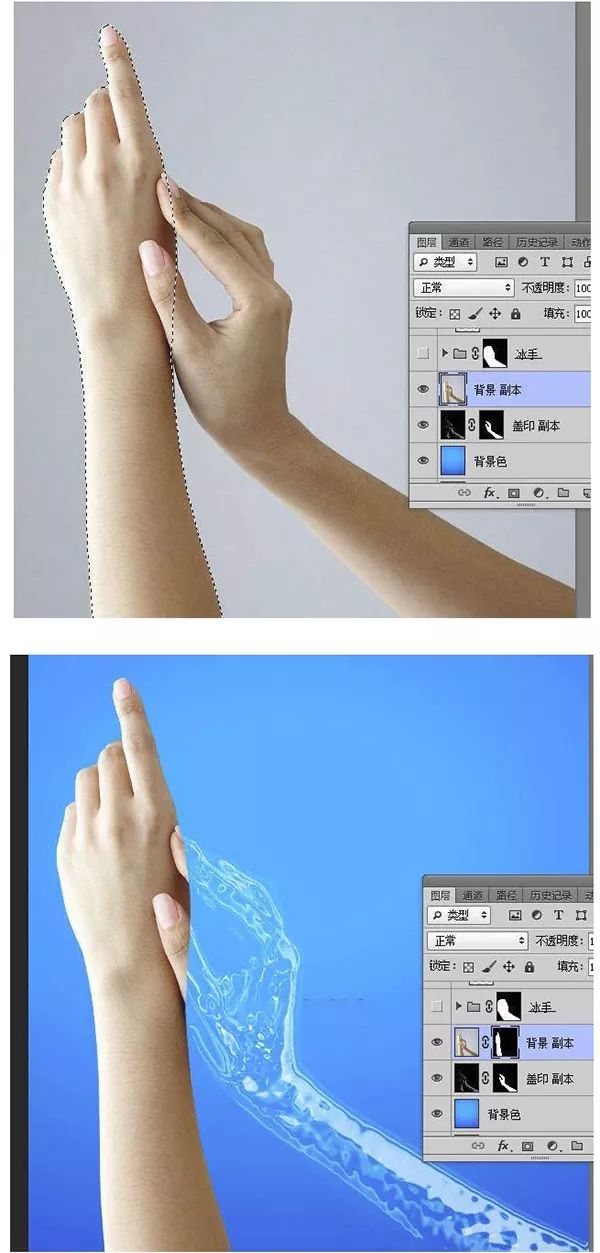
21、把背景图层复制一层,按ctrl+shift+]置顶,如下图:
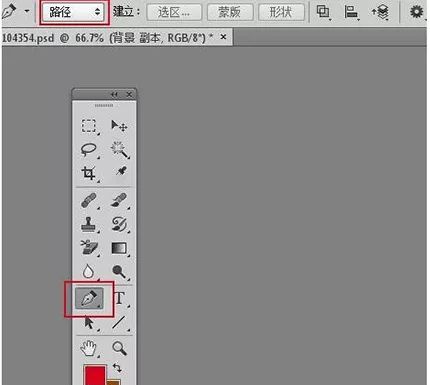
22、在工具箱选择钢笔工具,在属性栏选择路径。
23、用钢笔勾出右手轮廓。

24、按ctrl+回车把路径转为选区。
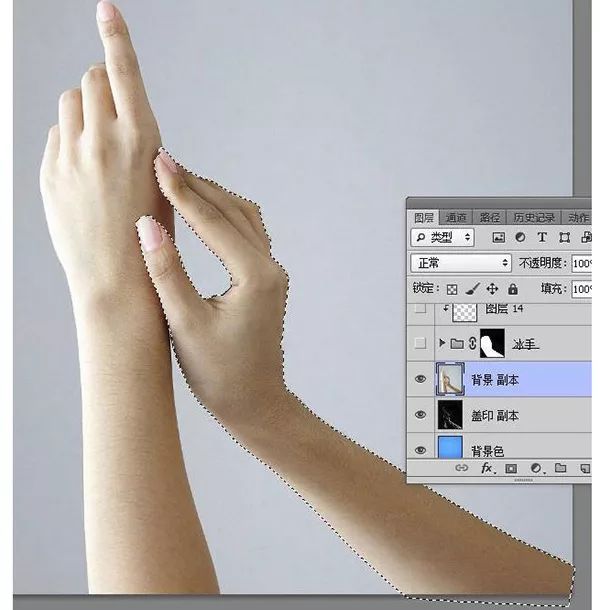
25、给盖印副本图层添加图层蒙版,如下图:
26、回到背景副本图层,用钢笔勾出左手轮廓,转为选区后添加图层蒙版。
27、把背景副本图层暂时隐藏。
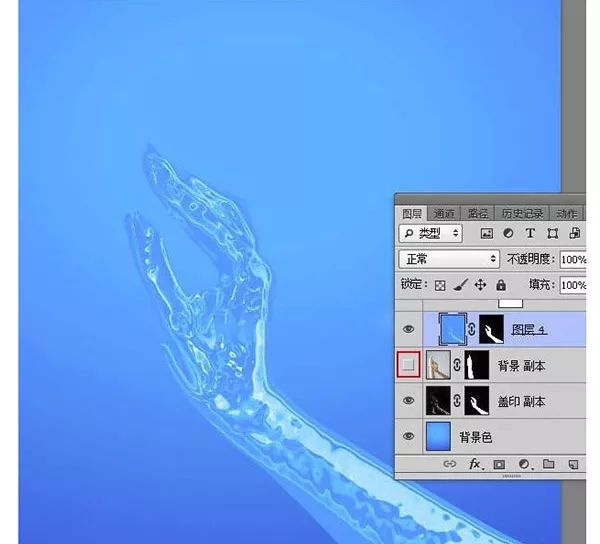
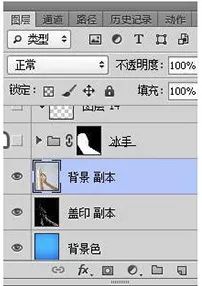
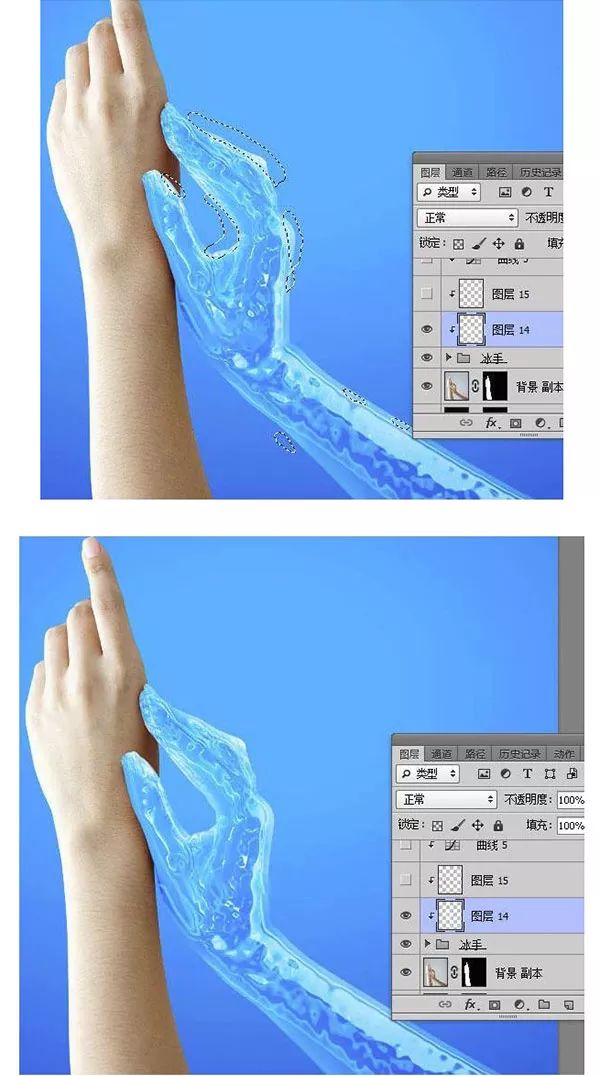
28、新建一个组,在组里新建一个图层,按ctrl+alt+shift+e盖印图层,然后调出右手选区,添加图层蒙版,再把背景副本图层显示出来。
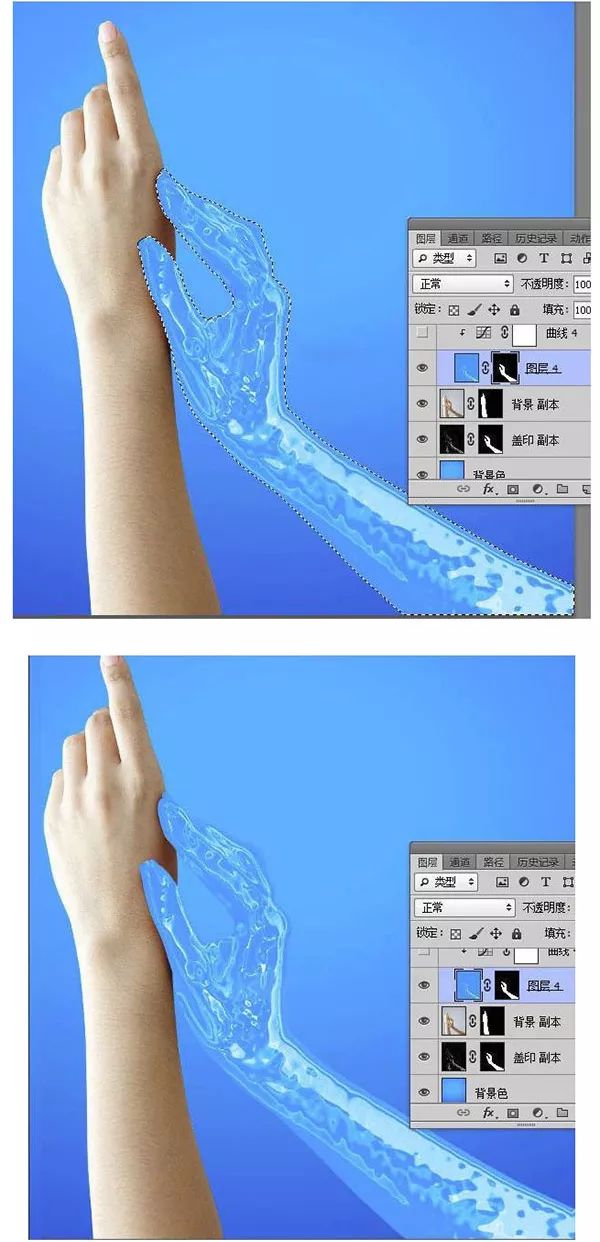
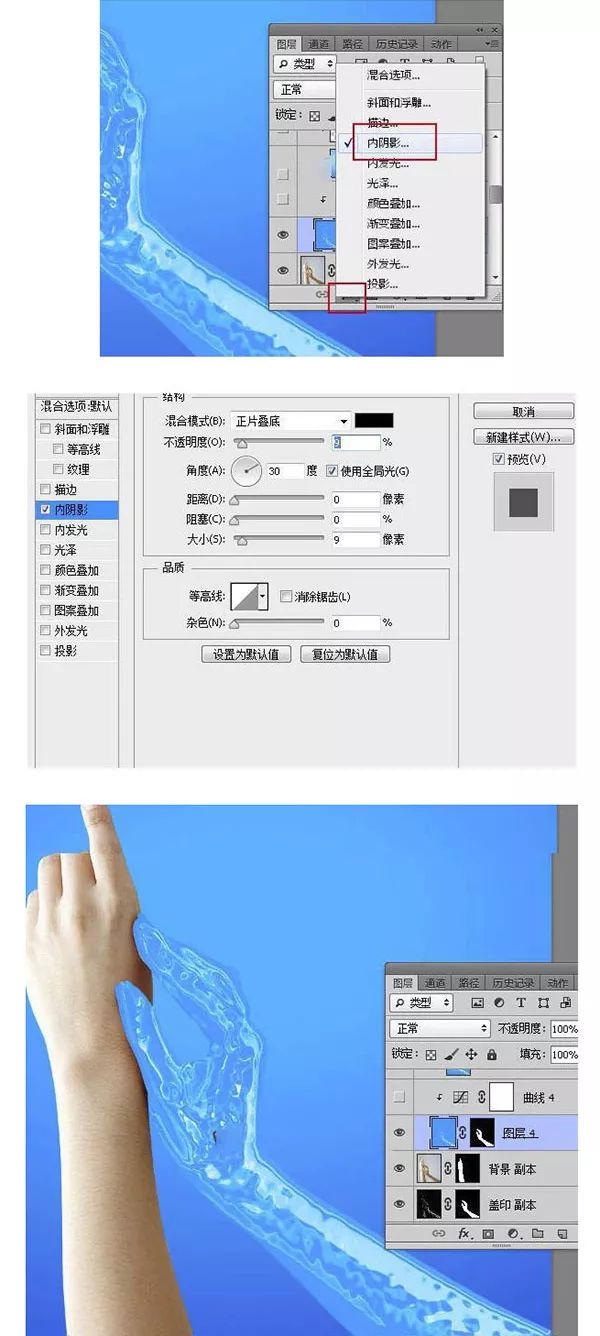
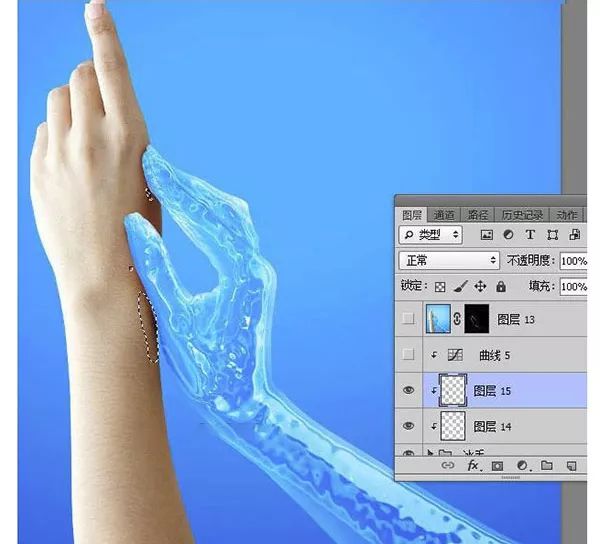
29、给当前图层添加图层样式,选择内阴影,参数及效果如下图:
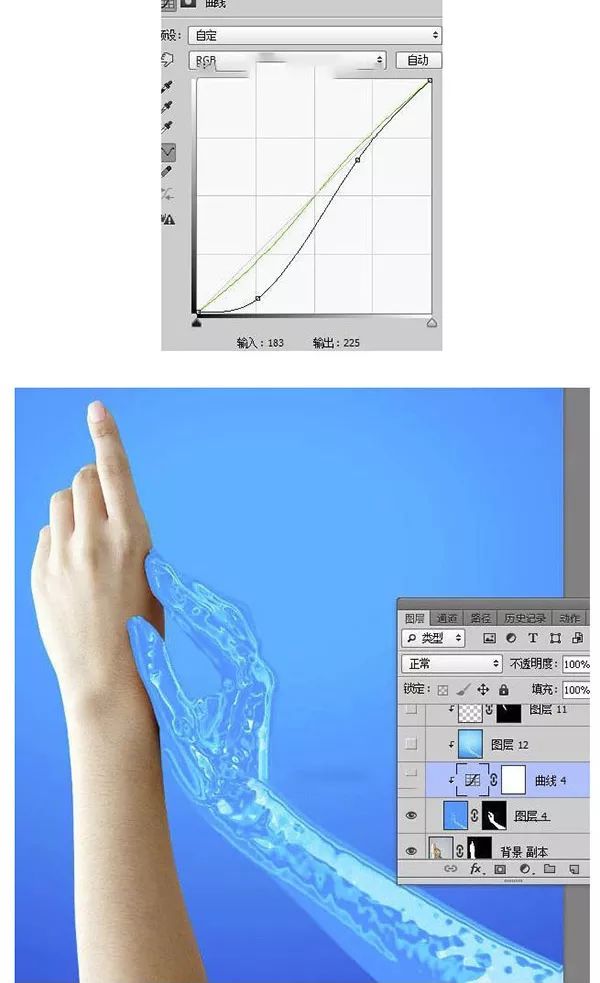
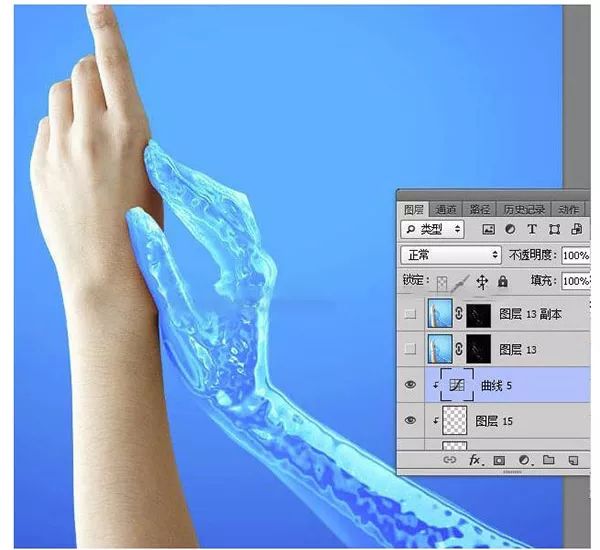
30、创建曲线调整图层,把RGB通道压暗一点,参数设置如下图,确定后创建剪切蒙版。
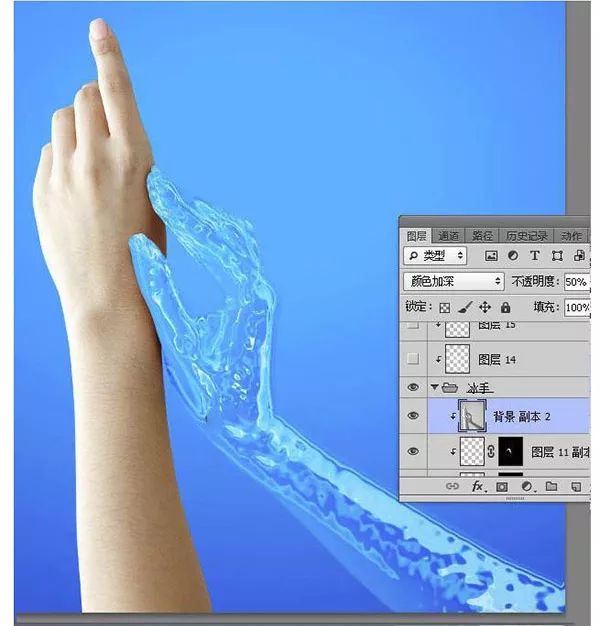
31、把蓝通道图层复制一层,移到当前组里面,如下图:
32、创建剪切蒙版后把混合模式改为颜色加深,不透明度改为50%:
33、在组的外面新建一个空白图层,并创建剪切蒙版。
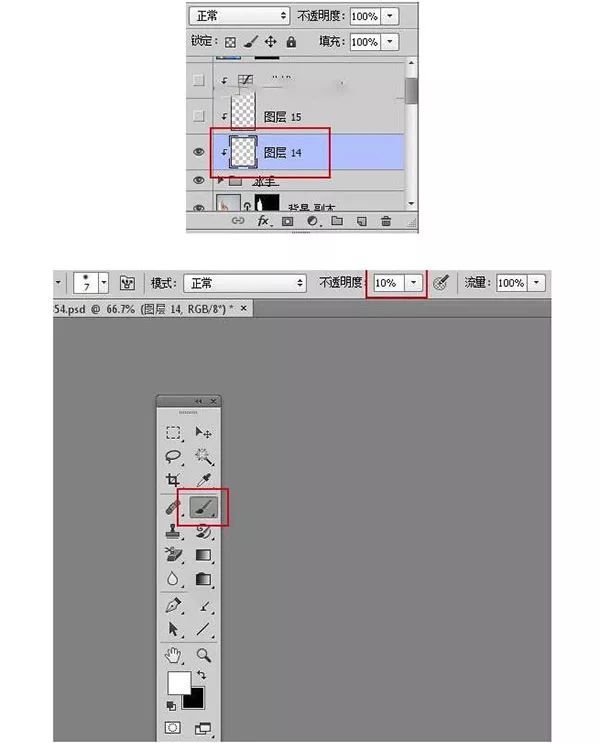
35、用画笔把受光区域涂亮一点:
36、新建一个空白图层创建剪切蒙版,把前景色设置为暗蓝色,用画笔给手背光区域涂暗一点。
37、创建曲线调整图层,对RGB、绿、蓝通道进行调整,确定后创建剪切蒙版。
最终完成效果:

素材都是很好找的素材,甚至自己拍张照片就可以是练习的素材,www.16xx8.com站内也有很多液体效果的教程,同学们可以根据想要学习的关键词进行搜索。
学习 · 提示
相关教程