宝宝调色,Lightroom滤镜营造温暖色调
来源:weibo
作者:摄影师延延
学习:12754人次
在海边拍的一组片子,由于天气和光线原因有些阴冷。我个人喜欢暖暖的色调,所以想在LR里做些调整。这次要用到一个关键的方法,就是渐变滤镜。
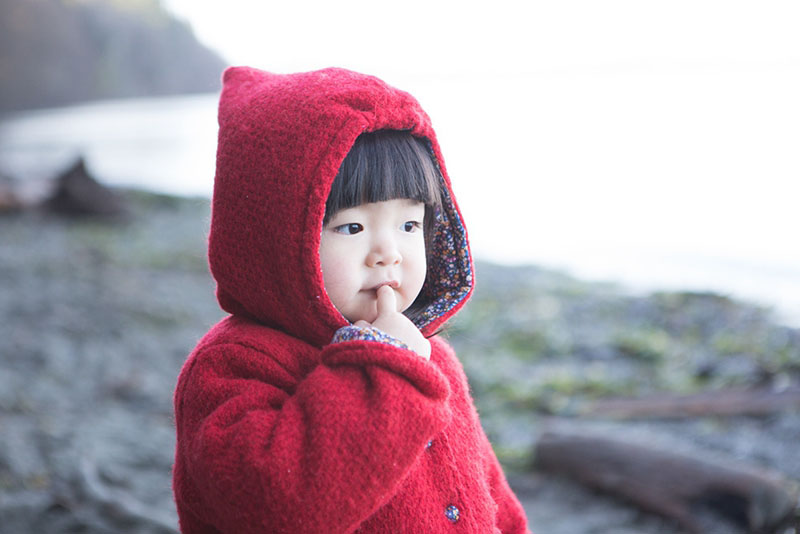
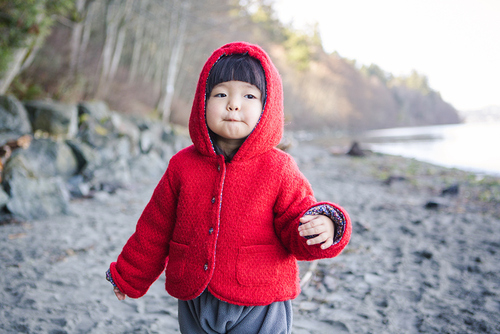
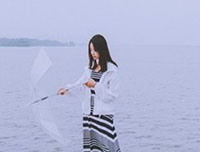
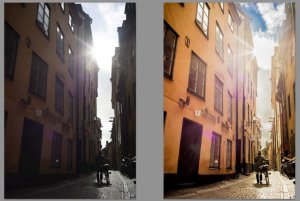
先看调整后的图:

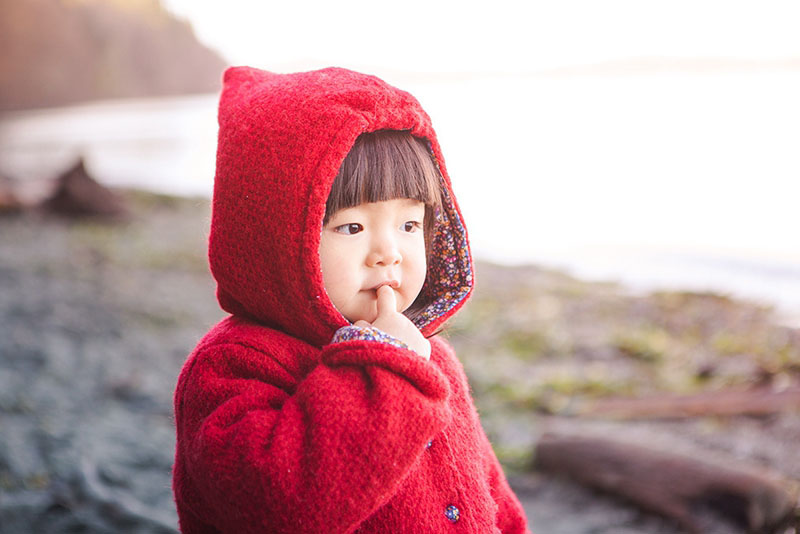
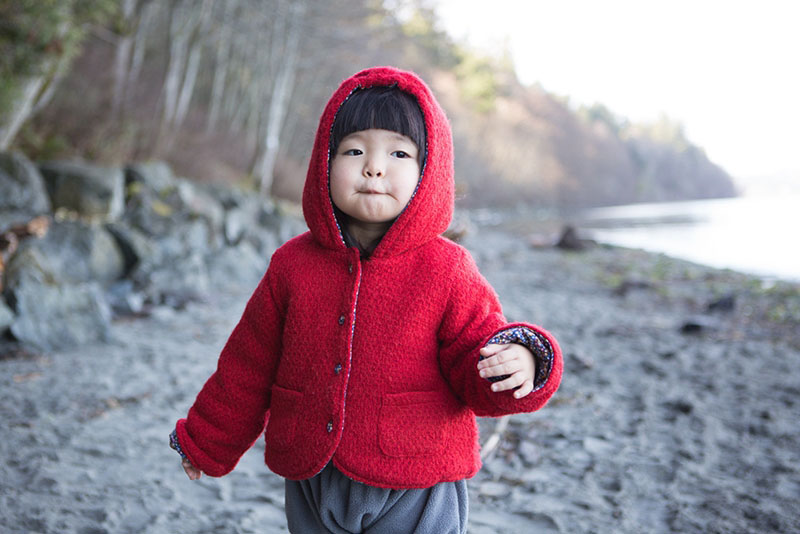
原图是这样的:
下面就来看看是怎么调整的捏。
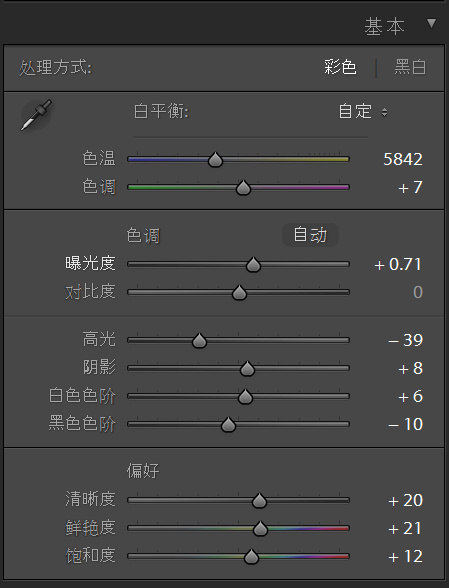
一、常规的调整
白平衡调到如图所示,曝光也提高。
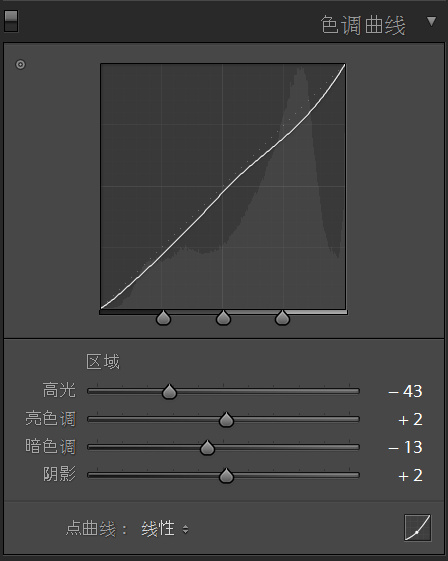
二、曲线调整
因为整体曝光增加了,所以要压暗一点儿暗色调。避免整体提亮以后层次变弱。
三、颜色的调整
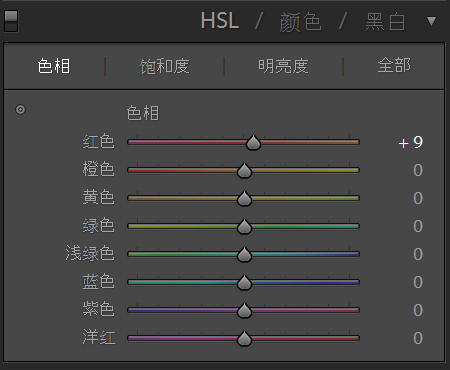
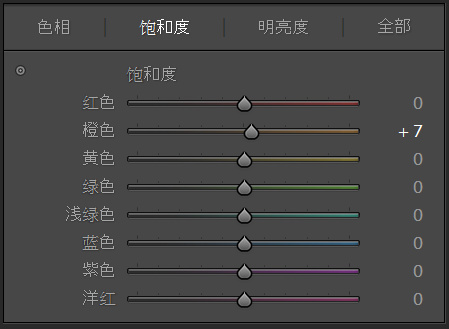
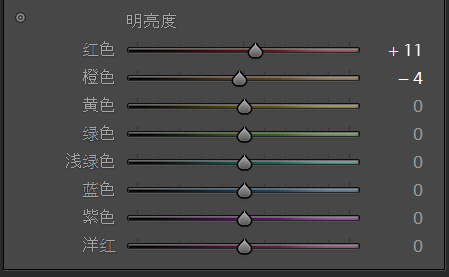
调整的不多,主要是针对橙色和红色的调整,这样做是为了改善肤色。
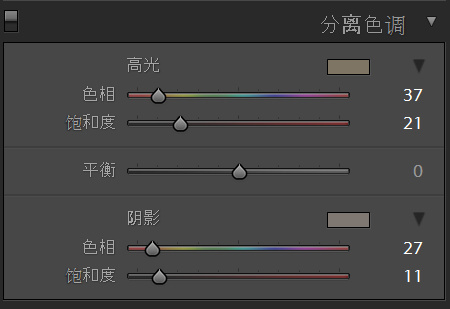
四、分离色调
高光和阴影都调整为偏暖色调,数值如下图。
前四步完成以后,图片是这样的:
虽然比起原图整体温暖了一些,但是仍然还是比较灰冷的调子。所以,下面就是最重要的一步啦——利用渐变滤镜!
五、渐变滤镜
我这次用的参数如下:
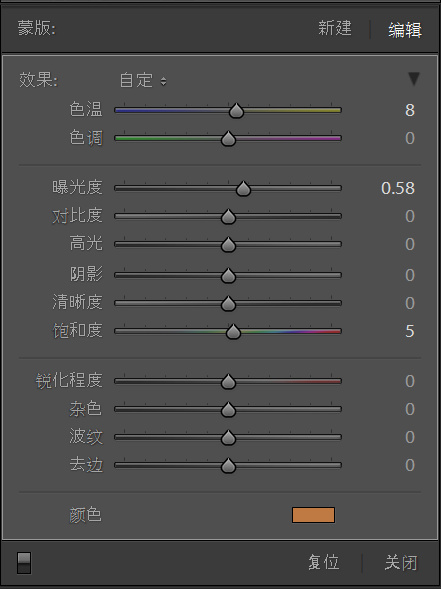
最主要是颜色的选择——橙色。
点选完滤镜之后,会在编辑的图片上出现如下图所示的三条线和一个点点:
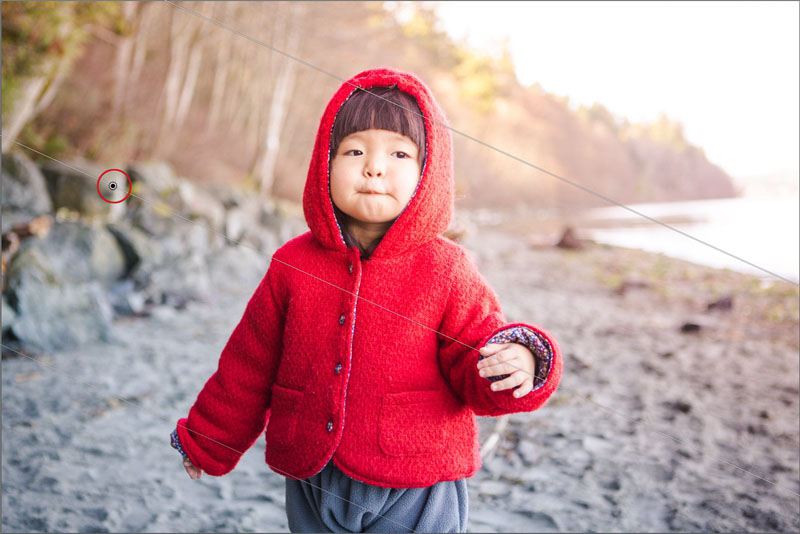
点点我用红圈标出来了,鼠标选择这个点,就会出现一个旋转箭头,可以调整滤镜的角度。
那三条线,可以调整滤镜的覆盖范围。
-----------------------------------------
好啦,至此,就OK啦,调整后的图片,亮部偏暖,暗部是弱化后的冷色调,整张图就更多层次和色彩变化。
而且,仿佛还有一点儿逆光的感觉有没有?
最后,提醒大家,可以把上面所做的这些调整步骤,存成预设:
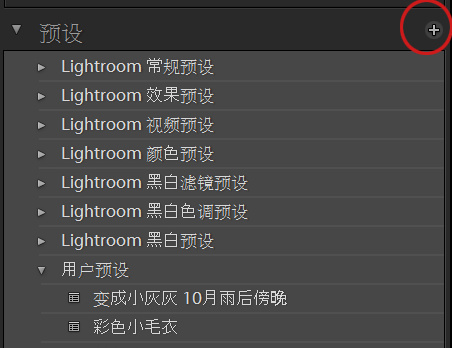
选择红圈圈出的+号,就可以添加刚刚所做的调整为预设,取好名字,保存下来。
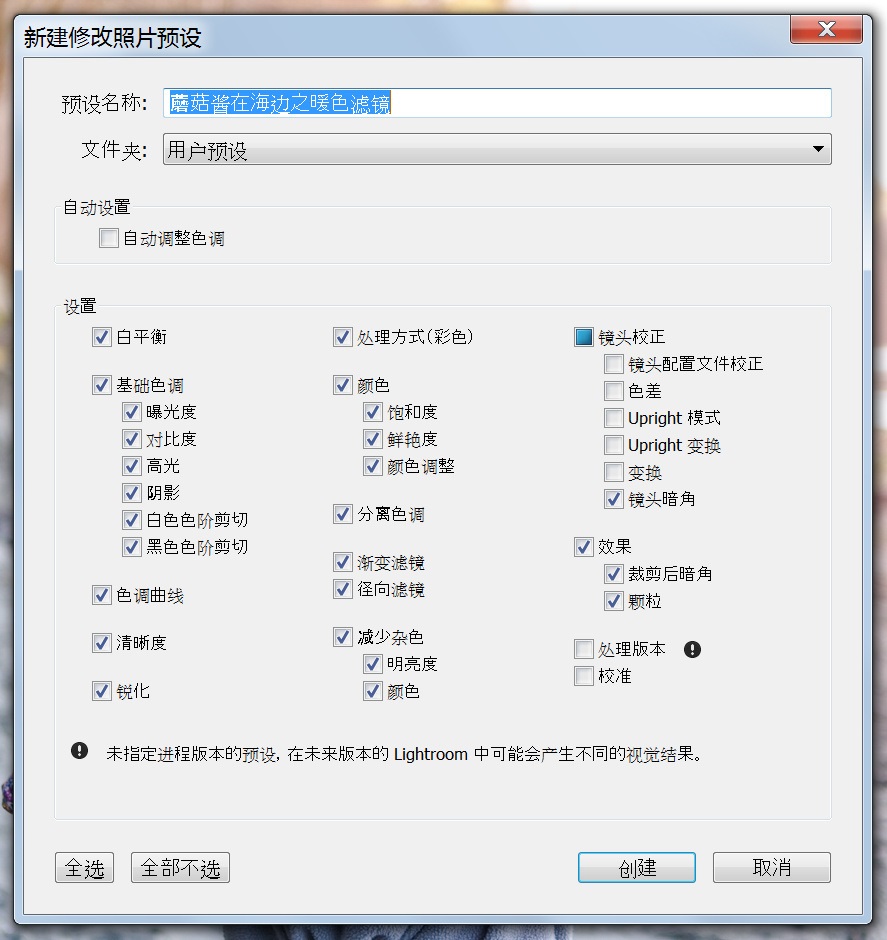
就可以对同一批拍摄的图片使用这个预设,以后遇到类似的片子,也可以直接用预设调整,当然多数时候,用完预设,还是要根据具体图片手动做微调以达到最好效果。
这次的小教程就讲完啦,冬天的时候经常会拍出的片子灰灰暗暗冷冷的,试试这个方法吧,当然,还要提个醒,那就是,滤镜的暖色和高光要加在照片上光线射过来的方向喔,才会自然喔。
先看调整后的图:
原图是这样的:
下面就来看看是怎么调整的捏。
一、常规的调整
白平衡调到如图所示,曝光也提高。
二、曲线调整
因为整体曝光增加了,所以要压暗一点儿暗色调。避免整体提亮以后层次变弱。
三、颜色的调整
调整的不多,主要是针对橙色和红色的调整,这样做是为了改善肤色。
四、分离色调
高光和阴影都调整为偏暖色调,数值如下图。
前四步完成以后,图片是这样的:
虽然比起原图整体温暖了一些,但是仍然还是比较灰冷的调子。所以,下面就是最重要的一步啦——利用渐变滤镜!
五、渐变滤镜
我这次用的参数如下:
最主要是颜色的选择——橙色。
点选完滤镜之后,会在编辑的图片上出现如下图所示的三条线和一个点点:
点点我用红圈标出来了,鼠标选择这个点,就会出现一个旋转箭头,可以调整滤镜的角度。
那三条线,可以调整滤镜的覆盖范围。
-----------------------------------------
好啦,至此,就OK啦,调整后的图片,亮部偏暖,暗部是弱化后的冷色调,整张图就更多层次和色彩变化。
而且,仿佛还有一点儿逆光的感觉有没有?
最后,提醒大家,可以把上面所做的这些调整步骤,存成预设:
选择红圈圈出的+号,就可以添加刚刚所做的调整为预设,取好名字,保存下来。
就可以对同一批拍摄的图片使用这个预设,以后遇到类似的片子,也可以直接用预设调整,当然多数时候,用完预设,还是要根据具体图片手动做微调以达到最好效果。
这次的小教程就讲完啦,冬天的时候经常会拍出的片子灰灰暗暗冷冷的,试试这个方法吧,当然,还要提个醒,那就是,滤镜的暖色和高光要加在照片上光线射过来的方向喔,才会自然喔。
学习 · 提示
相关教程
关注大神微博加入>>


网友求助,请回答!