效果教程,Lightroom打造逆光效果照片
来源:不详
作者:摄影师延延
学习:9238人次
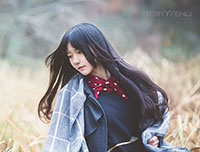
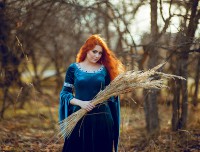
这次的示例是一张黄昏时分的逆光照片。
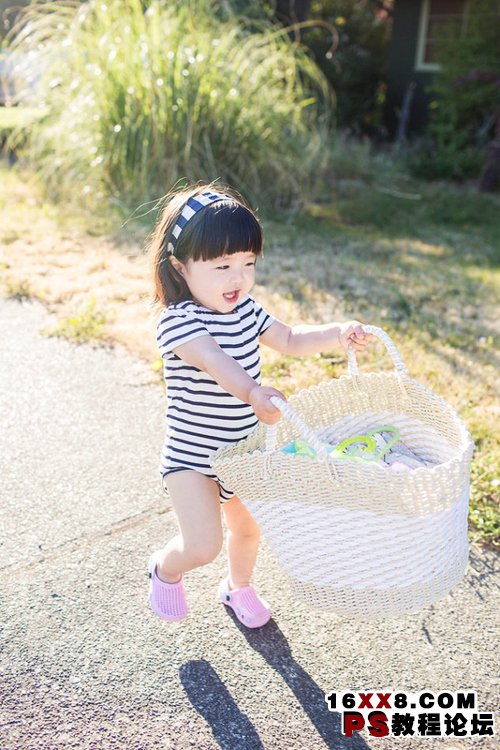
摄影师延延(微博:@摄影师延延)作品

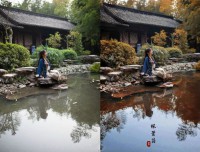
原片
原片脸部略暗,需要调整。色温偏冷,要调的暖一些。
做如下调整:
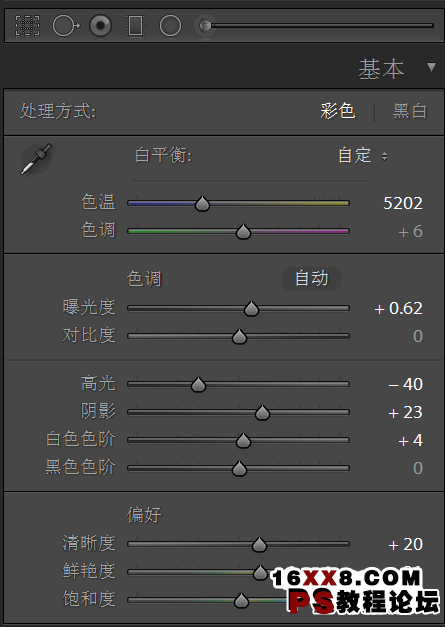
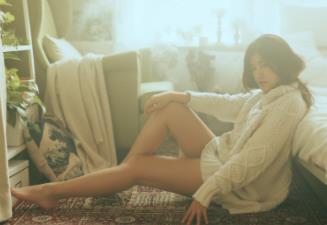
1、加大曝光,适当压暗高光,提亮暗部。色温调高一些。
数值如下。
2、调整曲线。同样是减高光,提亮暗部。
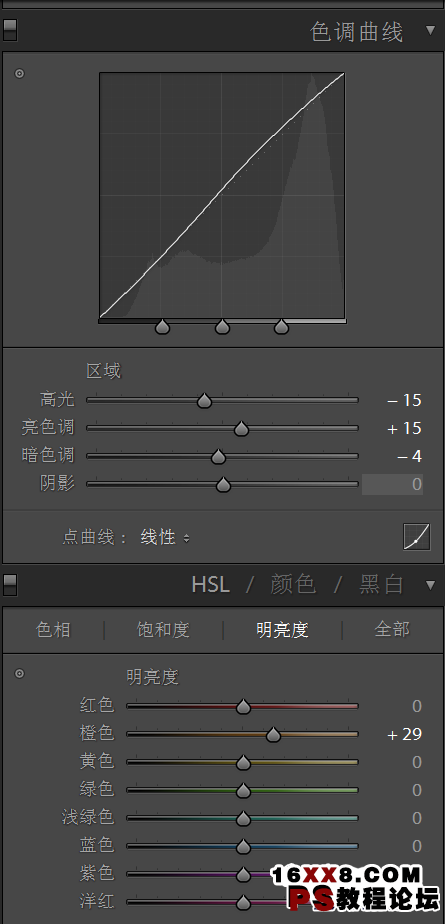
色彩的调整上,提亮橙色。这样做是为了让皮肤亮白一些。
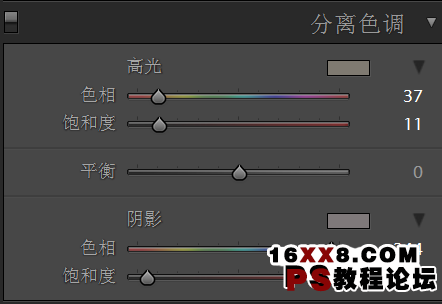
3、分离色调的调整。本着让原片整体"暖融融"的色彩感觉,让高光部分和暗部都倾向暖色调。调整和数值如下。
这样就调整好啦!清新明朗又暖融融的逆光照!
学习 · 提示
相关教程
关注大神微博加入>>

网友求助,请回答!