用Photoshop制作立体感的效果
来源:不详
作者:佚名
学习:1609人次
用Photoshop制作立体感的效果我们生活的世界里,充满了形形色色的物品,当你仔细观察就会发现,这些物品不论形式多么复杂,结构多么烦琐,最终都会归纳成为几种最简单的几何形体,它们都是由若干几何造型组成的,比如:杯子、盒子、苹果、人脸等。
这里我就来为大家介绍几种基本几何体的做法,以及几何体光与影的处理效果。
一、球体
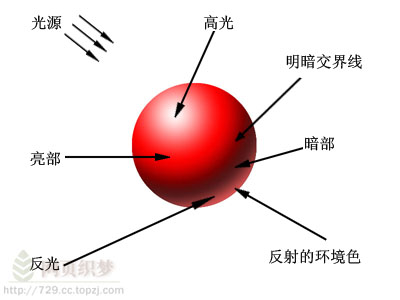
1、地球、苹果、足球、鸡蛋、人的头部、水珠等都可以看作是由球体够成的物体。
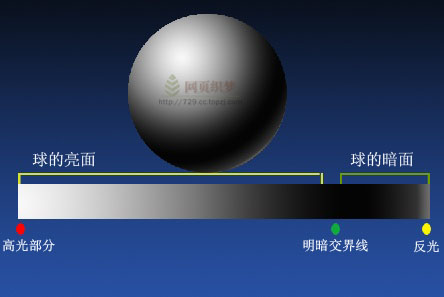
我们眼中所见到的物体均和光线有关,光决定了物体的立体感,如果一个物体具备了以下因素,它就可以产生立体效果。
2、开始制作球体
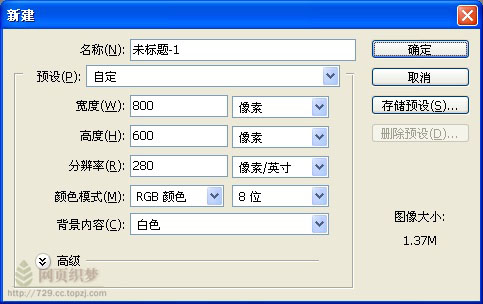
执行菜单命令“文件”--“新建”,建立一个画布,画布设置如下图:
3、添加背景色。
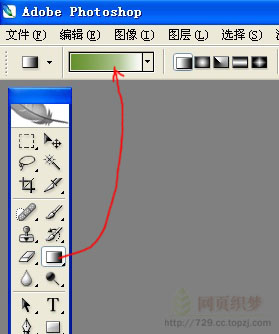
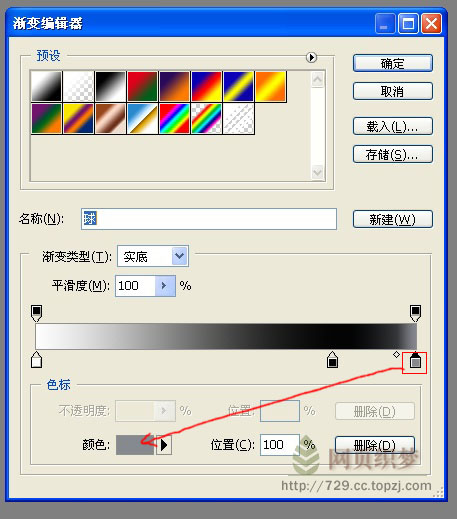
单击“渐变”工具,再单击上方的“渐变编辑器”,打开渐变编辑对话框。
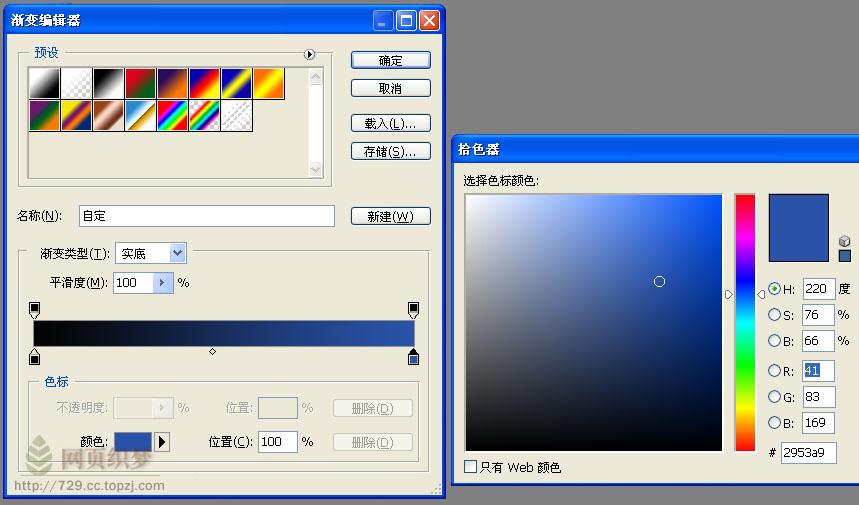
4、如图设置渐变色:
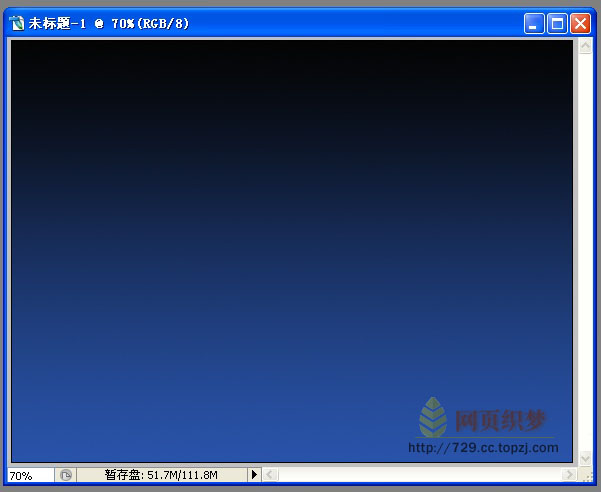
5、回到工具面板,选择“渐变”工具,由上至下拉出渐变色,这时画面上出现了一个漂亮的渐变色。
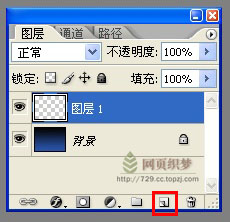
6、执行菜单命令“窗口”--“图层”打开图层面板,点击红框中的图标,建立一个新层(图层1)。
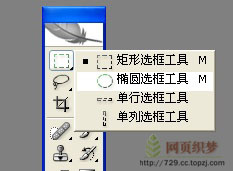
7、回到工具面板,将“矩形选框工具“换成”椭圆选框工具“。
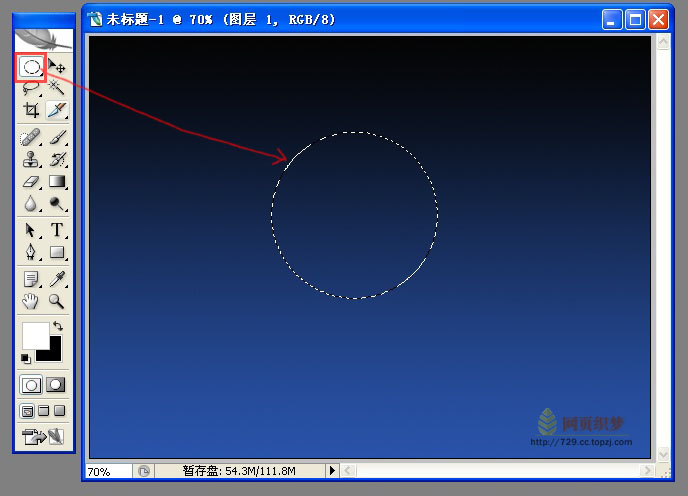
8、按shift键,在层1画一个正圆。
9、按照开始所讲的立体规律做一个渐变色,选择颜色块可以进行色彩的编辑。
10、回到工具面板,将”线性渐变“切换到”径向渐变“。
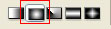
11、在图层1的选区中,由圆的高光部位斜向下方拉出渐变。
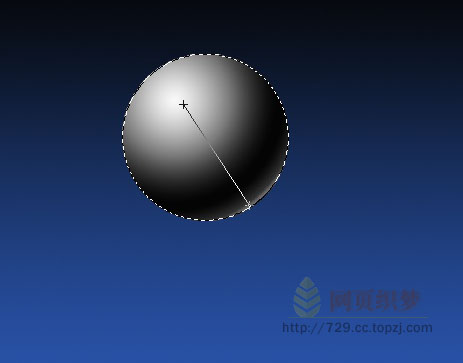
12、取消浮动,一个立体感的球体就呈现在你眼前。
假如你的球体看起来不太像的话,请多做几遍,成功后,你才有理由轻松一下哦~
最后不要忘了存盘:文件--另存为--圆球。
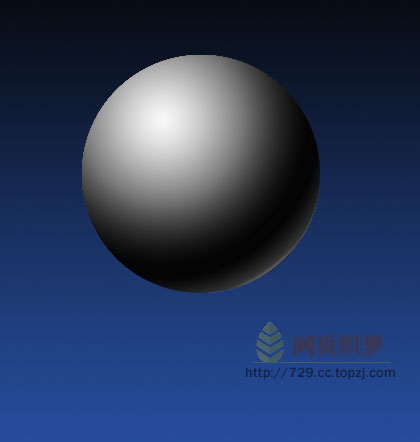
13、记住:一定要搞清楚球的立体感关系。

这里我就来为大家介绍几种基本几何体的做法,以及几何体光与影的处理效果。
一、球体
1、地球、苹果、足球、鸡蛋、人的头部、水珠等都可以看作是由球体够成的物体。
我们眼中所见到的物体均和光线有关,光决定了物体的立体感,如果一个物体具备了以下因素,它就可以产生立体效果。
2、开始制作球体
执行菜单命令“文件”--“新建”,建立一个画布,画布设置如下图:
3、添加背景色。
单击“渐变”工具,再单击上方的“渐变编辑器”,打开渐变编辑对话框。
4、如图设置渐变色:
5、回到工具面板,选择“渐变”工具,由上至下拉出渐变色,这时画面上出现了一个漂亮的渐变色。
6、执行菜单命令“窗口”--“图层”打开图层面板,点击红框中的图标,建立一个新层(图层1)。
7、回到工具面板,将“矩形选框工具“换成”椭圆选框工具“。
8、按shift键,在层1画一个正圆。
9、按照开始所讲的立体规律做一个渐变色,选择颜色块可以进行色彩的编辑。
10、回到工具面板,将”线性渐变“切换到”径向渐变“。
11、在图层1的选区中,由圆的高光部位斜向下方拉出渐变。
12、取消浮动,一个立体感的球体就呈现在你眼前。
假如你的球体看起来不太像的话,请多做几遍,成功后,你才有理由轻松一下哦~
最后不要忘了存盘:文件--另存为--圆球。
13、记住:一定要搞清楚球的立体感关系。
学习 · 提示
相关教程
关注大神微博加入>>


网友求助,请回答!