PS照片处理棕褐色老照片效果(2)
来源:网络
作者:不详
学习:10529人次
6。 改变图层混合模式 从正常到柔光
7。 改变不透明度为50%
")
8。 再新建一个图层
9。 设置前景色为黑色,背景色为白色。10。 执行:滤镜> 渲染 > 云彩
")
11。 改变图层混合模式 从正常到柔光
")
12。 新建图层, 填充50%的灰色13。 执行 滤镜 > 素描 > 绘图笔进行以下设置:
")
14。 改变图层混合模式 从正常到叠加
")
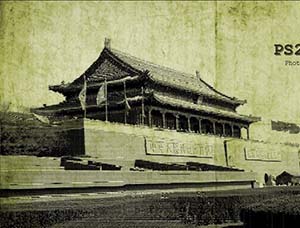
现在老照片的效果更更好了。
15。 在ps中打开下面这张图,并拖入我们的文档。
")
16。执行 滤镜 > 素描 > 水皮进行以下更改:
")
17。 改变图层混合模式 从正常到柔光18。 改变不透明度为50%
")
就是这样,宝贝。 (原文:That'sit,babe.)
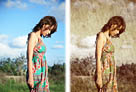
最终效果:
")
学习 · 提示
相关教程
关注大神微博加入>>


网友求助,请回答!