马上注册,结交更多好友,享用更多功能,让你轻松玩转社区。
您需要 登录 才可以下载或查看,没有账号?注册
x
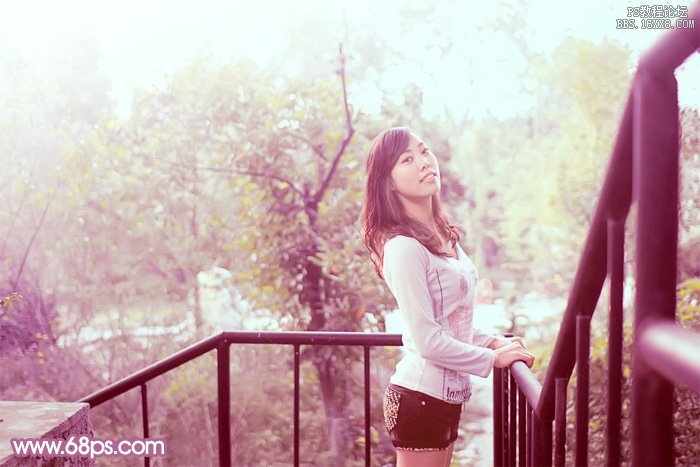
素材图片颜色以绿色为主,要转为比例适当的双色图片还真有点难度,可以考虑把图片中间调部分的颜色与其它部分的颜色分开,这样调色就容易很多。最终效果
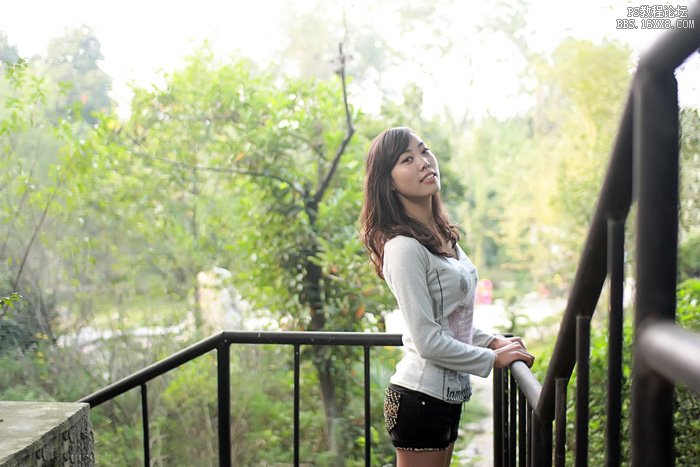
![](http://pic.16xx8.com/allimg/121212/0155406428-1.jpg)
原图
![](http://pic.16xx8.com/allimg/121212/015540B22-0.jpg)
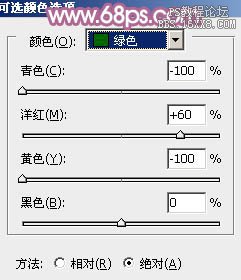
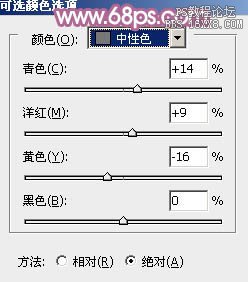
1、打开素材图片,创建可选颜色调整图层,对绿、中性色进行调整,参数设置如图1,2,效果如图3。这一步把图片的绿色转为黄绿色,中间调部分的颜色转为蓝色。这一步比较重要,方便后面调色。
![](http://pic.16xx8.com/allimg/121212/0155402433-2.jpg)
![](http://pic.16xx8.com/allimg/121212/0155406235-3.jpg)
![](http://pic.16xx8.com/allimg/121212/0155405D8-4.jpg)
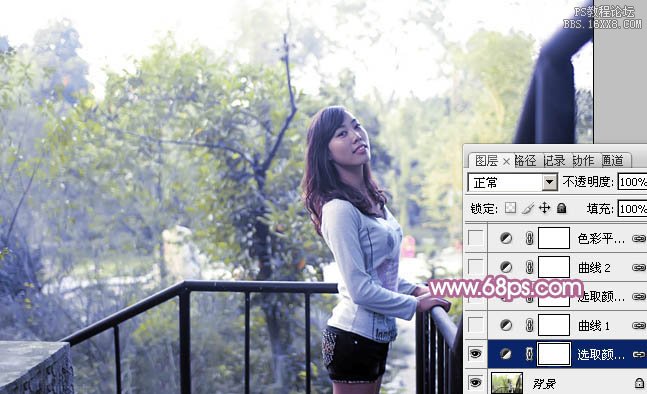
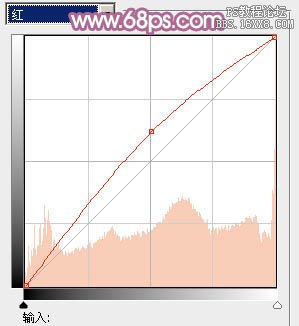
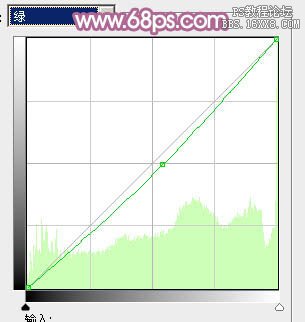
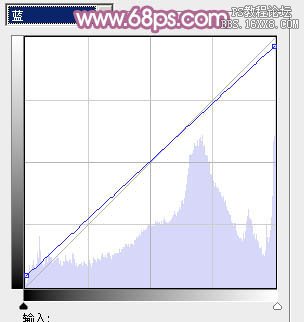
2、创建曲线调整图层,对红、绿、蓝通道进行调整,参数设置如图4- 6,效果如图7。这一步把图片的主色转为黄紫色。
![](http://pic.16xx8.com/allimg/121212/015540N16-5.jpg)
![](http://pic.16xx8.com/allimg/121212/0155406195-6.jpg)
![](http://pic.16xx8.com/allimg/121212/01554021G-7.jpg)
![](http://pic.16xx8.com/allimg/121212/0155405252-8.jpg)
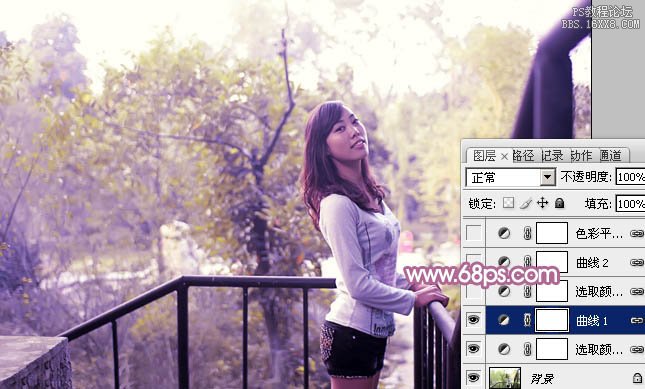
3、创建可选颜色调整图层,对红、蓝、洋红进行调整,参数设置如图8- 10,效果如图11。这一步把图片中的蓝紫色转为红紫色。
![](http://pic.16xx8.com/allimg/121212/0155405450-9.jpg)
![](http://pic.16xx8.com/allimg/121212/0155405400-10.jpg)
![](http://pic.16xx8.com/allimg/121212/0155403263-11.jpg)
![](http://pic.16xx8.com/allimg/121212/0155404D4-12.jpg)
4、创建曲线调整图层,对红、绿、蓝通道进行微调,参数设置如图12,效果如图13。这一步主要增加图片暗部颜色亮度。
![](http://pic.16xx8.com/allimg/121212/0155406024-13.jpg)
![](http://pic.16xx8.com/allimg/121212/0155403234-14.jpg)
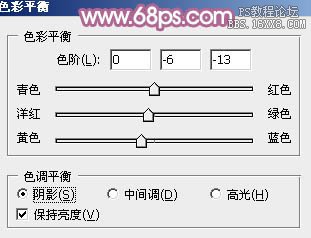
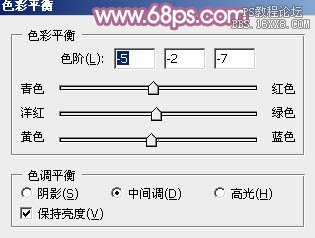
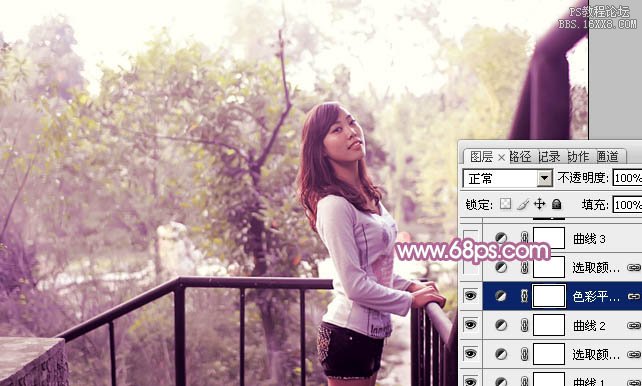
5、创建色彩平衡调整图层,对阴影,中间调进行调整,参数设置如图14,15,效果如图16。这一步给图片增加一些橙黄色。
![](http://pic.16xx8.com/allimg/121212/0155402605-15.jpg)
![](http://pic.16xx8.com/allimg/121212/0155402233-16.jpg)
![](http://pic.16xx8.com/allimg/121212/01554051b-17.jpg)
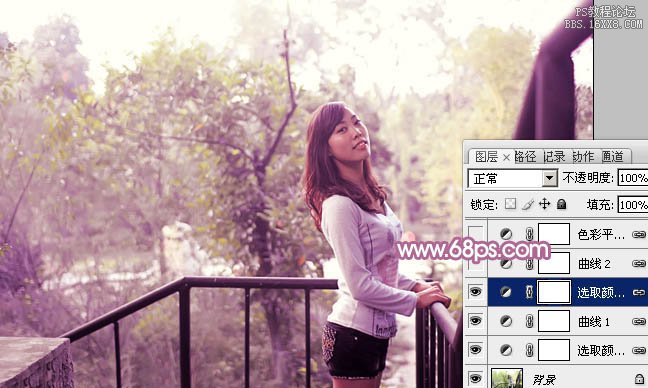
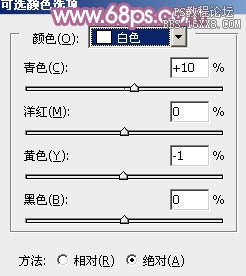
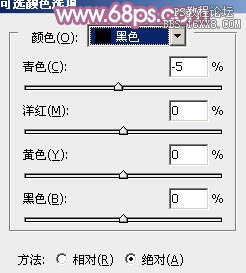
6、创建可选颜色调整图层,对红、白、黑进行调整,参数设置如图17- 19,效果如图20。这一步微调图片主色,并给高光部分增加一些淡蓝色。
![](http://pic.16xx8.com/allimg/121212/015540BA-18.jpg)
![](http://pic.16xx8.com/allimg/121212/0155404609-19.jpg)
![](http://pic.16xx8.com/allimg/121212/0155405529-20.jpg)
![](http://pic.16xx8.com/allimg/121212/0155402508-21.jpg)
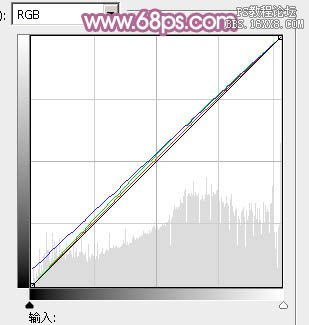
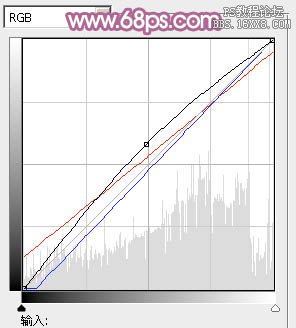
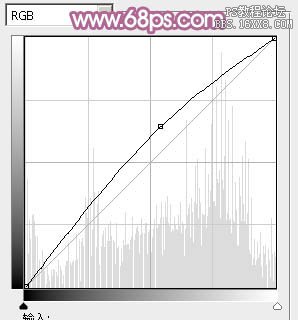
7、创建曲线调整图层,对RGB、红、蓝通道进行调整,参数设置如图21,效果如图22。这一步适当增加图片亮度,并增加红色。
![](http://pic.16xx8.com/allimg/121212/015540J91-22.jpg)
![](http://pic.16xx8.com/allimg/121212/015540Dc-23.jpg)
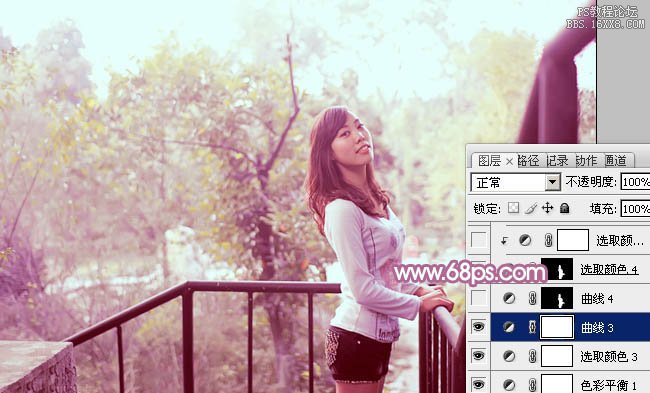
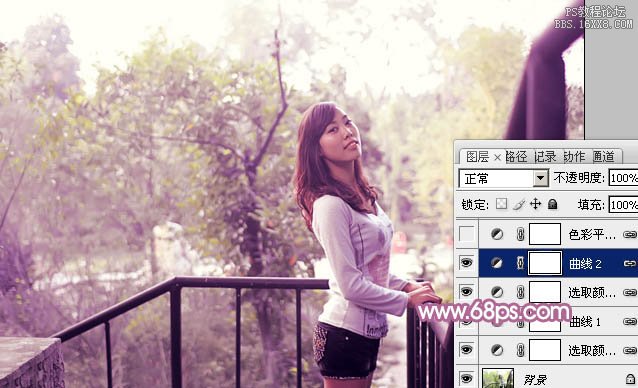
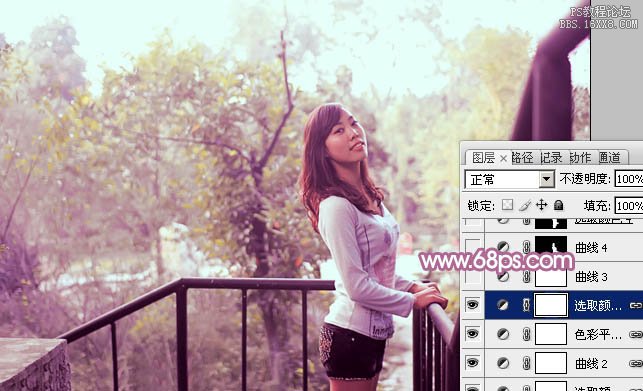
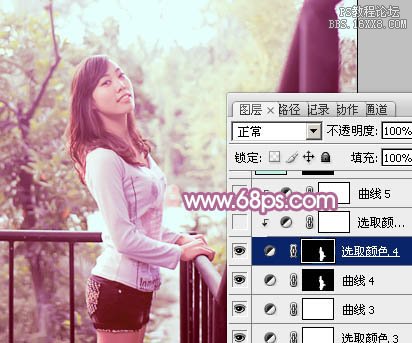
8、创建曲线调整图层,对RGB进行调整,参数设置如图23,确定后把蒙版填充黑色,用白色画笔把人物部分擦出来,效果如图24。这一步增加人物部分的亮度。
![](http://pic.16xx8.com/allimg/121212/0155406140-24.jpg)
![](http://pic.16xx8.com/allimg/121212/0155401I6-25.jpg)
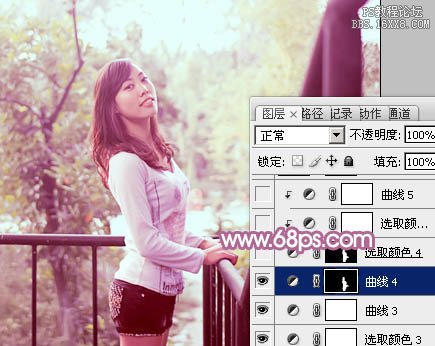
9、调出当前图层蒙版选区,创建可选颜色调整图层,对红色进行调整,参数及效果如下图。这一步微调人物肤色。
![](http://pic.16xx8.com/allimg/121212/015540IH-26.jpg)
![](http://pic.16xx8.com/allimg/121212/0155402032-27.jpg)
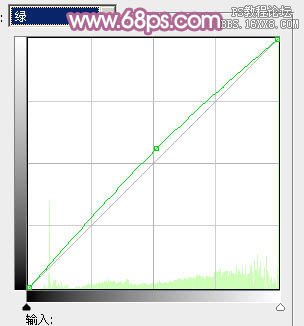
10、调出当前图层蒙版选区,创建曲线调整图层,对绿色通道进行调整,参数及效果如下图。这一步同样调整人物肤色。
![](http://pic.16xx8.com/allimg/121212/015540HQ-28.jpg)
![](http://pic.16xx8.com/allimg/121212/015540I38-29.jpg)
最后给图片增加一些高光,再微调一下颜色,完成最终效果。
![](http://pic.16xx8.com/allimg/121212/0155406428-1.jpg)
教程编号:112131 作者:Sener 出处:photoshop联盟 |