马上注册,结交更多好友,享用更多功能,让你轻松玩转社区。
您需要 登录 才可以下载或查看,没有账号?注册

x
素材图片有点偏暗,主色以绿色为主。转为橙红色非常方便,只需要把图片稍微调亮,绿色转为橙红色,再在暗部及高光部分增加一些橙红色即可。
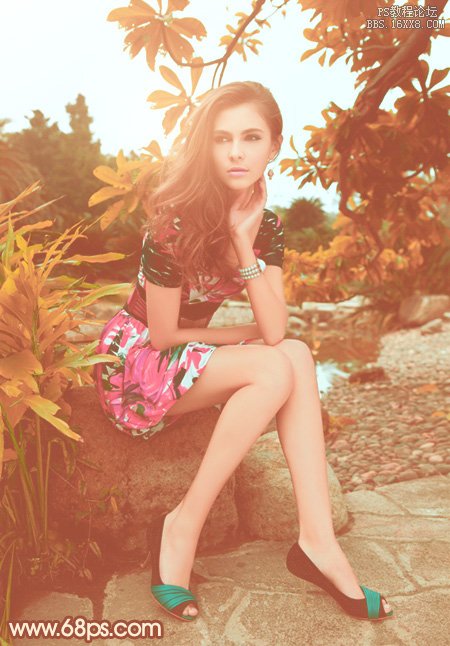
最终效果
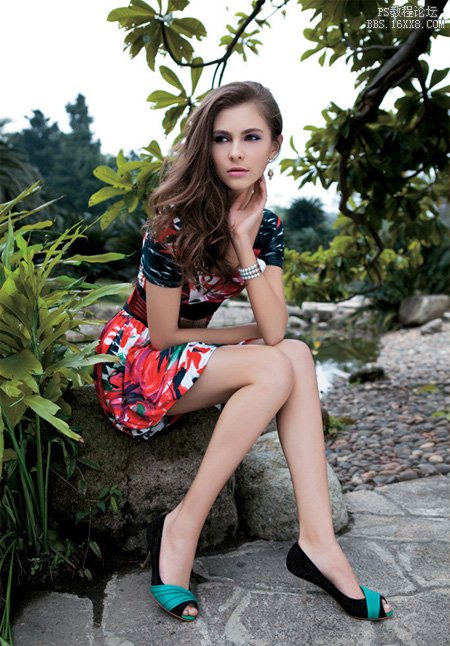
原图
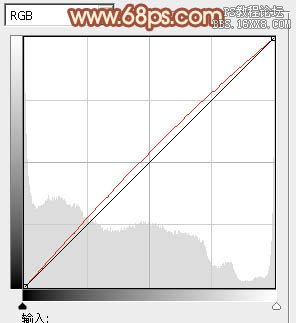
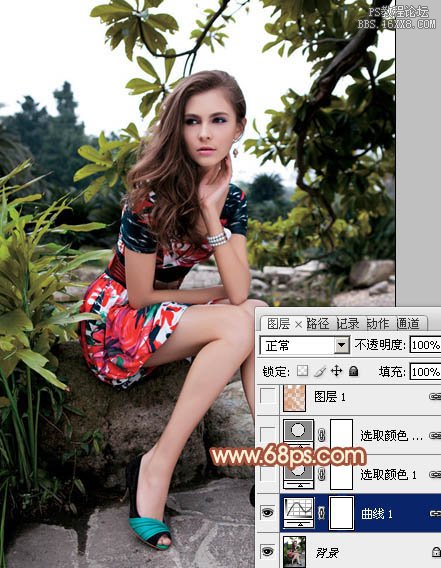
1、打开素材图片,创建曲线调整图层,对红色通道进行调整,参数设置如图1,效果如图2。这一步给图片增加红色。
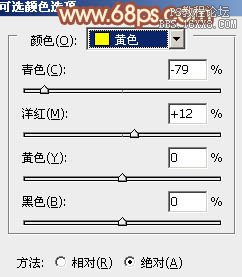
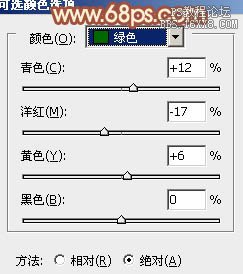
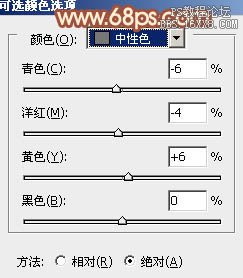
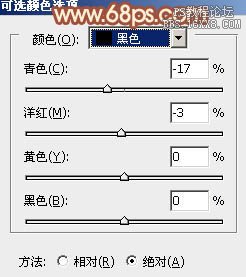
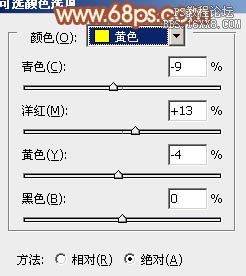
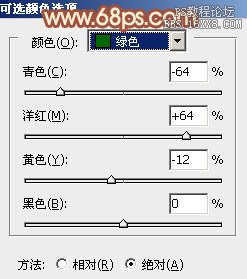
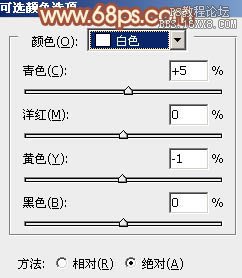
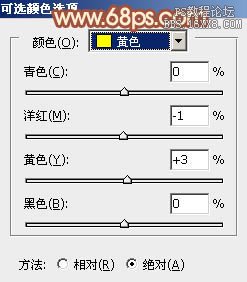
2、创建可选颜色调整图层,对黄、绿、中性、黑进行调整,参数设置如图3- 6,效果如图7。这一步把背景部分的黄绿色转为橙黄色。
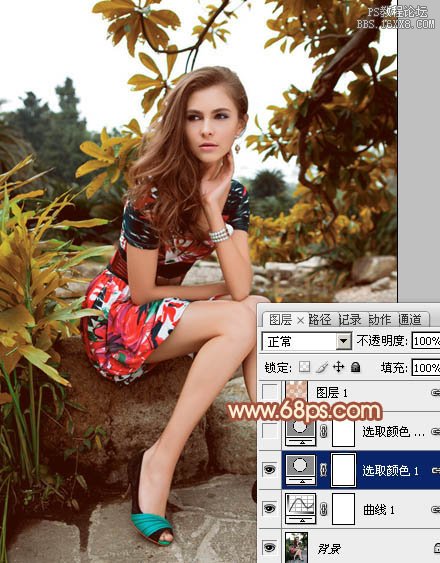
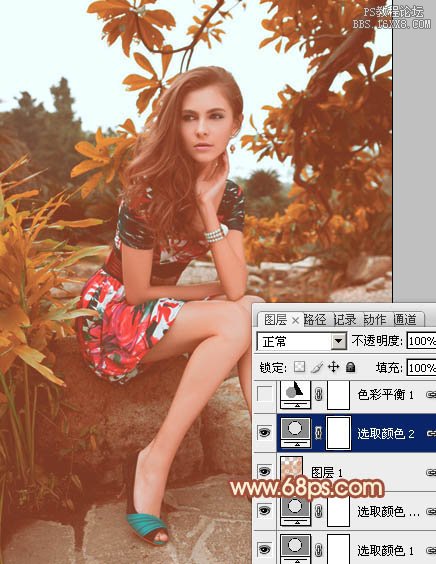
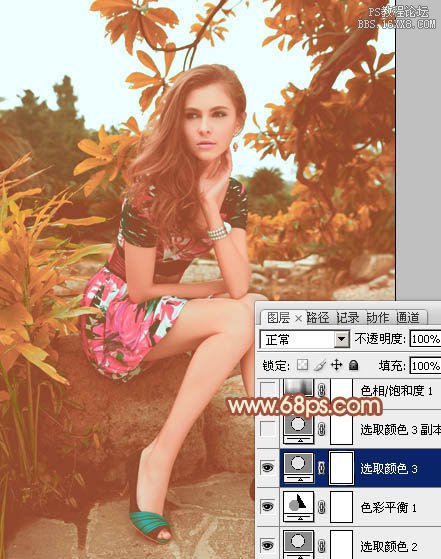
3、按Ctrl+ J 把当前可选颜色调整图层复制一层,不透明度改为:50%,效果如下图。
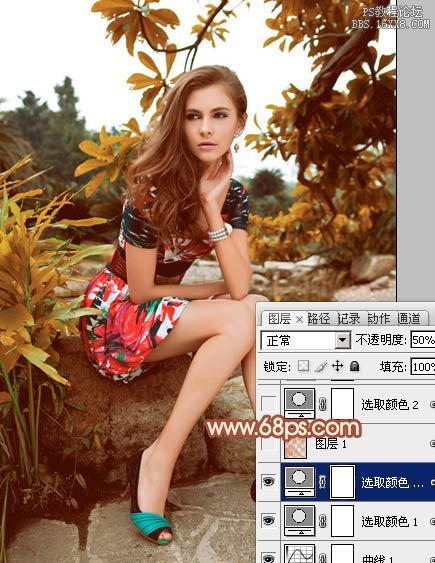
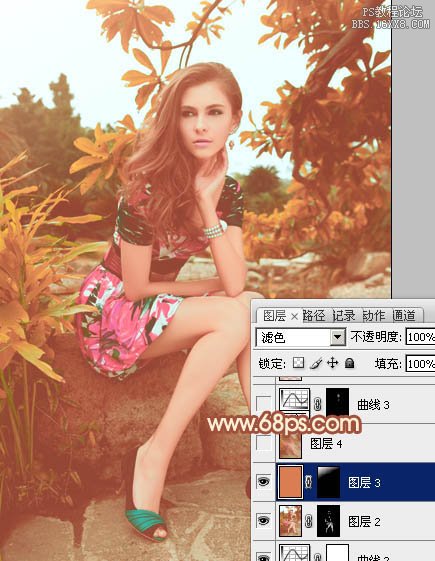
4、按Ctrl+ Alt + 2 调出高光选区,按Ctrl + Shift + I 反选,新建一个图层填充橙红色:#D68E53,不透明度改为:40%,效果如下图。这一步给图片的暗部增加红色。
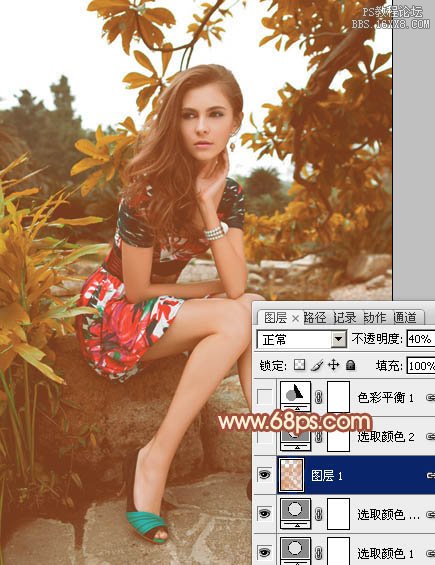
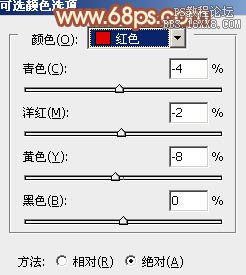
5、创建可选颜色调整图层,对红、黄、绿、白进行调整,参数设置如图10- 13,效果如图14。这一步给图片增加橙红色。
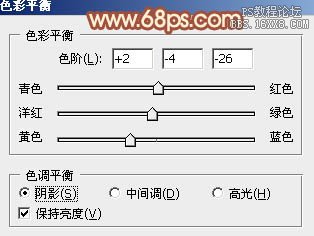
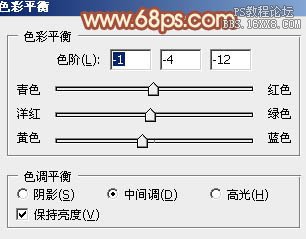
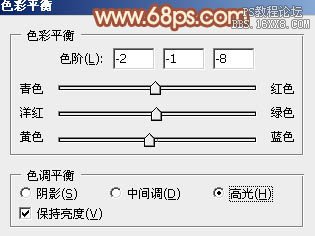
6、创建色彩平衡调整图层,对阴影、中间调、高光进行调整,参数设置如图15- 17,效果如图18。这一步主要给图片的高光部分增加橙黄色。

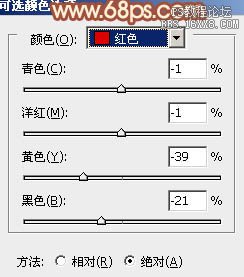
7、创建可选颜色调整图层,对红、黄、白进行调整,参数设置如图19- 21,效果如图22。这一步适当增加红色亮度。

8、新建一个图层填充橙红色:#D97D52,混合模式改为“滤色”,按住Alt键添加图层蒙版,用白色画笔把左上角部分擦出来,效果如下图。这一步给图片增加高光。
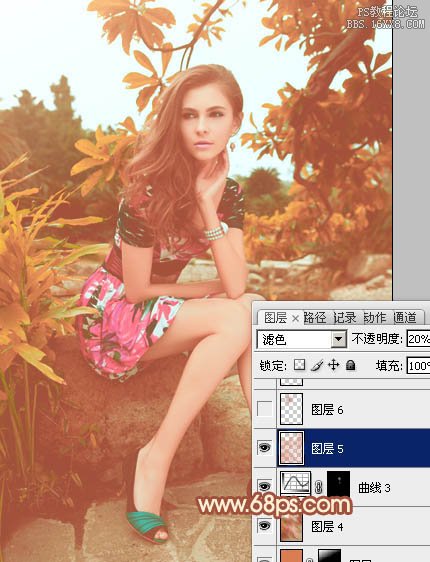
9、按Ctrl+ Alt + 2 调出高光选区,按Ctrl + Shift + I 反选,新建一个图层填充橙红色:#D97D52,混合模式改为“滤色”,不透明度改为:20%,效果如下图。这一步适当增加图片暗部亮度。
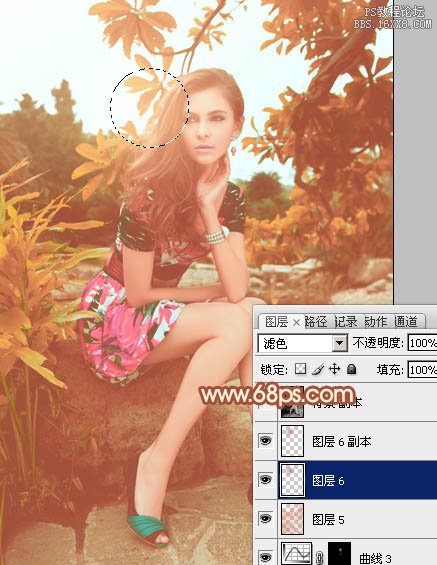
10、新建一个图层,用椭圆选框工具拉出下图所示的椭圆选区,羽化20个像素后填充同上的橙红色,混合模式改为“滤色”,效果如下图。
最后微调一下颜色,完成最终效果。
教程编号:111921 作者:Sener 出处:photoshop联盟 | 


 狗仔卡
狗仔卡 发表于 2012-11-29 17:58:58
 提升卡
提升卡 置顶卡
置顶卡 沉默卡
沉默卡 喧嚣卡
喧嚣卡 变色卡
变色卡 千斤顶
千斤顶 显身卡
显身卡 发表于 2012-11-29 21:21:52